
 There is something about holidays that brings out the best in people. Last week I came home from a busy day at my new job to find a beautiful gift wrapped in brown paper from a beautiful friend. Buying Easter eggs for this pavlova, I had a laugh with a woman and her children about which eggs were the most delicious. Setting up the photo shoot for the cake, I was heaped with praise and kind words from friends and family who were visiting.
There is something that changes as holidays approach. People in traffic seem nicer, strangers smile more readily, grumpy neighbours laugh more easily. I just adore holidays.
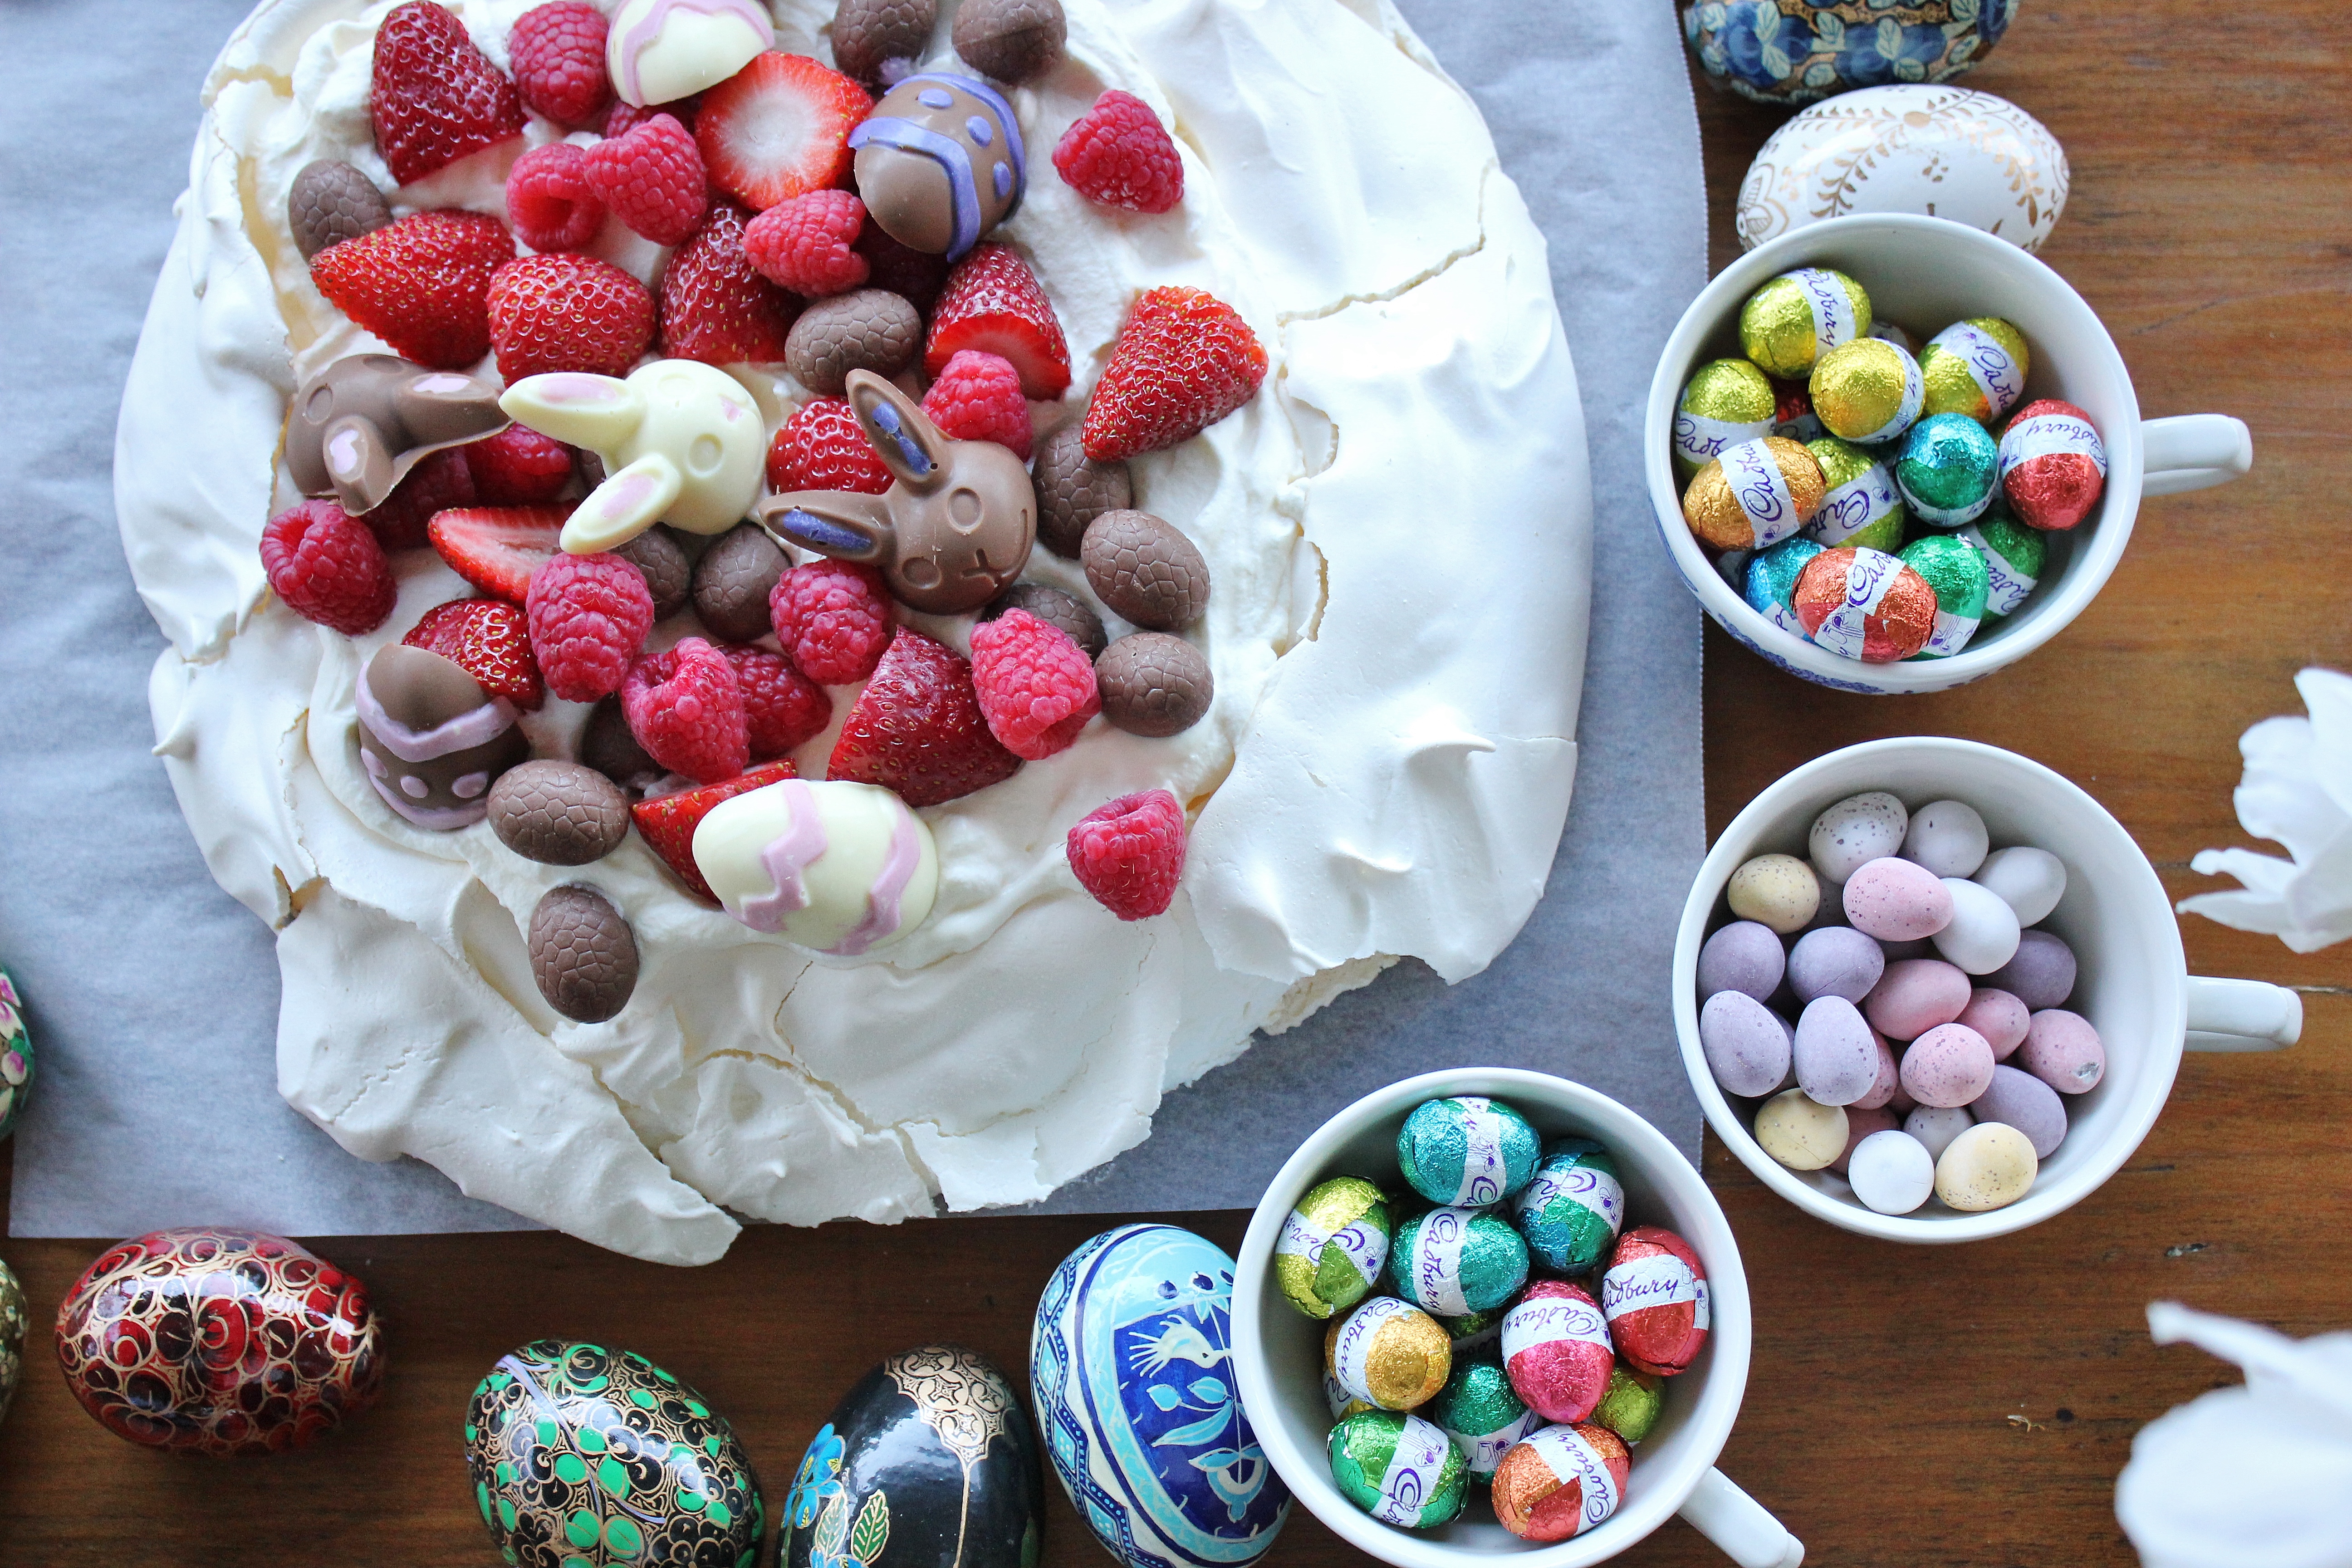
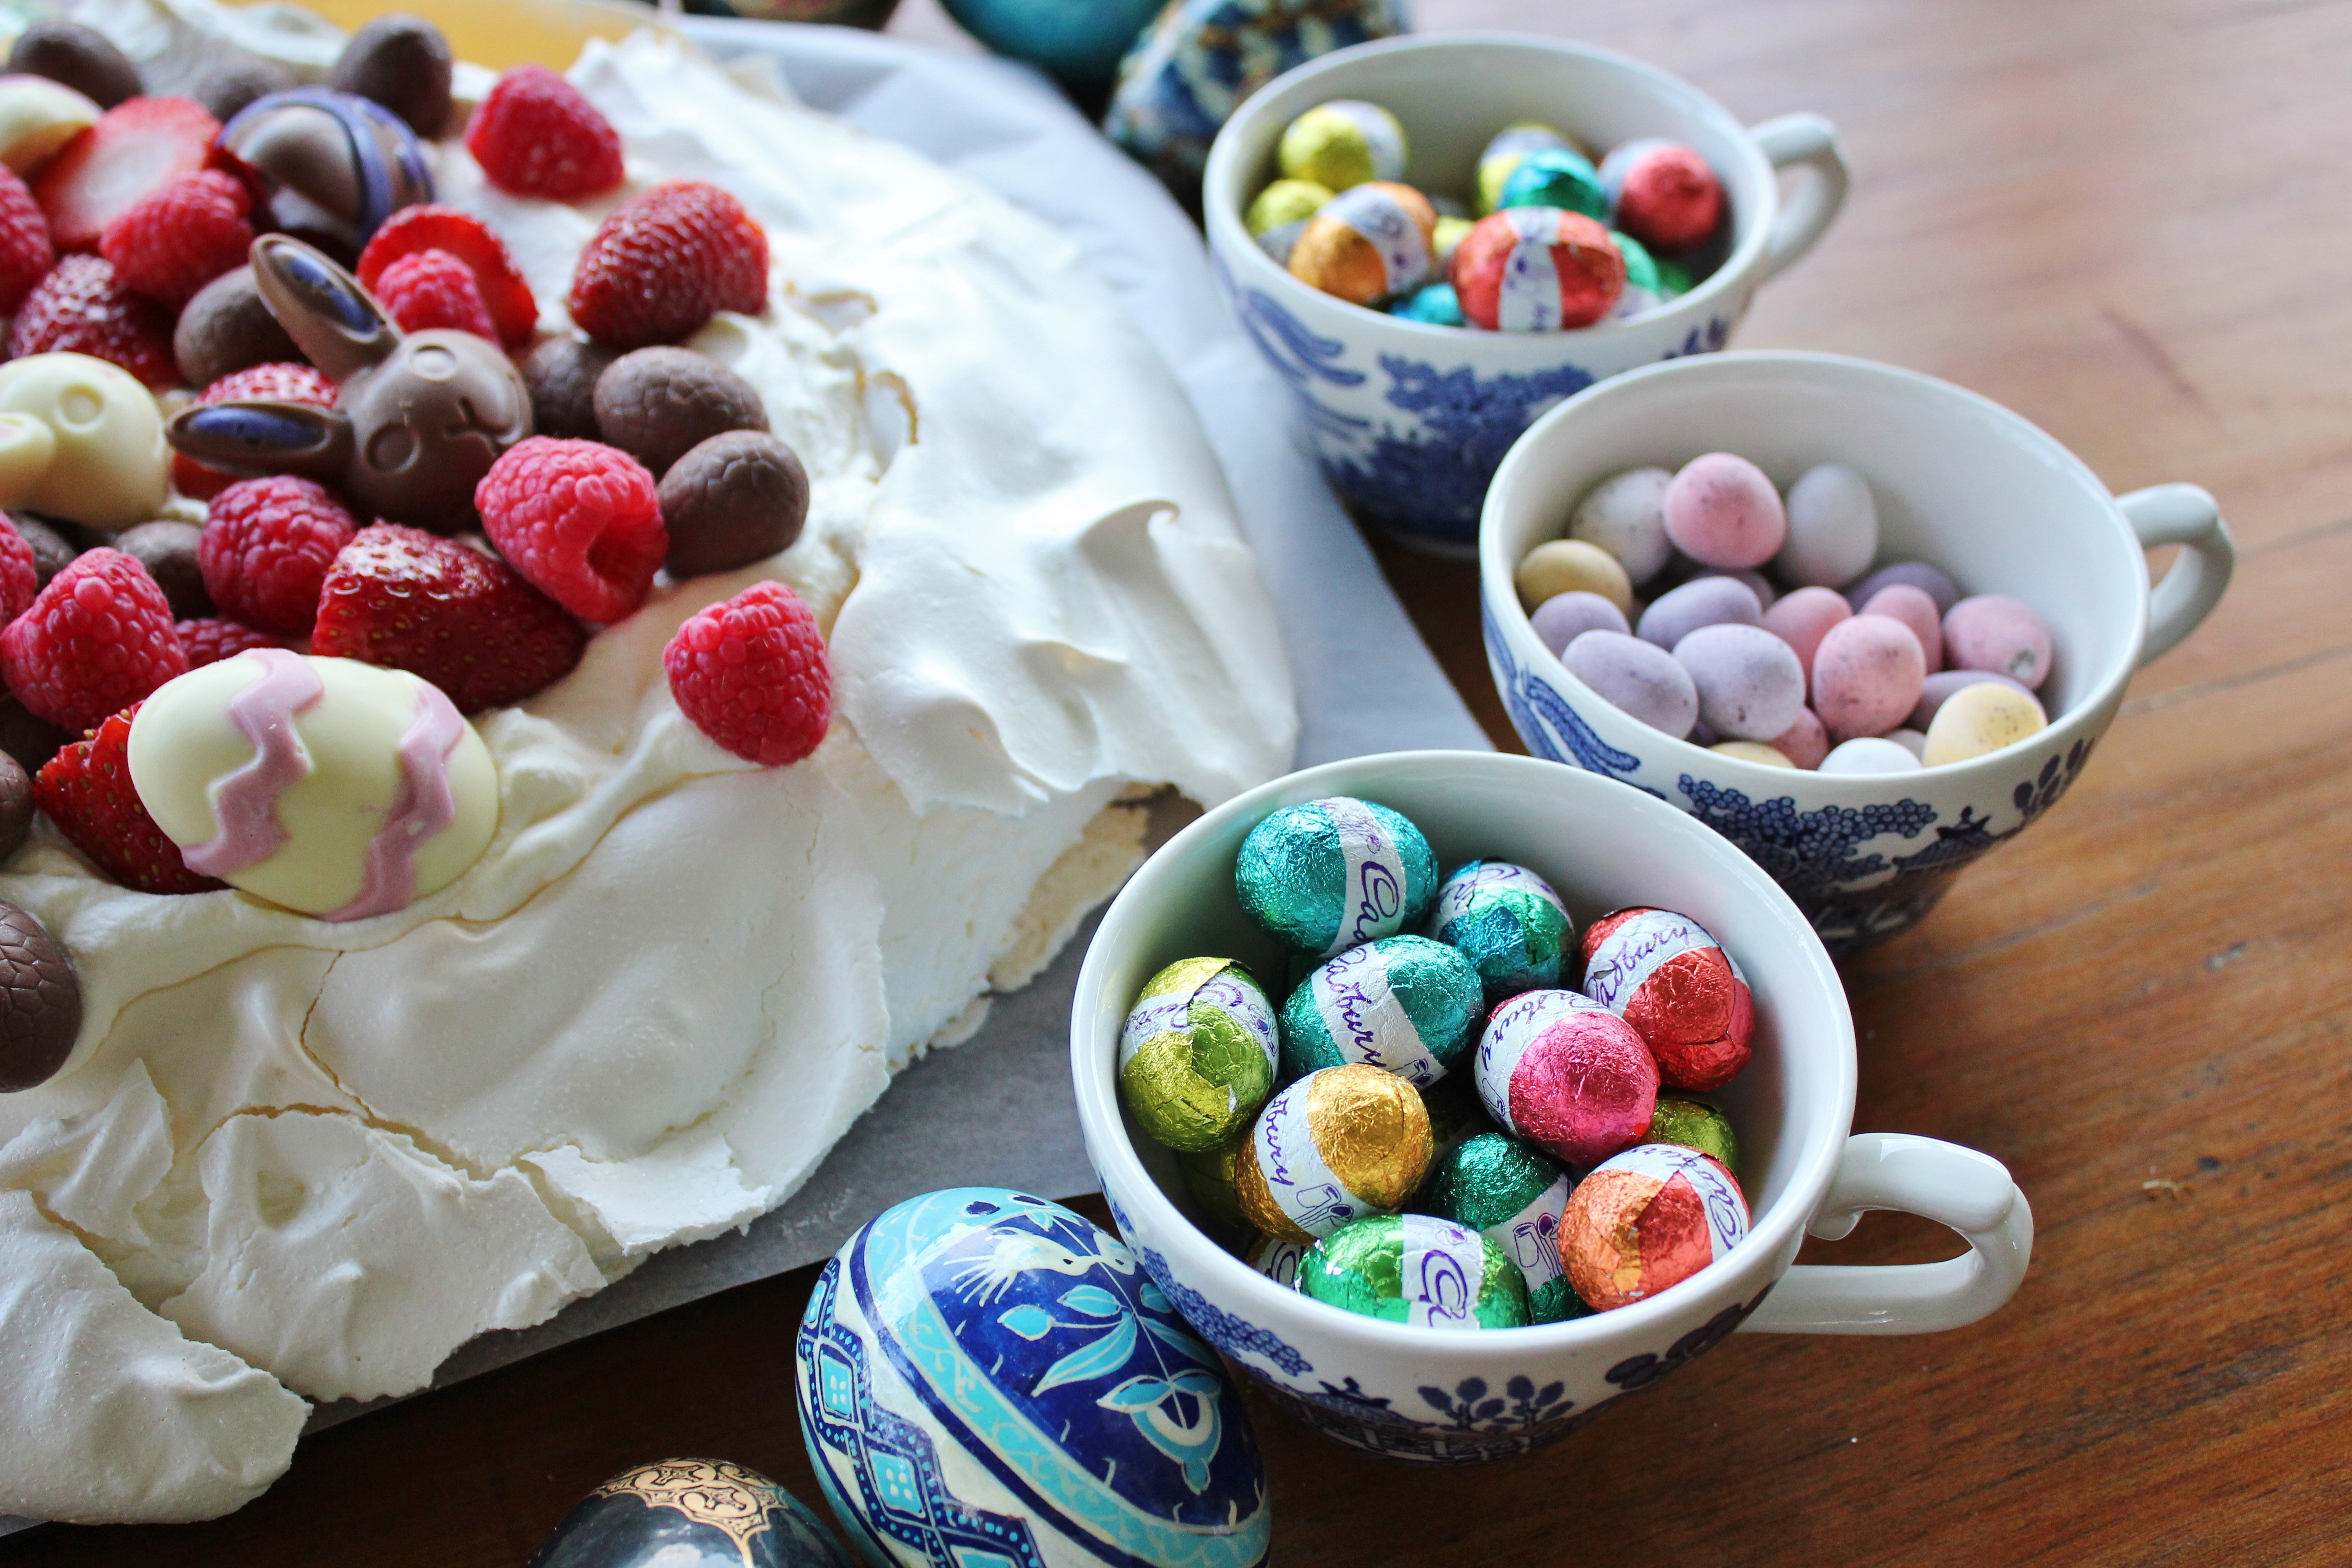
I also happen to adore a good pav – this is the first pav I’ve ever shared on the blog, and I have to say that I’m very fond of it. It’s easy and delicious. I topped mine with fresh fruit, chocolate eggs and chocolate bunnies which were part of my gorgeous gift last week. The silicone moulds are from Typo if you’re desperate to have them for your Easter dessert.
Easter pavlova
- 6 egg whites

- 1 ½ cups castor sugar
- 1 ½ cups thickened cream
- 2 tbsp icing sugar
- ½ cup raspberries
- ½ cup strawberries
- Easter eggs, to decorate

Bring your egg whites to room temperature. Start whipping the egg whites on a medium speed until they are frothy. Add the sugar slowly while continuing to whip. Amp up the speed to medium-high and continue to mix until the egg mixture is glossy and smooth and forms stiff peaks.
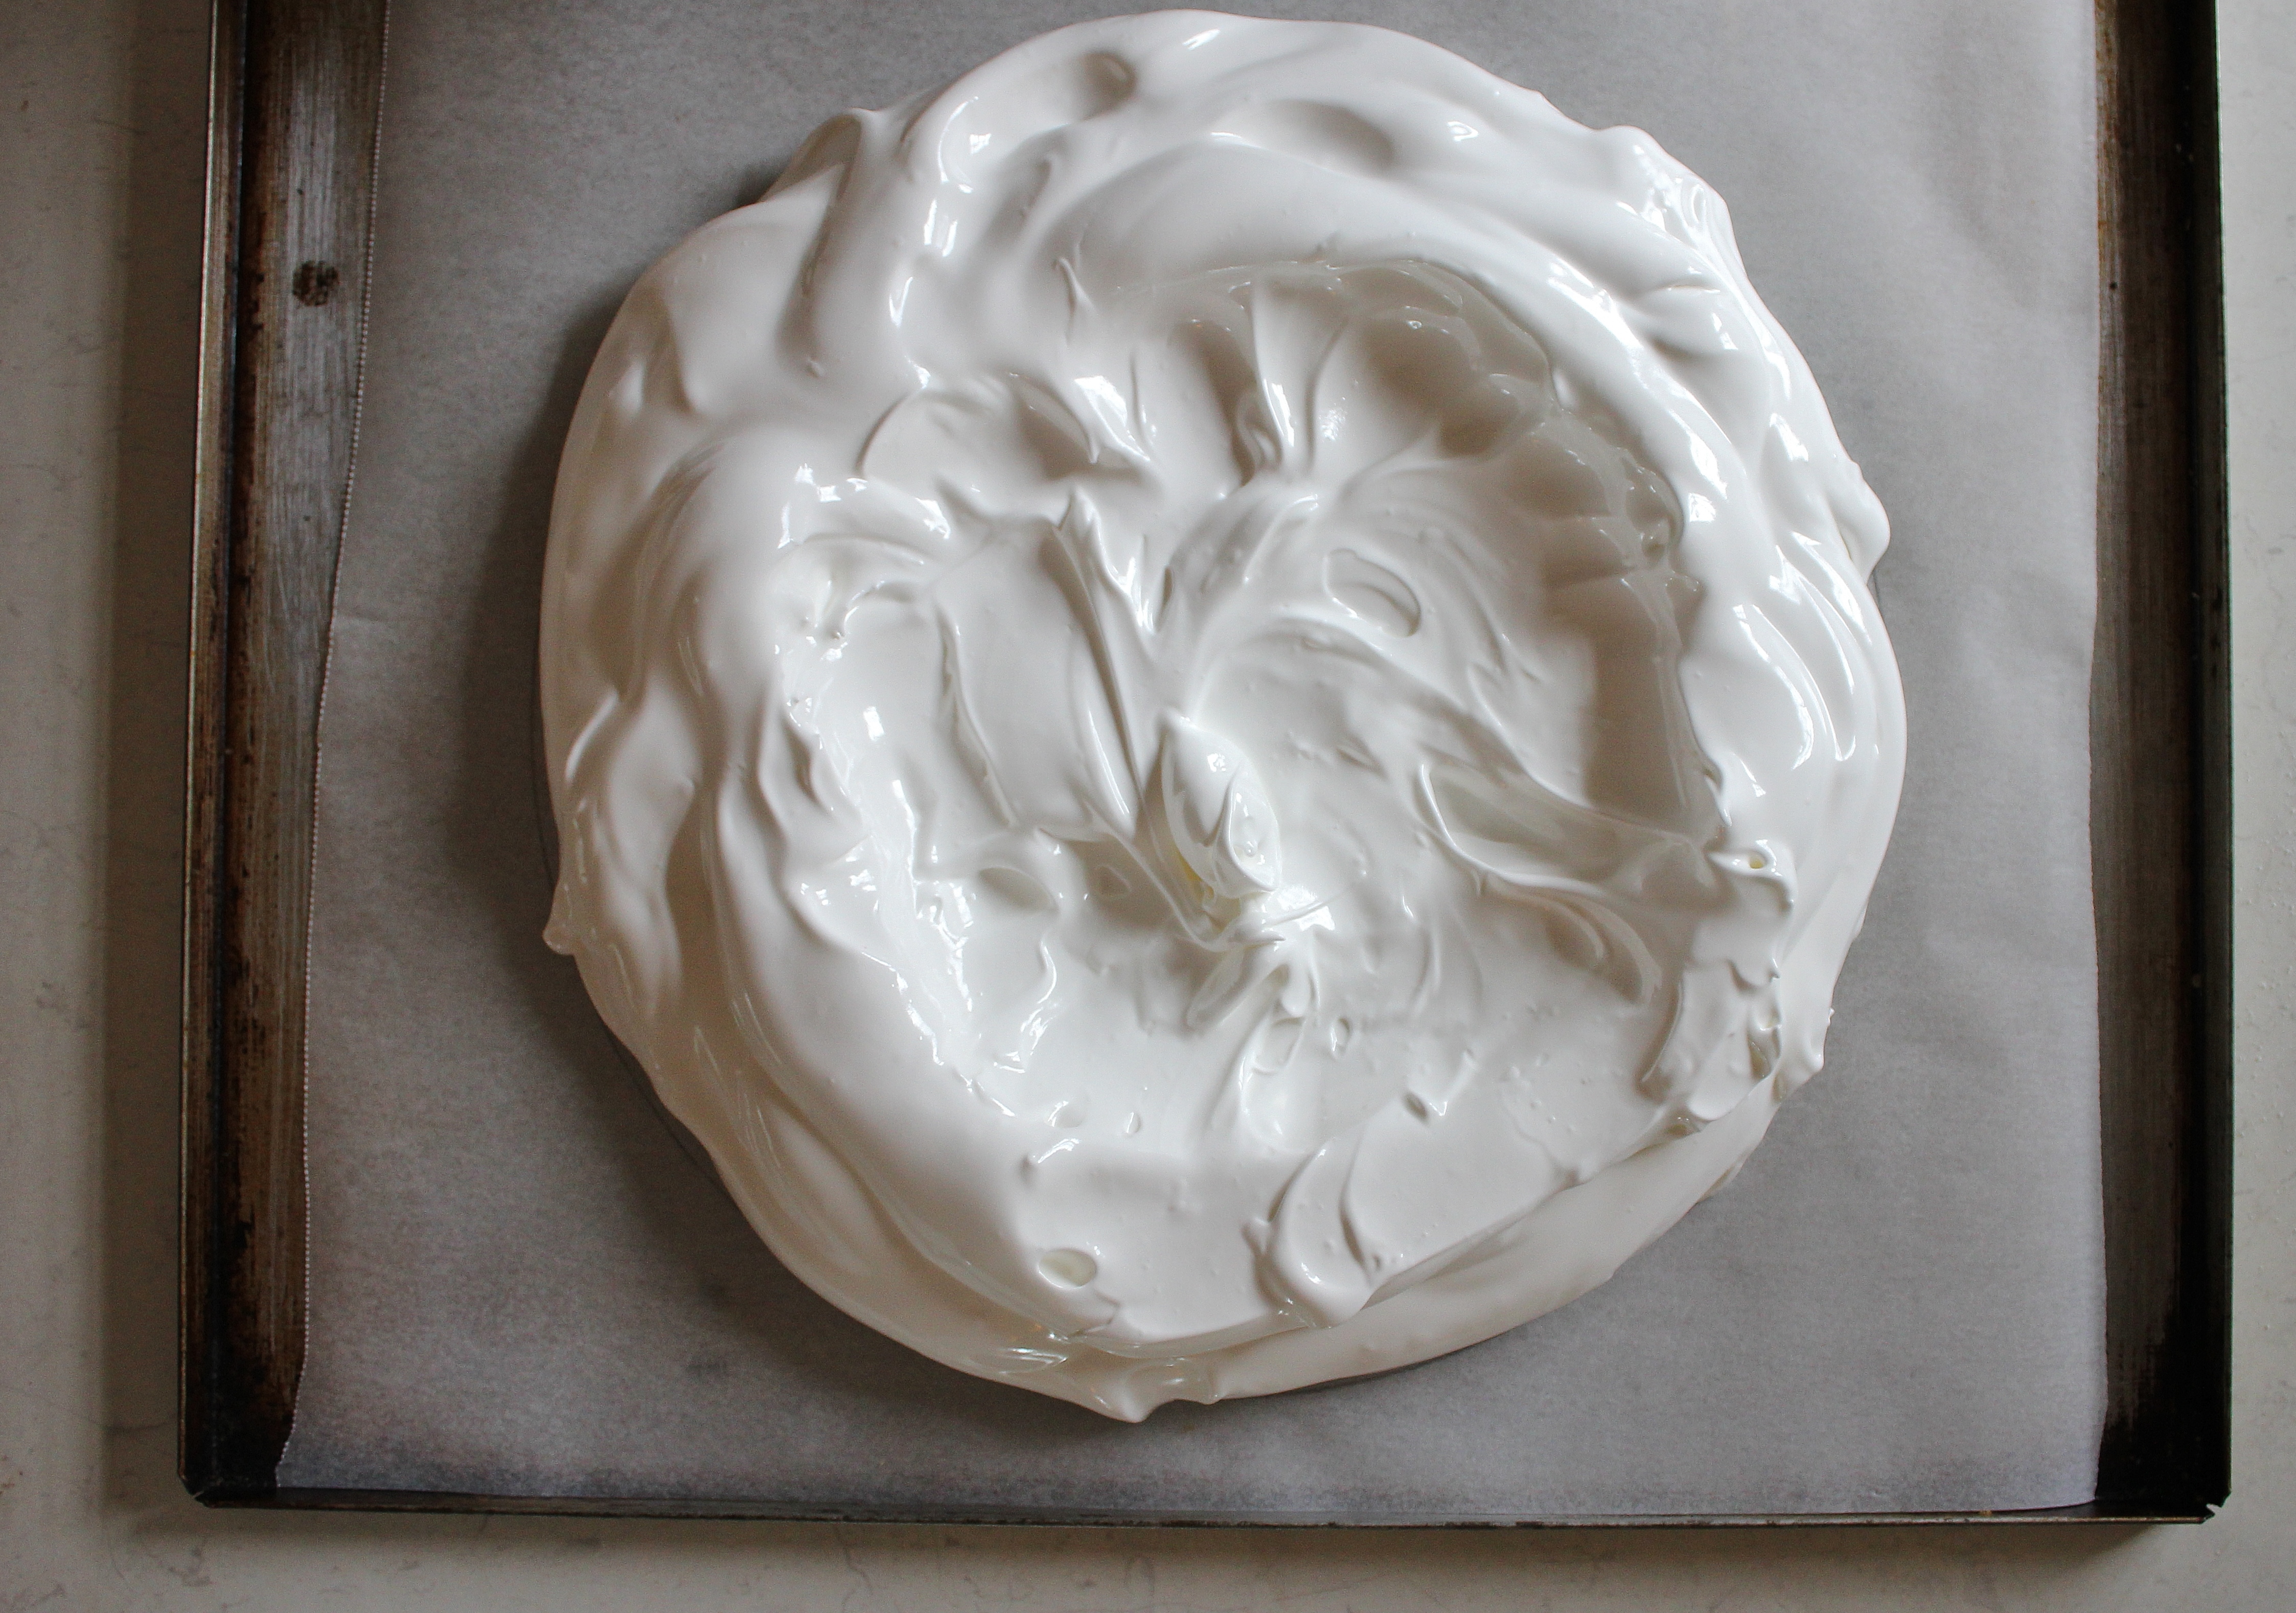 Preheat your oven to 150°C. Grab some baking paper and trace the outline of a dinner plate (it should be about 22cm.) Flip the baking paper so that the egg whites don’t touch the pencil and start to fill the circle with egg whites. There’s no need to be neat, just scoop the egg whites evenly into the circle and then smooth out with a spatula. Try to create a nest shape so that you can fill the middle of the pavlova with your cream later on.
 Pop into the oven for 40 minutes and then allow the pav to rest in the oven for 2-3 hours. This will allow the shell to dry out further and for the whole thing to become a bit more stable. Don’t be tempted to leave the oven turned on for any longer, this will dry out the middle of the pav, and ruin your chances of achieving the delicious squidgy centre.
 If you’ve got moulds like mine, melt 30g of white chocolate and add a few drops of food colouring. Mix to achieve an even colour, then scoop into a snap lock bag. Allow the melted chocolate to cool slightly so it becomes easier to work with, then pipe the coloured chocolate into the spots, chevrons or bunny ears. Melt 200g of milk chocolate and spoon over the white chocolate to fill moulds. I repeated this step four times, using combinations of milk chocolate, white chocolate, white chocolate dyed pink and white chocolate dyed purple. It’s a really easy way to make your chocolate decorations a little bit more snazzy!

yum! 🙂
what a great way to celebrate easter.
combing classic australian goodness with easter deliciousness – love it!
Thank you Bec 🙂 I thought so too!
It looks delicious! I’ve never made pavlova — or eaten it, for that matter.
I haven’t really noticed much of the oncoming holiday (except tons of Easter food in the supermarkets), but now I’m starting to think I should make something special for my family! 🙂
Oh you must try pavlova, it’s gorgeous!! How interesting that you haven’t seen many Easter-related things yet, they’re everywhere in the shops near me!
So cute!
Thank you 🙂 It was hard to eat the bunnies, they were almost too smiley and cute to eat!
This is beautiful Gab! I love how it looks… I’ve never made it, nor have I even had the pleasure of eating pavlova. You’ve inspired me to try…it’s so pretty. 🙂
Thank you 🙂 Pavlova always looks stunning – there’s something so enticing about it’s beautiful cream-coloured shell and the soft, stark white centre. Let me know if you try it, I’d love to hear what you think!!
Mmmm… I’m making this for Easter! 🙂
That’s so exciting, Corrina! Let me know how you go 🙂 would love for you to share a pic on my Facebook page if you get a chance!