Lavender shortbread and excitement

previewThis recipe was my first contribution to a website that wasn’t my own – I know, super exciting, right?! I was stoked when the Geelong Blabbertiser said that they wanted me a contributor! I already wrote an introduction for the post (which can be found here), but I’m going to write a second one. That’s right, a double-barreled introduction. I hope you’re sitting down.

Today was a day of great excitement! My first post on the Geelong Blabbertiser went up (I had first post jitters!) and Norman got a hair cut (before and after photos!) While I was waiting for Norman I also ate at a patisserie that I’d never been to (see the amazing picture here.) You underestimate how exciting all of these things were! Norman’s haircut also lead to the discovery of a hernia which is kind of sucky, but that will hopefully be sorted out in the coming weeks.  Continue reading “Lavender shortbread and excitement”

Neenish tarts and Australian bakeries

I’ve decided that I need to add a little bit of Australia into my blog. I included the wattle in my blog here, but that’s not enough! So starting now, there will be a category of recipes which scream Australiana to me. I’m not promising any kangaroo burgers or emu pies, because I don’t have the slightest interest in eating our national symbols. What I do mean is recipes that taste like my childhood, or my parents childhood – many of these sweets (think lamingtons, cream buns), but I’ll do some research to find other dishes that are Australian. Continue reading “Neenish tarts and Australian bakeries”

Chocolate Nutella pots de crème and chilly weather

Chilly weather is making me fat. I’m staying indoors, seeking out sugar and becoming too attached to the heater. Luckily, chocolate Nutella Pots de crème are not as indulgent as you would imagine. Below a dark layer of chocolatey thickness is a paler, lighter substance…I feel less bad about eating them because they’re not too rich, they’re just right.

These little devils are less posh than they sound. The French vibe they give off is enough to wow dinner guests, but they’re super simple…not to mention delectable! They’re basically a chocolate custard pudding thing – do labels matter? If people ask, just say they’re made entirely of delicious ingredients, they don’t need a name.

You can throw them together in 15 minutes and leave them in the oven to do their work. Pop them in the fridge while you eat mains, and they’re ready to be devoured! They’re adaptable enough to be served alongside a three course dinner, but  will fit neatly along side a casual Sunday lunch menu. Serve them with berries to dress them up, or chuck a spoon straight into them to give them a laid back scruffy feel.

Do what you please, just make sure you lick the bowl.

Chocolate Nutella pots de Crème (aka deliciousness in a ramekin)nom

  • 4 egg yolks
  • ¼ cup sugar
  • 1 tsp vanilla
  • 1 ½ cups cream
  • ½ cup milk
  • 2/3 cup nutella
  • 50g chocolate

Preheat your oven to 170°C. Resist the urge to eat the Nutella. Find six ramekins or oven-safe tea cups (I’ve gone for a mix of both because two of my Nanna’s darling ramekins have broken over time.)nutella

Mix together your egg yolks, sugar and vanilla in a bowl. Set them to one side.

In a saucepan over low heat, melt the chocolate down and add the Nutella. Once you add the Nutella in it should be thicker and glossier. Once again, resist the urge to eat the Nutella from the jar.  Mix the chocolate and Nutella until no lumps remain. Add your cream and milk in and turn up to medium so that it combines. Keep stirring.

Boil your kettle now, you’ll need hot water to surround the filled ramekins later.

mixThe mixture will be speckled, so you need to keep on stirring for about ten minutes. You don’t want speckled pots de crème! Once the mixture is an even colour (with no more speckles) slowly add the egg mixture in. Make sure the chocolate mixture isn’t too hot, you don’t want to cook the sugary egg!

Once all the egg mixture is incorporated, whisk the mixture over heat for five minutes, allowing it to bubble and thicken slightly.

Divide the mixture among the ramekins. If you’re a messy pourer like me, wipe the edges so there are no sloppy bits. Place the ramekins in a baking tray and carefully pour the hot (not boiling) water into the tray, about half way up the ramekins.drop

with water
groupPop them in the oven for 50 minutes to 1 hour. If you can gently press the top of the chocolate without it wobbling too much, they’re done. Put them back in the oven if you’re not 100% sure, the water means that it’s really hard to burn them. This style of cooking also ensures that your mixture is super silky and smooth. When they’re out of the oven, allow them to cool and place them in the fridge until they’re ready to serve.

shavingsUse a vegetable peeler to cover your pots de crème with shavings of chocolate – enjoy!spoon in

Brownies and weekends away

I made brownies yesterday in preparation for going away tonight. I’m doubling the recipe and leaving half with the fam and taking half away. The Boy and I are spending a few days in Orange. I’ve got cousins to visit, fresh produce to check out and cafes to explore. There is also a sausage dog pup that I want to steal from said cousins. The Boy doesn’t really have a choice in what we do, luckily he’s fairly compliant when it comes to these things! He’ll busy himself being a country boy for the weekend. He spent the first 20 years of his life in England, but something about leaving Sydney and heading for dirt roads unleashes his inner country boy. When we visit my cousins’ farm he wears plaid and an akubra and busies himself with fencing, quad-biking and burning things.

I read, bake and attempt to coax the farm dogs into leaving the country and returning to the city with me. I’m never successful. Sometimes I feel as though The Boy also needs coaxing back home.

I made this brownie recipe because it just screams homeliness and I think it suits the farm vibe perfectly. It’s cosy and simple. And just delightful.

Just as the farm is escapism from Sydney life, this brownie is escapism from the real world. Put away your diets for a minute, lay down the celery and indulge in a square of escapism.

textureChocolate brownie

  • 200g dark chocolate, chopped
  • 200g butter
  • 1 1/2 cups (310g) brown sugar
  • 3 eggs
  • 2/3 cup (35g) cocoa powder, sifted
  • 1 cups (185g) plain (all-purpose) flour, sifted
  • 1 teaspoon baking powder
unhealthy
Hello deliciousness!

Preheat your oven to 160°C and line a 20cm baking tin. Roughly chop your chocolate and butter and place them in a saucepan over low heat and stir until smooth and glossy. Put this to one side to cool slightly.

eggsCombine the sugar, cocoa, flour and baking powder in a bowl. Add in the eggs and mix as thoroughly as you can, it will be hard to mix because the mixture is so dry. Add the chocolate mixture and combine. Pour the mixture into your baking tin.

uncookedBake for 40-50 minutes or until a skewer inserted into the middle comes out mostly clean. For me, a perfect brownie should be squidgy in the centre, so I don’t want a completely clean skewer. If the skewer pulls out a whole chunk of mixture, pop it back into the oven, but if there is just a little bit of chocolate on the skewer, I’d say it’s done.

Allow the brownie to cool slightly in the tin before slicing. It will sink. It just will. There is nothing wrong with that – the sides and top will have puffed up more than the rest of the mixture and the centre will be deliciously moist. It’s dense, chocolatey and decadent.

wholeSprinkle with icing sugar and whip up some cream to serve.

Serve warm or cold. Makes 16 decent slices.

tongue out
Norman got some cream because chocolate isn’t good for dogs!

Yoghurt Berry cake and cooking credentials

You may be reading this blog wondering what credentials I have to be advising people about their cooking (valid question) – the answer is: none. I have no formal culinary qualifications, I just love it. I’m a strong believer in doing what you love – I love writing, pretty things and cooking, so writing a cooking blog seemed like a sensible choice.

flowersWhen I say cooking, I mainly mean baking. I have a near insatiable sweet-tooth, so I gravitate towards cooking things which are sweet (and often visually pleasing!) I will try to blog about savoury dishes as well, but I can’t promise they’ll be exciting – nobody gets excited over spag bol!

Cooking (baking especially) should make you happy. If it doesn’t, you’re doing it wrong. There are always going to be times when you can’t fathom getting home from work/uni/whatever else you do to slave over an oven, but it doesn’t have to be this way.

Find recipes that excite you. Experiment. Make something up! You don’t have to be a professional to make something amazing.

Not everyone gets as excited about cooking as I do, but I like to think that they have it within them somewhere.

A friend of mine loves coming to my house because there are always left overs. She goes crazy over a simple chocolate slice or mashed potato, but refuses to believe that she can replicate them in her house.  She can. I’m going to make her understand this even if it pains me! You can cook as well.

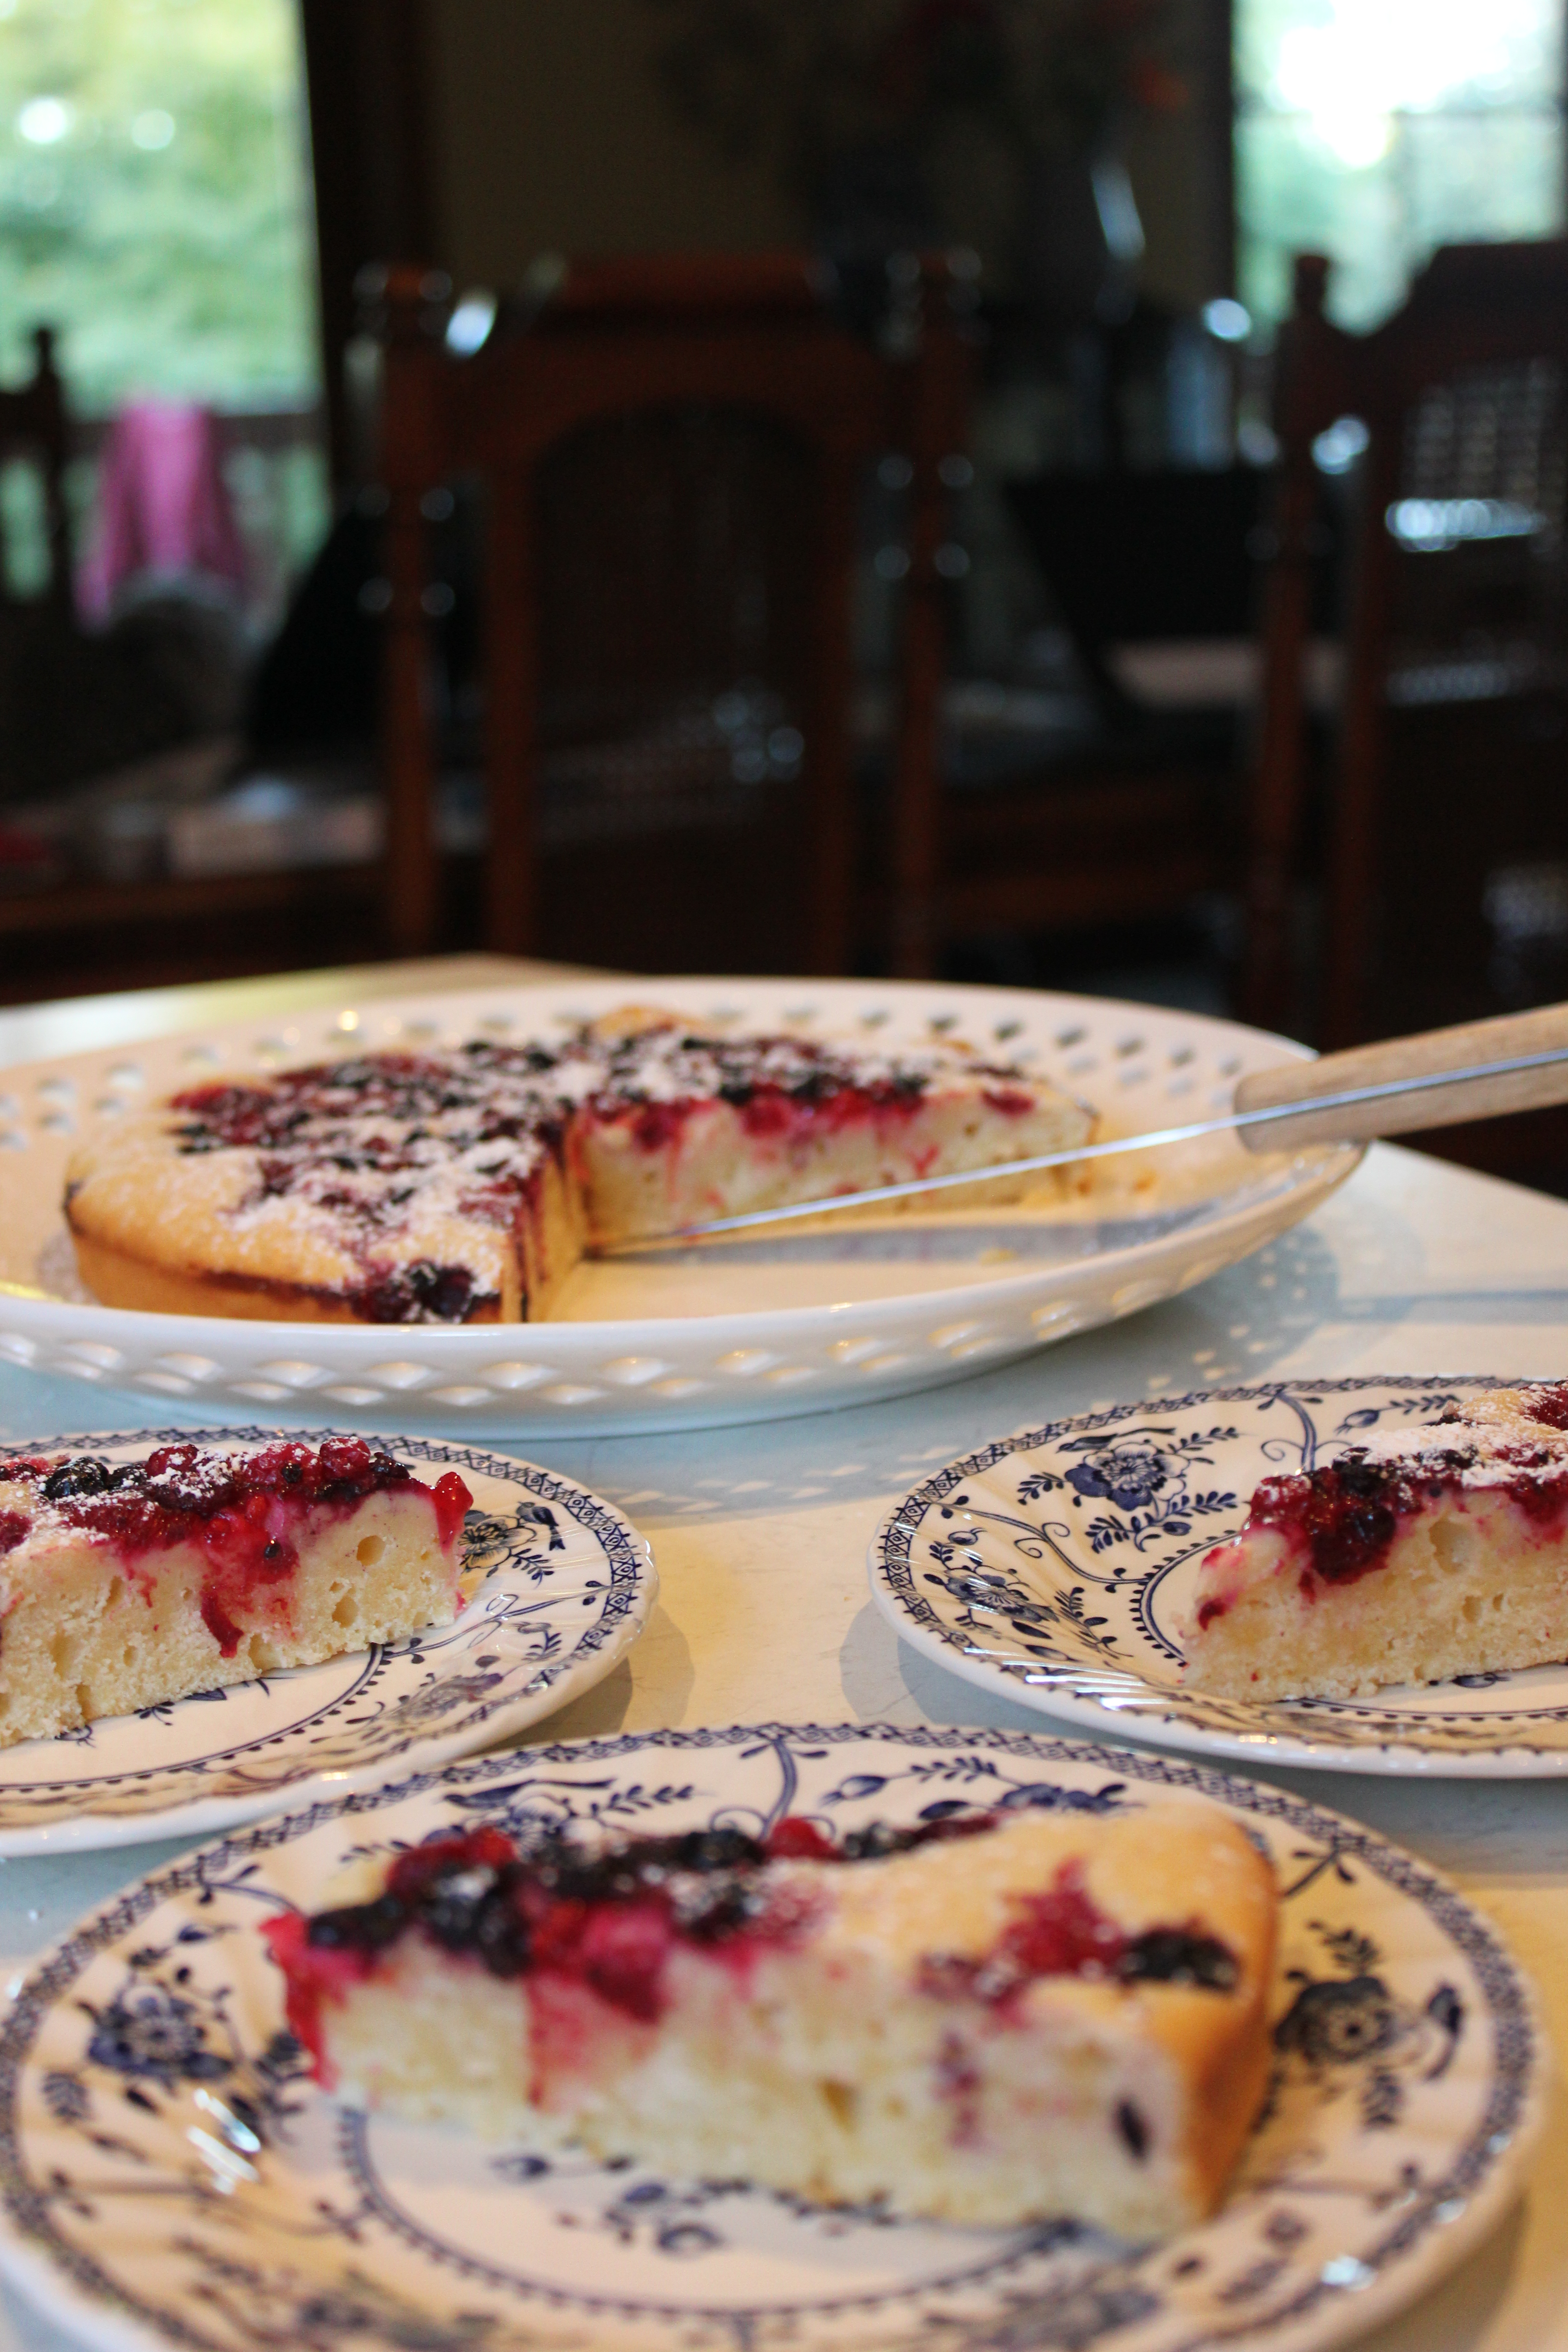
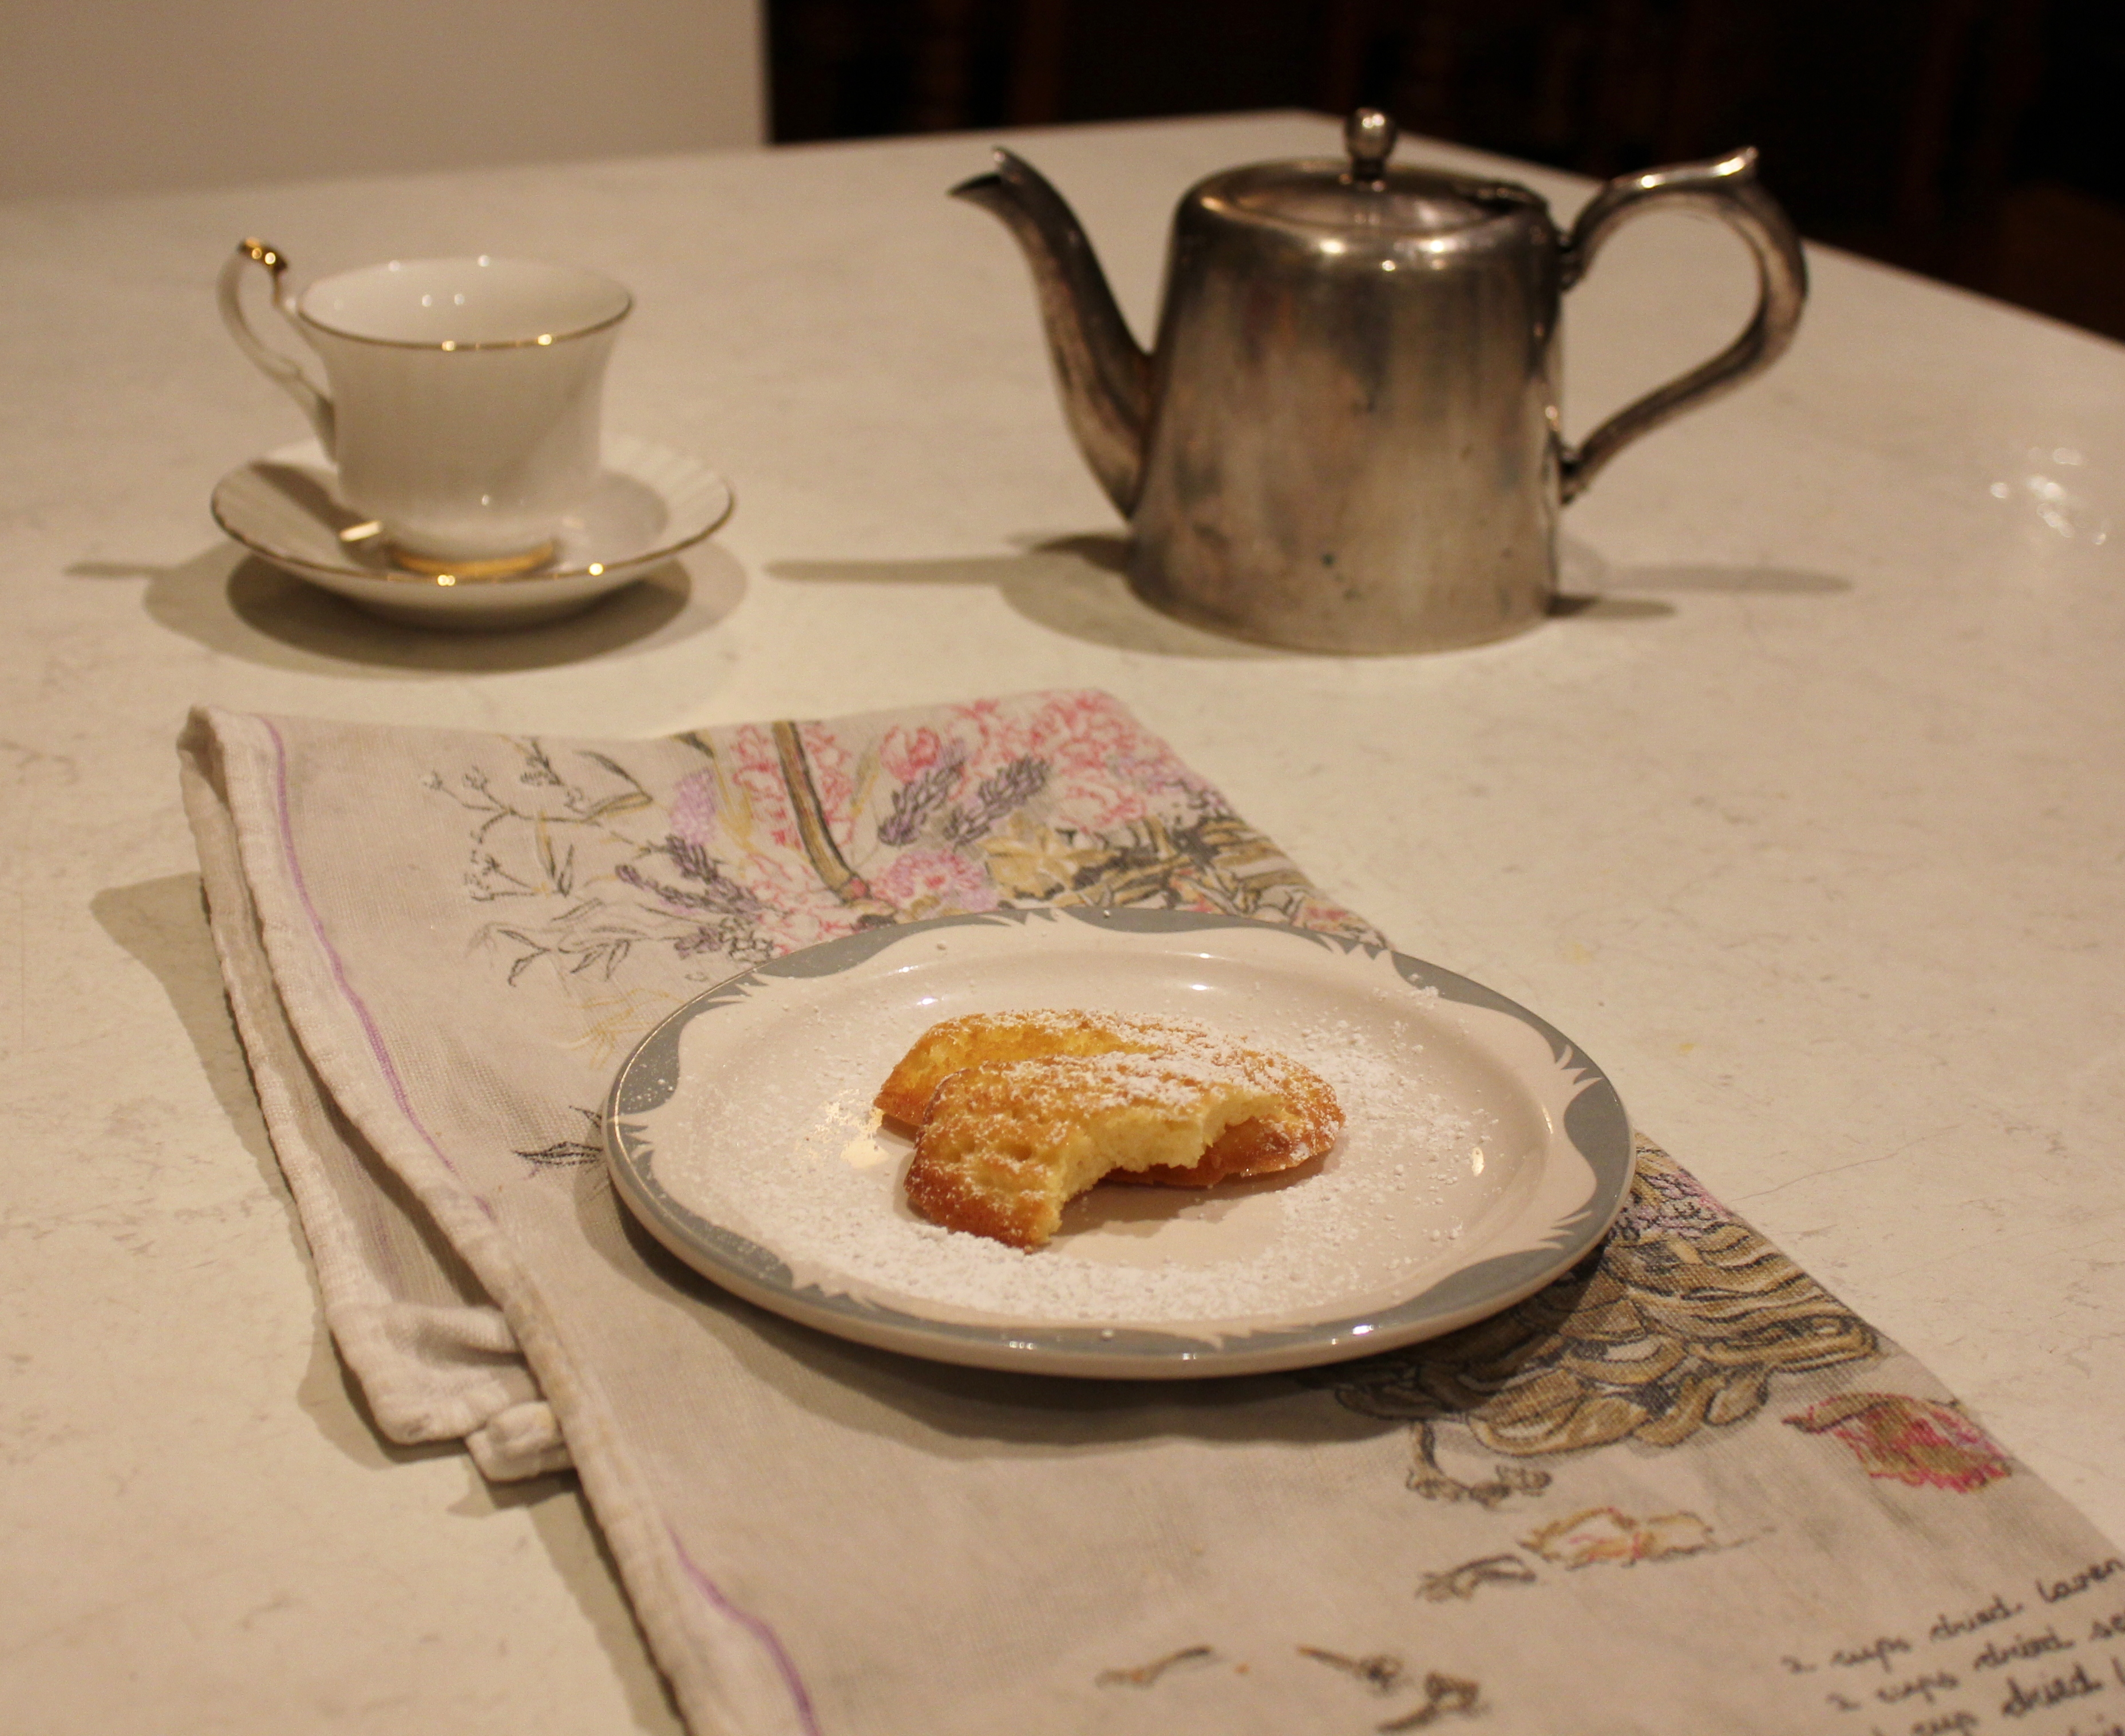
This recipe is super simple and works warm or cold. It’s great for entertaining – it’s quick to make and it makes people happy! It works with most fruits as well. If you don’t have fresh berries, use frozen ones. Nectarines cut into wedges look really effective if you use a lamington tin instead of round cake tin.

sliceSuper simple Berry Yoghurt Cake

  • 125g butter
  • ¾ cup caster sugar
  • 2 eggs
  • 1 cup plain flour
  • 1 cup self-raising flour
  • 3/4 cup vanilla yoghurt
  • 1 cup blueberries
  • Icing sugar, to serve

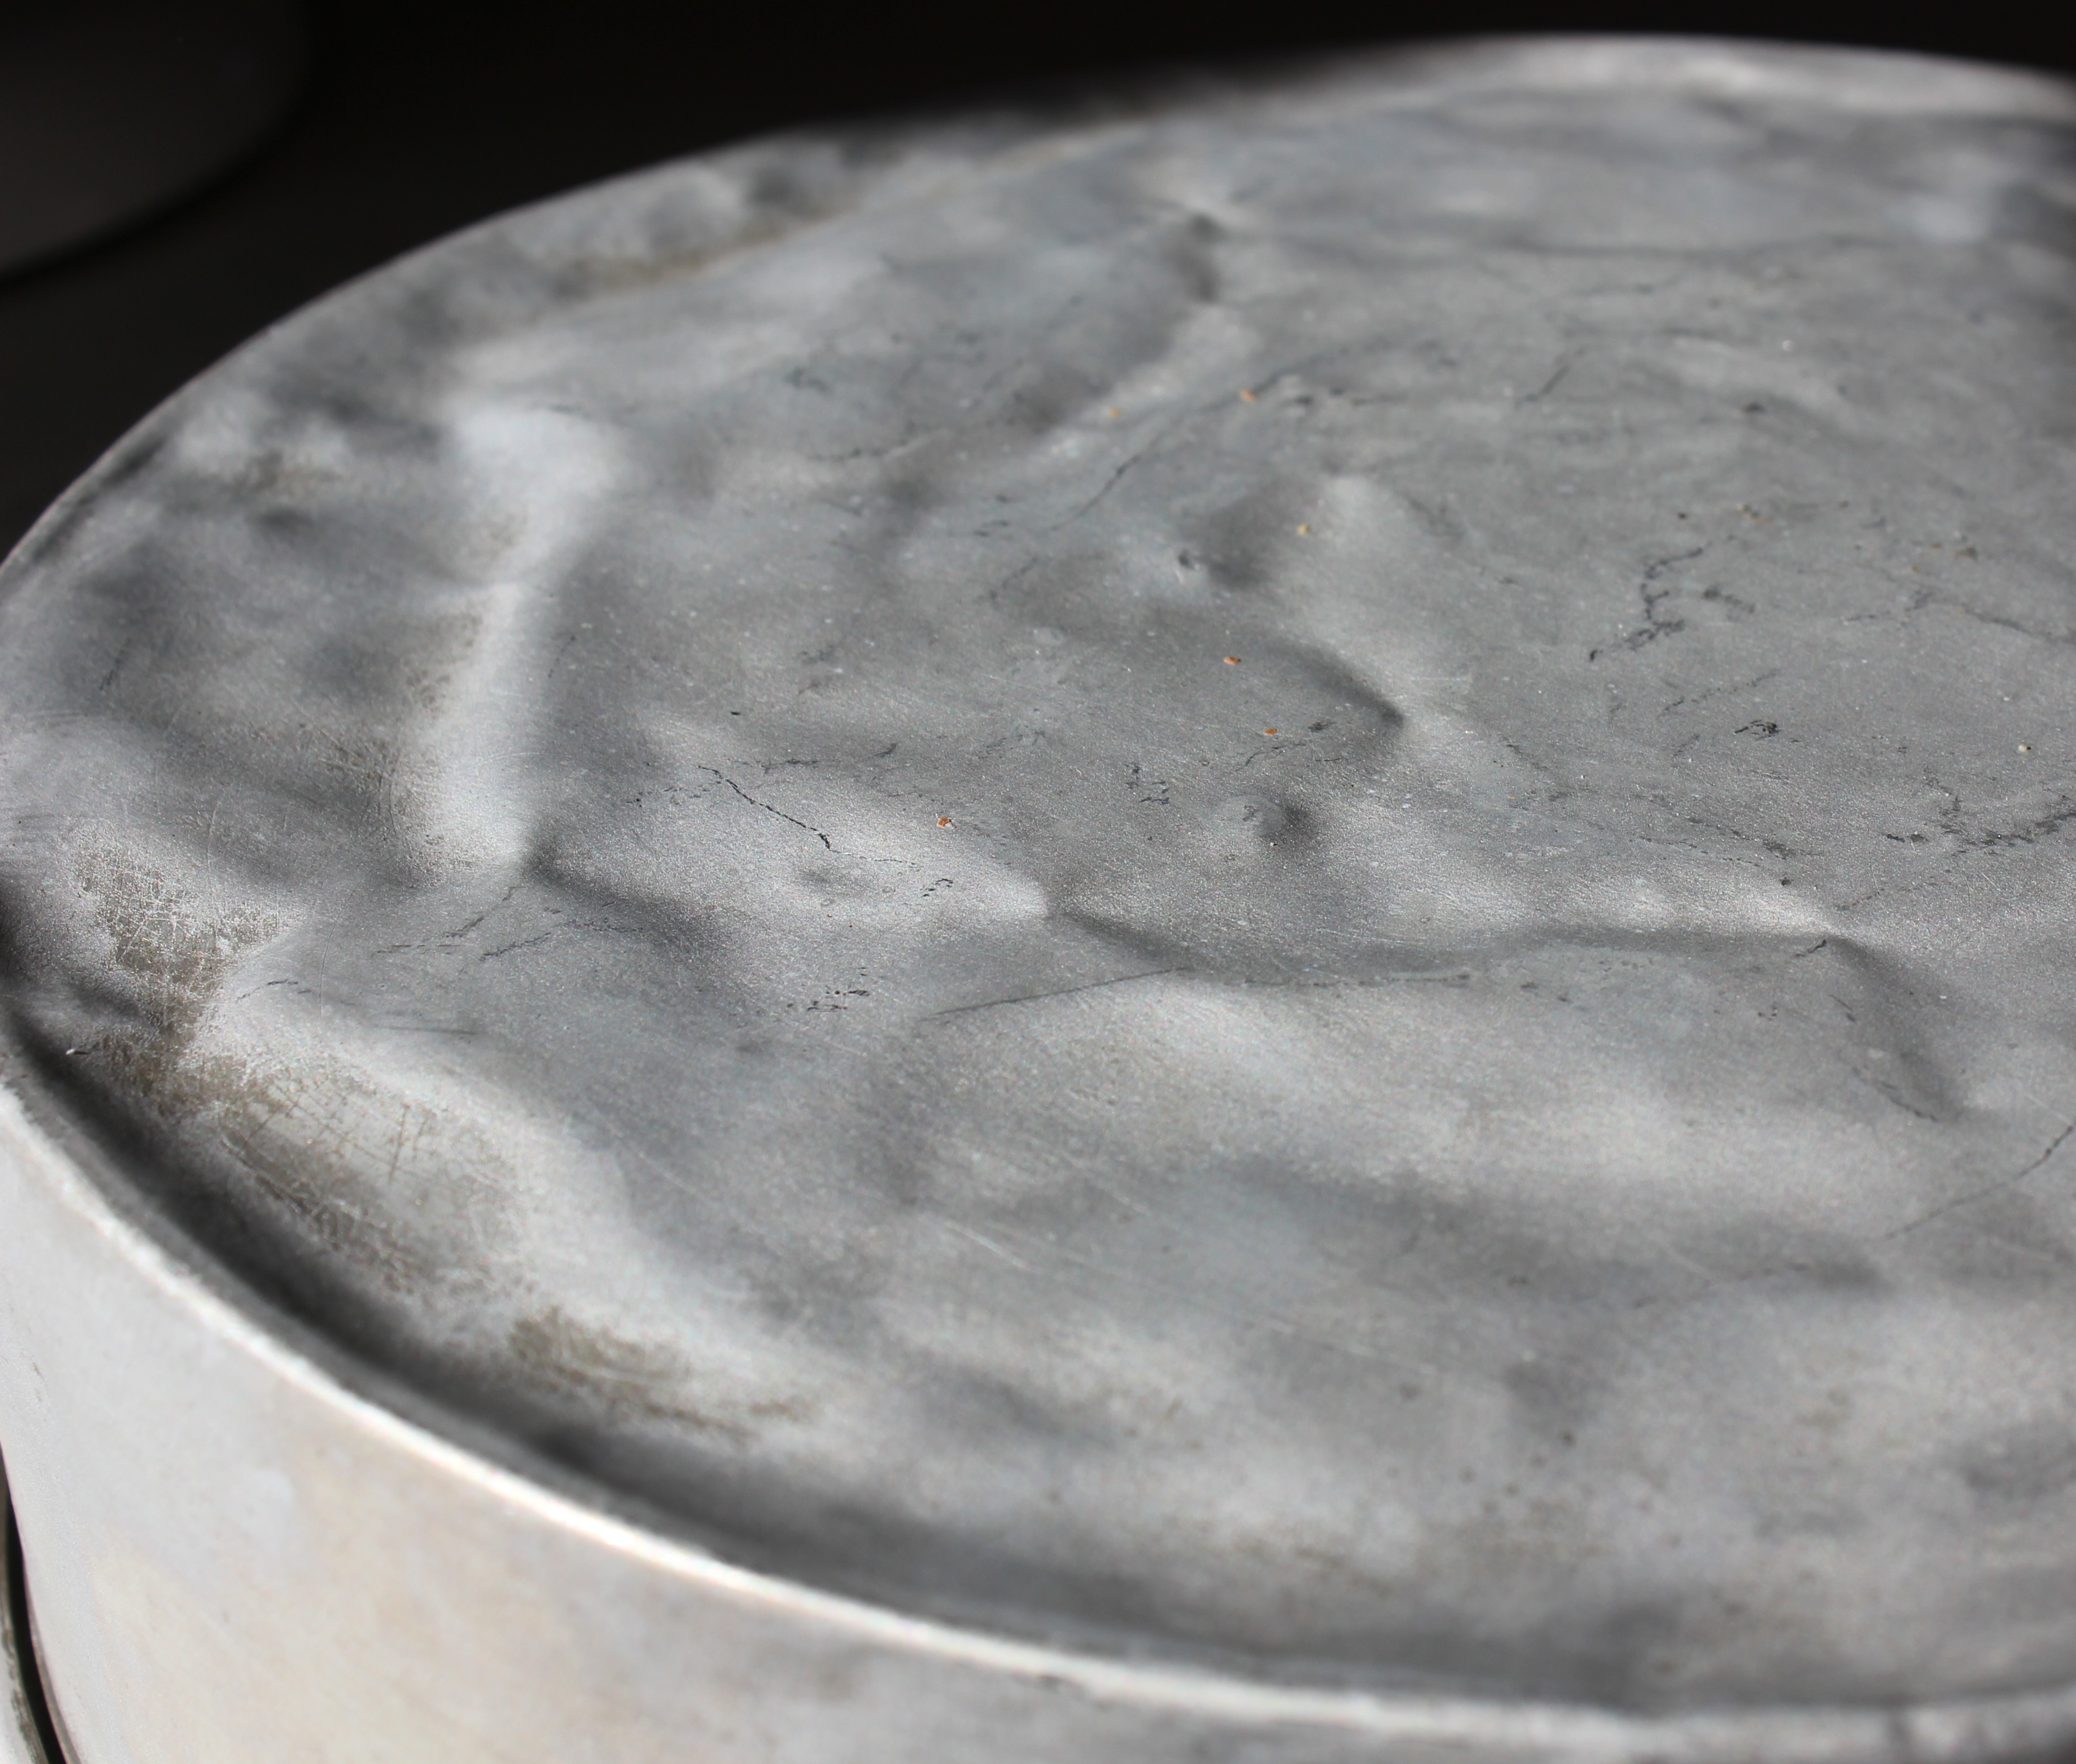
Preheat oven to 180°C fan-forced. Grease a 23cm round cake tin.

Beat butter and sugar together until light and fluffy.

mixture
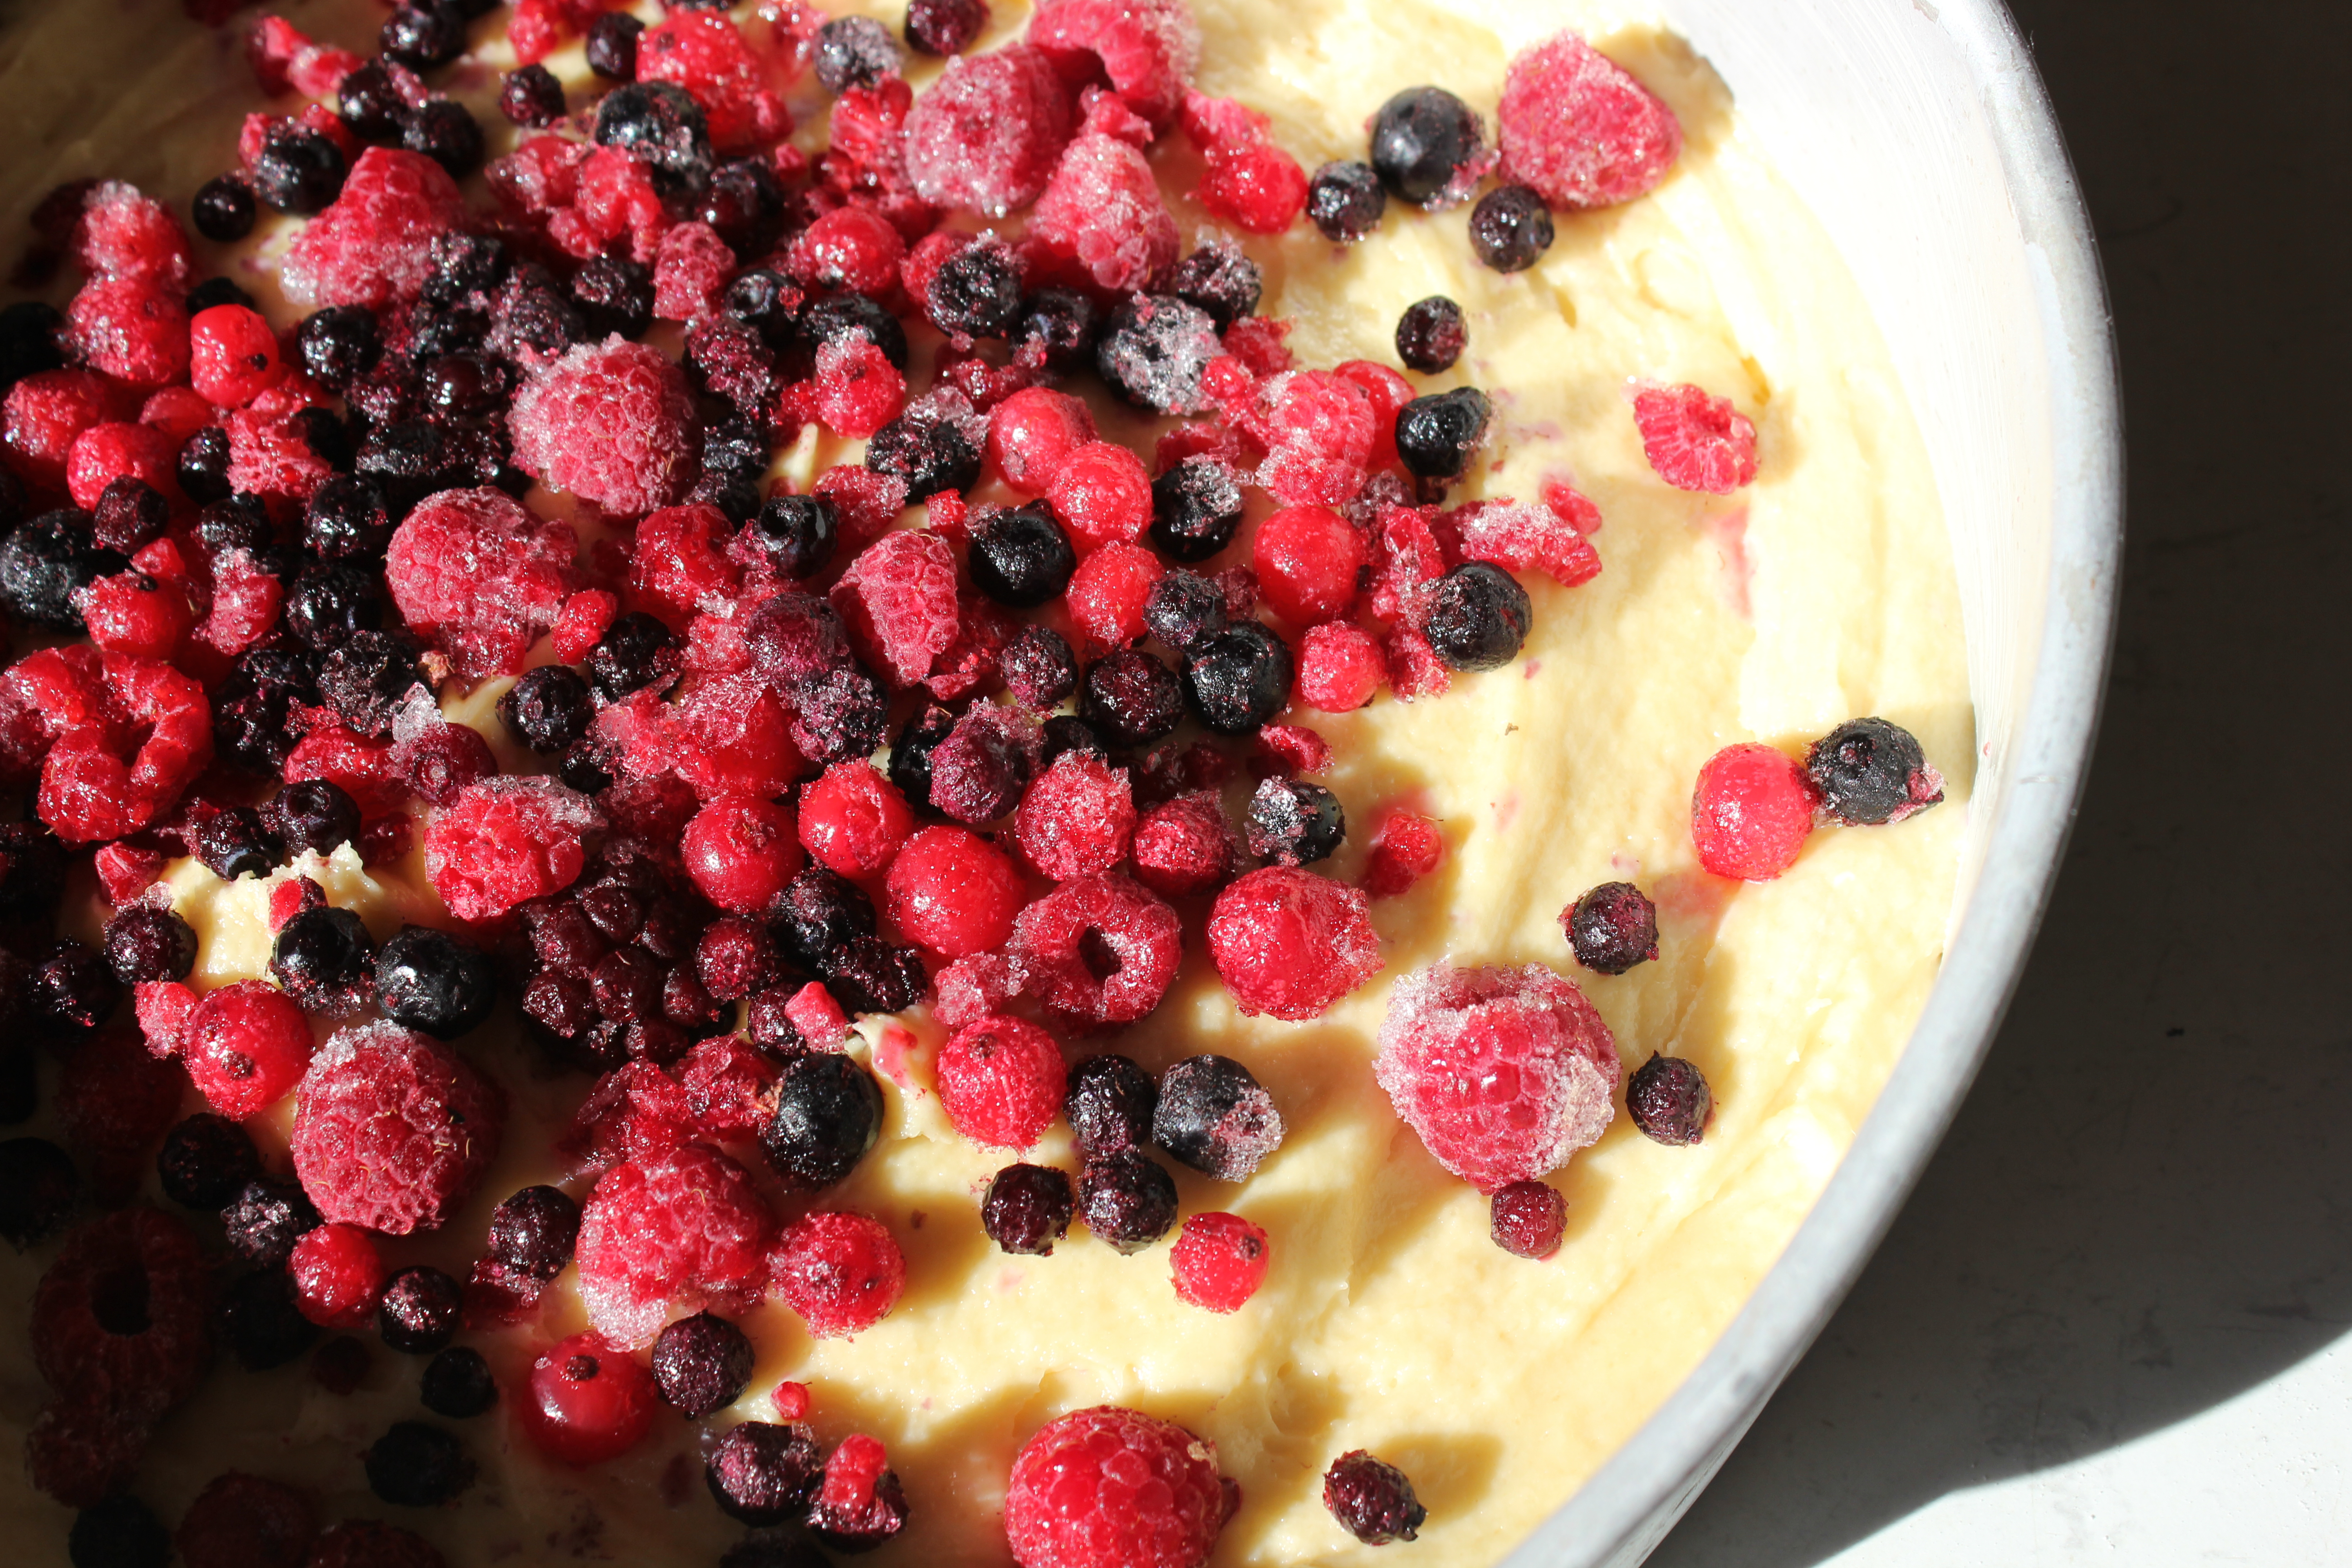
Add eggs, beating to combine. Mix in your plain flour, then the yoghurt. If you only have greek yoghurt in the fridge (like I did), add a teaspoon of vanilla to the mixture as well. Add the self-raising flour and mix until combined. This is quite a thick mixture, don’t worry if it’s a little hard to mix. Spread mixture into your greased cake tin.

tinThe cake tin I’m using has been well-loved. It has held many of my mother dearest’s crème caramels and cakes. As a result, it’s a little worn (that’s being polite) and has a tendency to cling onto cakes when you want to remove them. To combat this I simply trace the base of the tin onto baking paper, cut the round out and place it over the greased base. Problem solved.

frozen berriespressPress a few berries gently into the mixture, but sprinkle most of them across the top of it and then pat them down gently with your hand. If your oven is prone to over-browning things, cover the cake with tin foil two thirds of the way through cooking.

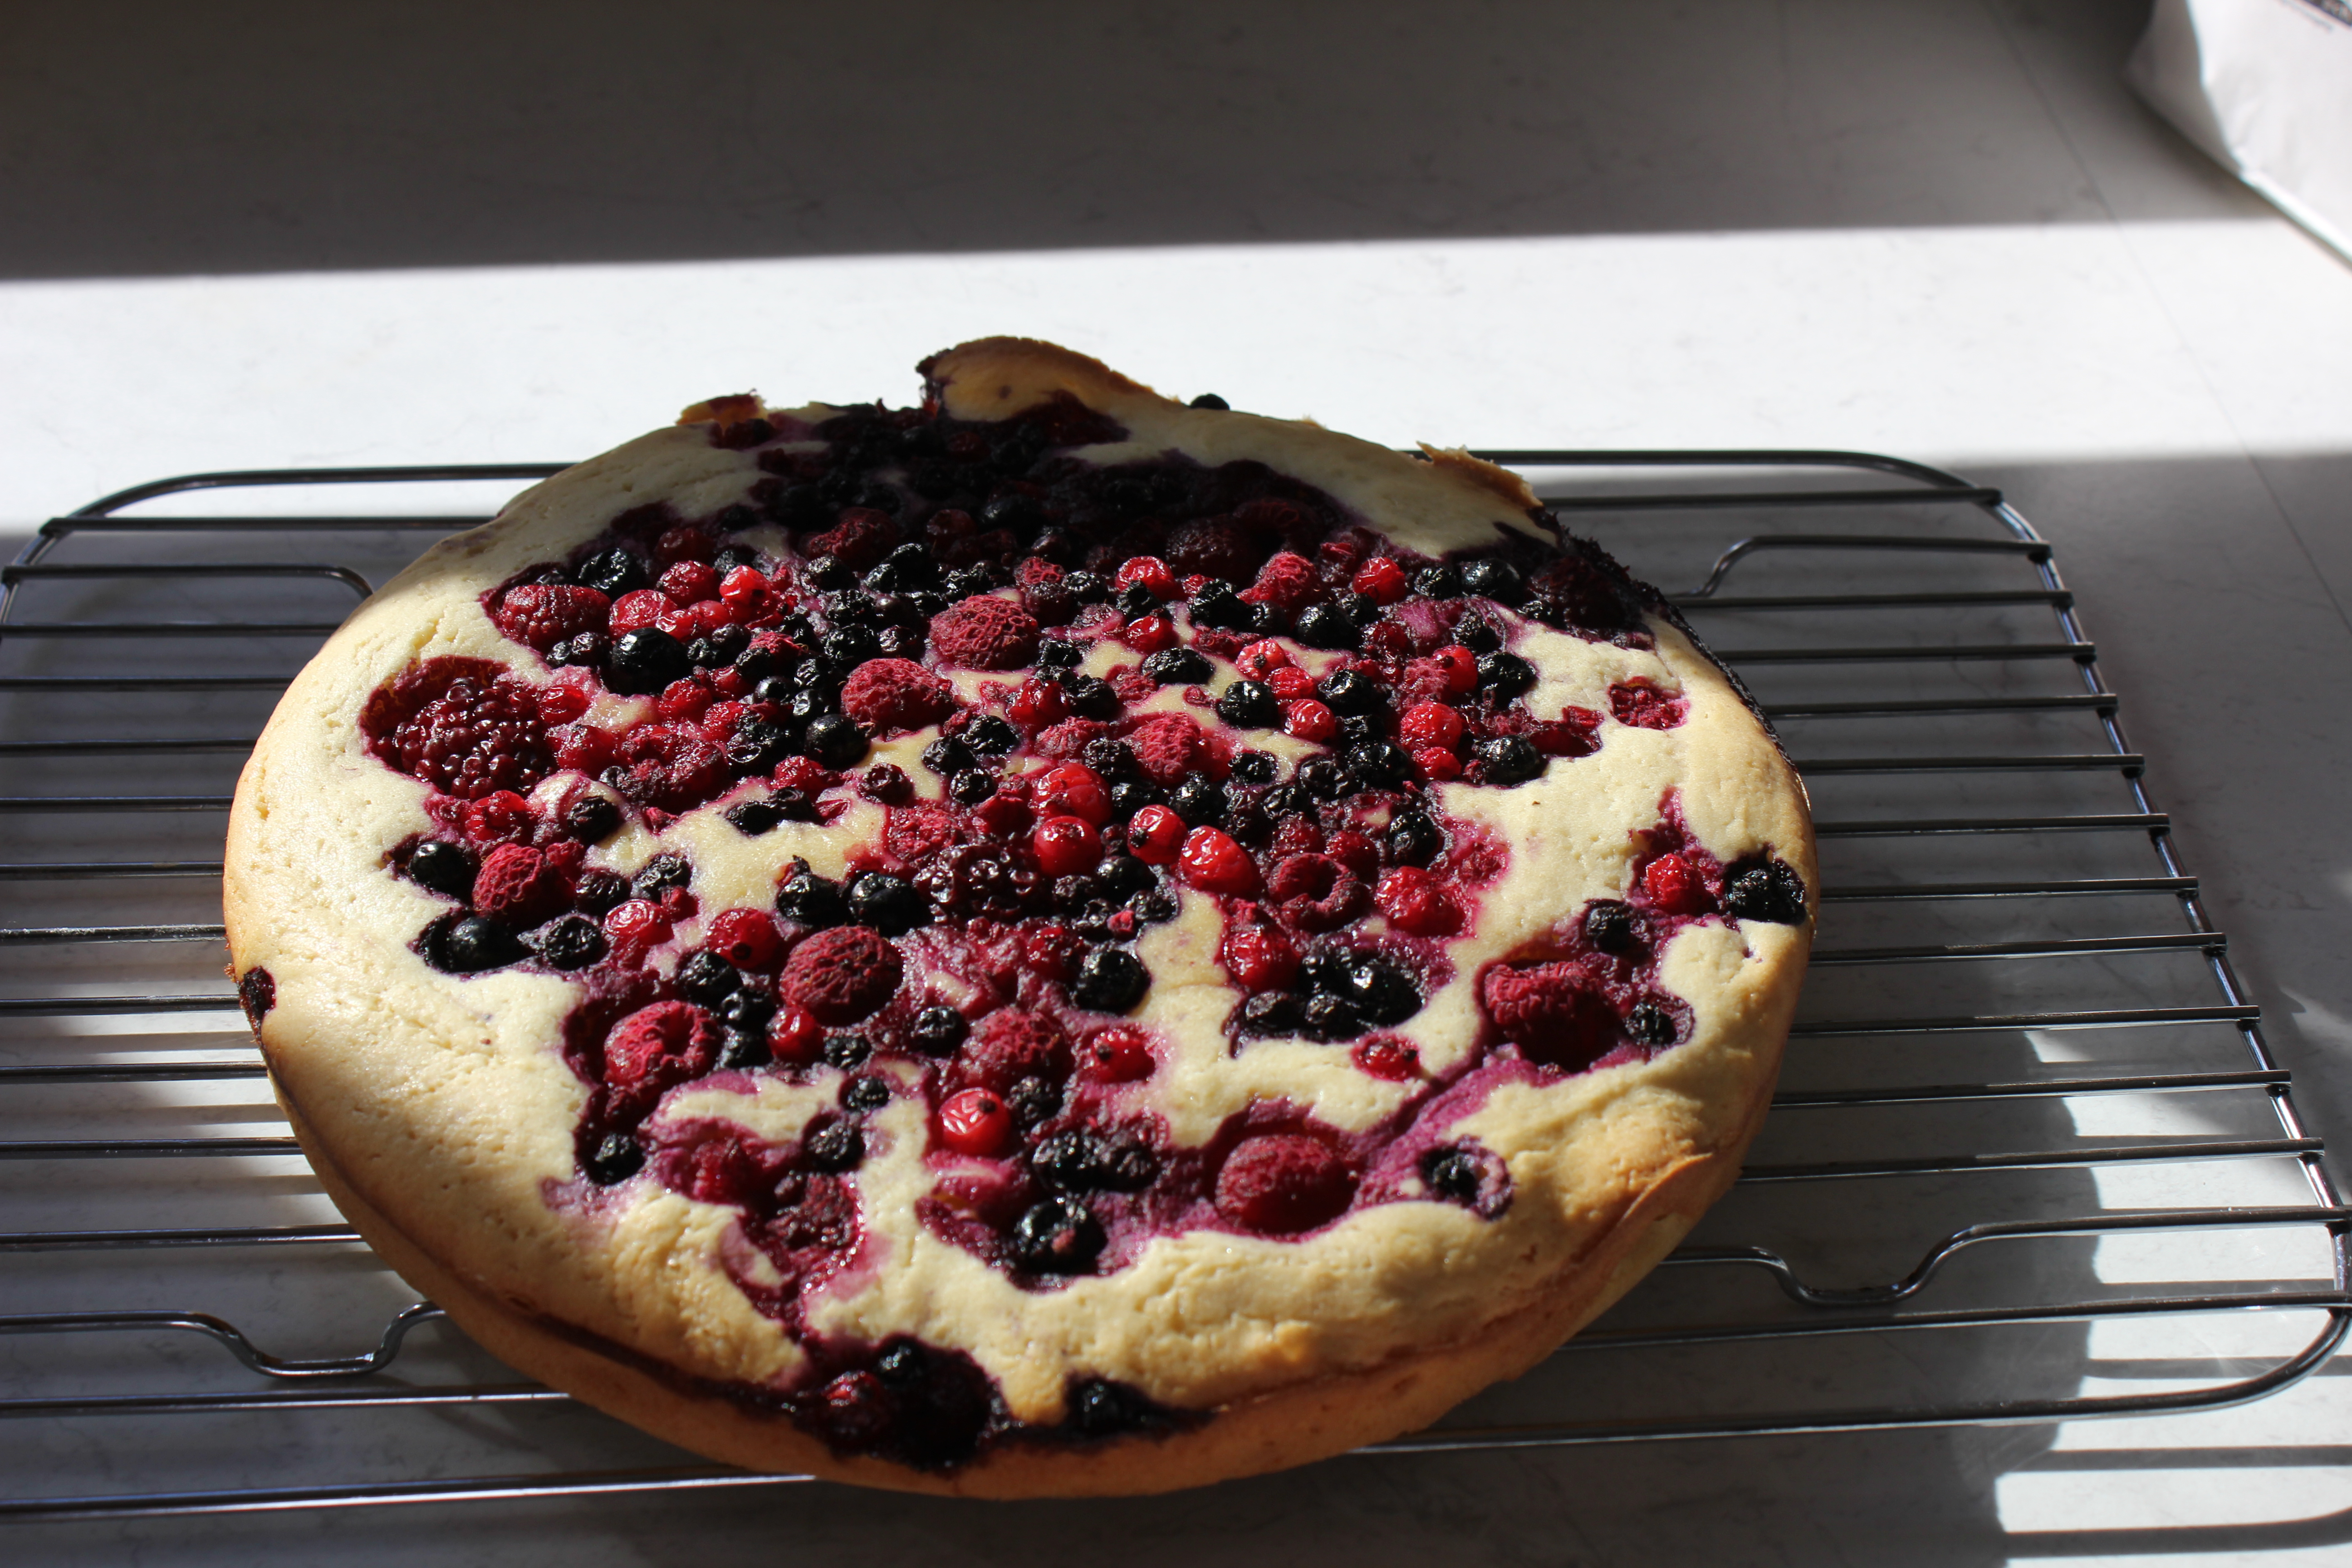
Bake for 50 minutes or until a skewer inserted in the centre comes out clean.

cake
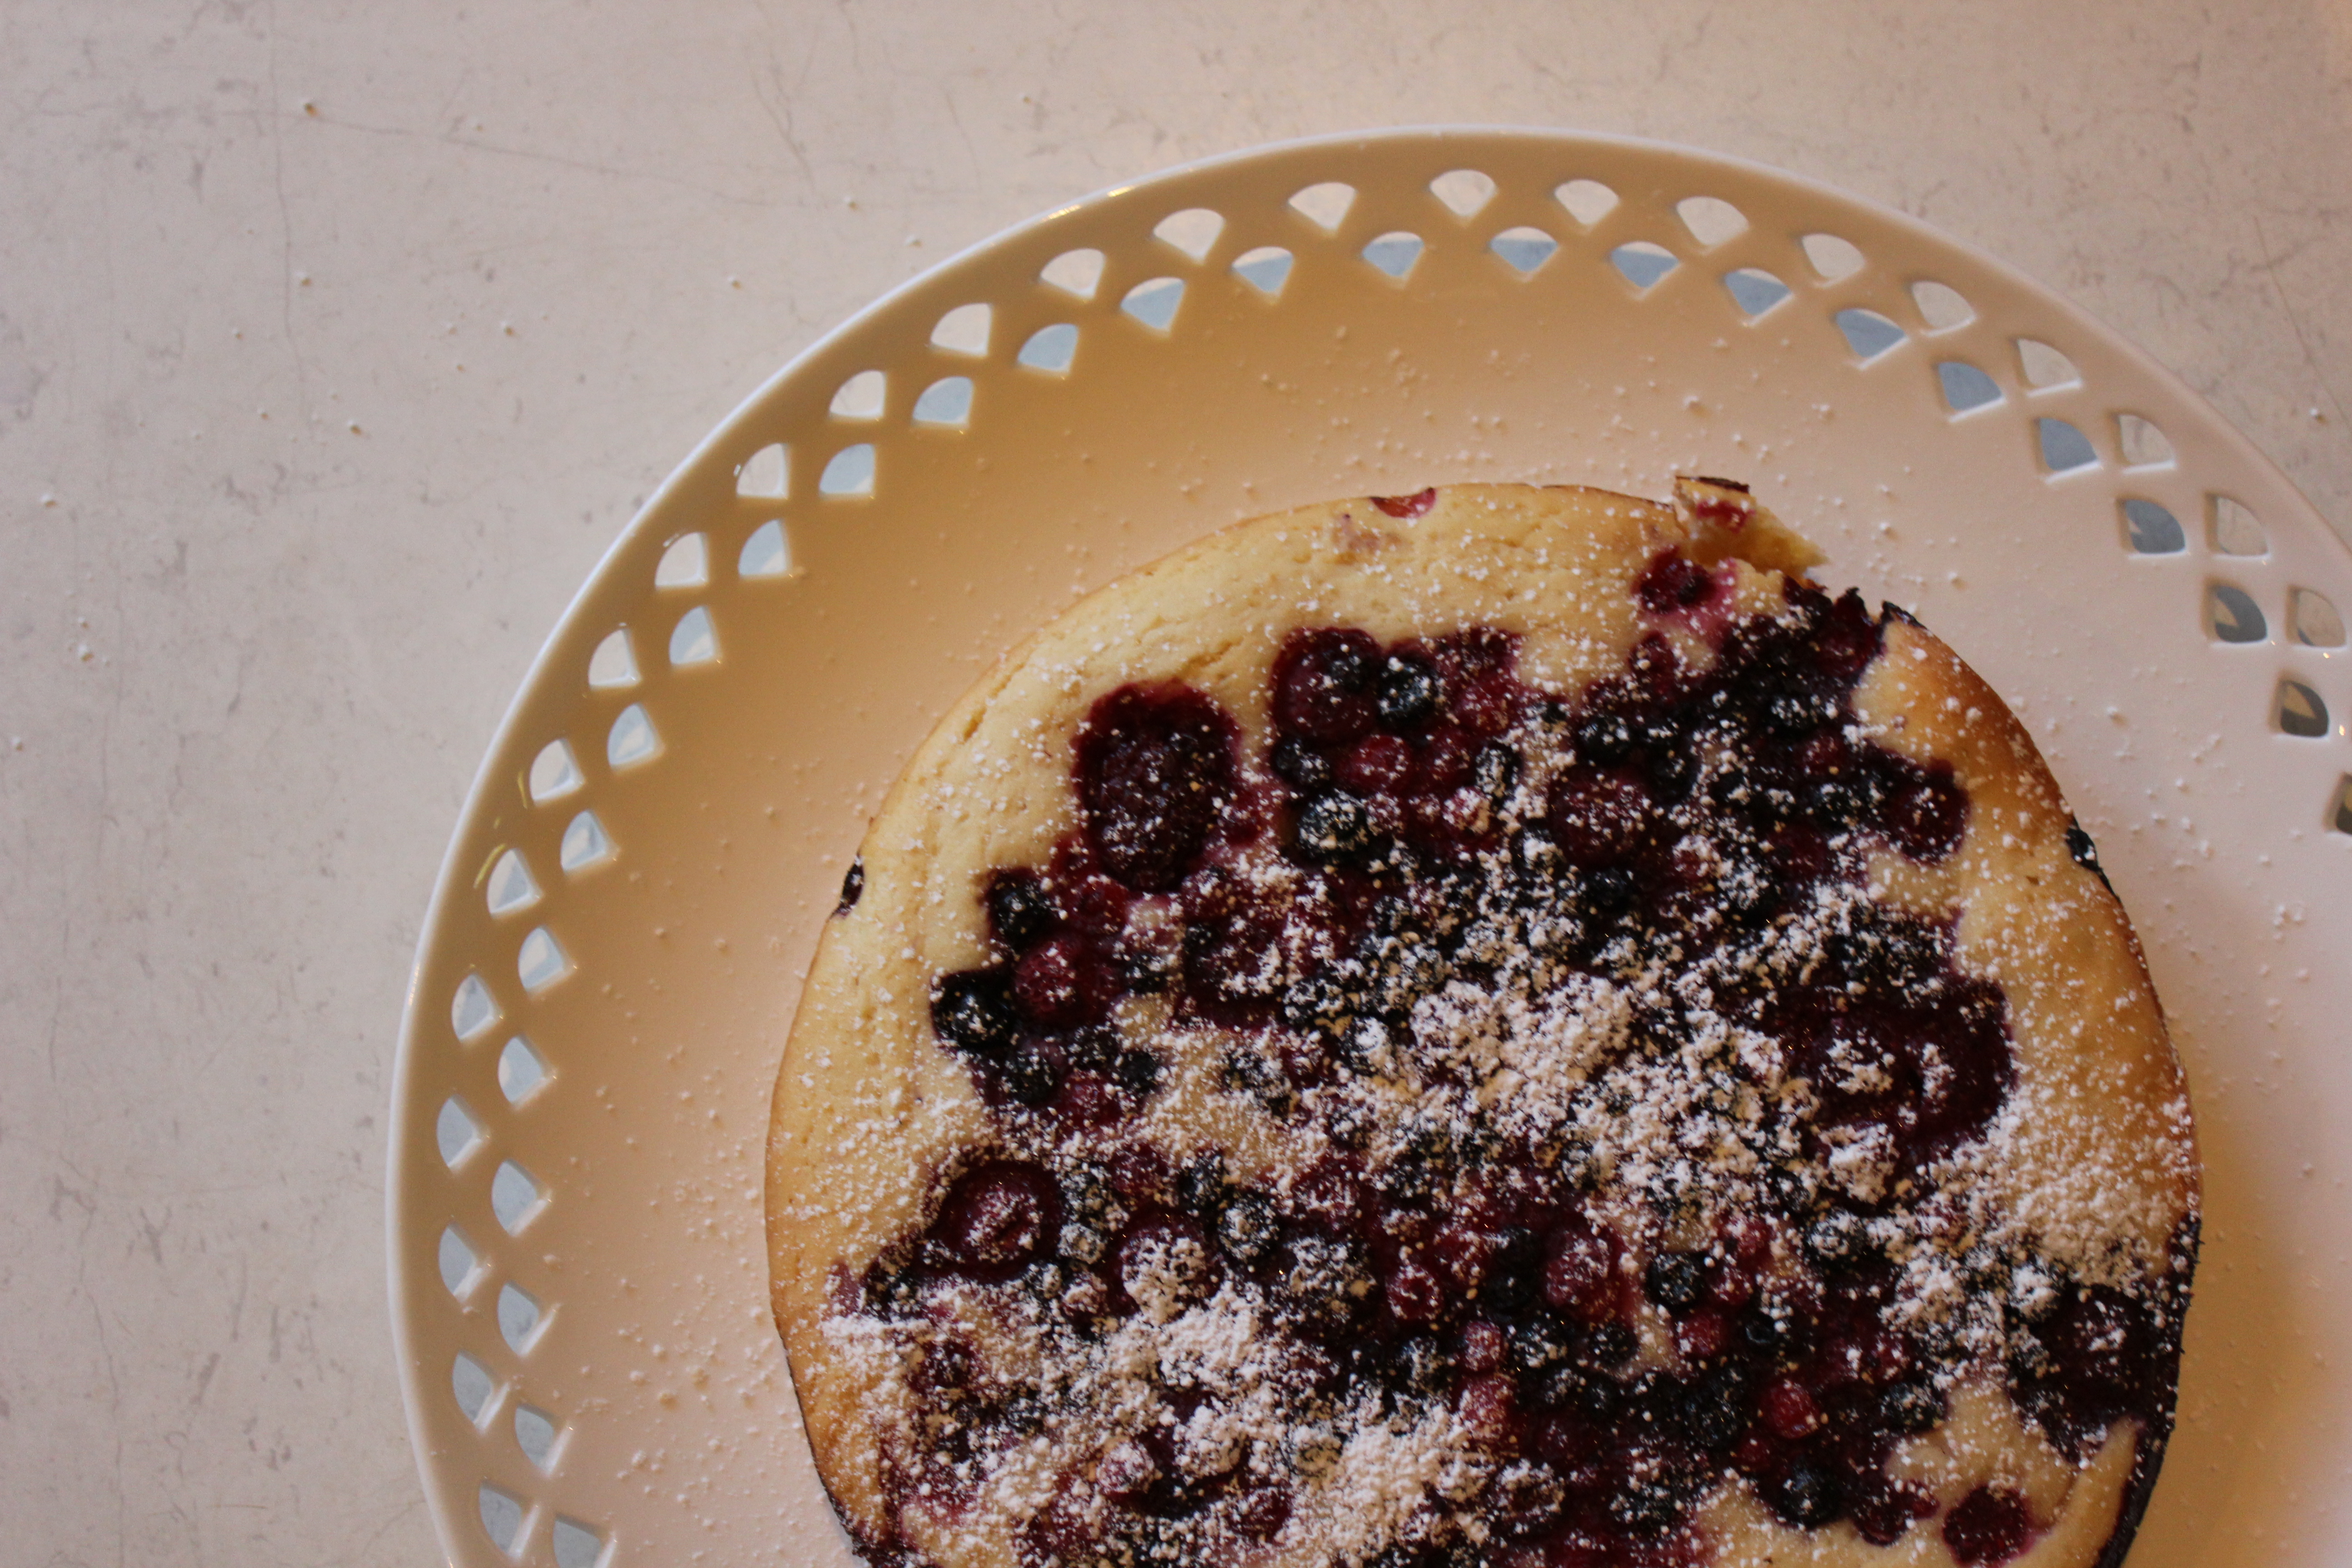
Remove from oven and let it stand for ten minutes before serving. Sprinkle with icing sugar and add a dollop of cream or yoghurt to finish.

off centreDon’t worry if you take this cake out a little too soon, my favourite part of any cake is the squidgy bit right in the centre where the heat hasn’t completely cooked the mixture. I’m a sucker for cake mixture, and the centre of this cake is glorious!

trio


Your finished product should look even better than mine because I foolishly used 2 cups of plain flour instead of one plain and one self raising. It should look more like this (I instagrammed this cake when I made it about a month ago.) We all make mistakes!


Madeleines and perfection

Wednesday was one of those days where everything just seemed to work.

Friends and I went op-shopping for plates and utensils to pretty up the blog, I was given home-made croissant dough to have a play with (because I’ve never made my own before), I found lots of new recipes and I ate some delicious food. (I Instagrammed it all, it must be true)

And to finish the perfect day off, I went to see Maeve O’Meara host a chat with Lorraine Elliot (better known as Not Quite Nigella!!) – it was so lovely! Lorraine was humble and completely adorable. She was generous with her tips for bakers and bloggers and the audience chatted to her freely. Most of the people in the audience knew intimate details of Lorraine’s life, which I suppose comes with choosing to be a blogger, so she spoke candidly about almost everything!

I also came home to delivery of new measuring spoons in the mail – Wednesday was perfection!

To celebrate my Wednesday (and share the celebrating with you all), here is my madeleine recipe.

This recipe, like my Wednesday, just works. The flavours are beautiful, soft and worth savouring. If you’ve never tried orange blossom water before, let this be the recipe that you amend this – it’s like bathing in gardenias, like swimming in blossoms.

Neither of those descriptions do it justice. This smell makes me long for the orange tree that used to grow in my backyard. Orange blossom water smells and tastes like my childhood.

I just Googled madeleines and it turns out that ‘madeleine’ is used in Proust’s In Search of Lost Time, to refer to something that evokes a memory or is a source of nostalgia. How neatly Proust just rounded off this evening’s recipe musings.

Orange blossom water may be a little bit hard to procure, but I promise every drop of this delightfully intoxicating little liquid is worth it.

Orange Blossom Madeleines:Madeleines (2)

  • 3 eggs
  • 1/2 cup sugar
  • 1/2 cup plain flour
  • 45g melted butter
  • 3 tsp orange blossom water

Preheat your oven to 180°C. Whisk together the eggs and sugar with a mixer until foamy, this should take about 2-3 minutes. Melt your butter in the microwave while the mixture foams up.

Butter stack

Take out the whisk element and slowly sift in the flour, then mix in gently using a wooden spoon.

Add the melted butter and orange blossom water to the mixture. If you’re unsure about the orange blossom water – despite my best attempts to entice you – try cutting back two one or two teaspoons and just to test it out. Or, if you’d prefer to be completely unadventurous, replace the orange blossom water with some lemon zest, coconut essence or rum.

Spoons

Before you grease anything, marvel at how beautiful the madeleine tins are for a second. Aren’t they just gorgeous?!

batter and tinsLiberally grease your madeleine tin with butter and fill them about 3/4 of the way up. When I say liberally, I mean lather your tin up, because these little ladies like to stay in their tins. Refrigerate your filled madeleine tins for about an hour if you’ve got the time (I got impatient and took them out after half an hour with no adverse affects.)

Place them in the oven and cook them for about 12 minutes, when the edges turn golden.

Allow to cool and sprinkle with a little bit of icing sugar.

Enjoy with tea and friends.