Mint Chocolate St Patrick’s Day Slice and greenery

I can’t overstate the love that I have for Ireland. The people, the dramatic landscapes, the green, green greenness of every single plant. To say that I love Ireland would simply not do it justice. I visited Ireland in 2010 because I had a cousin there (and because I had always wanted an excuse to go) and it was indescribably lush.

St Patrick's day mint chocolate slice (5 of 9)

And those gorgeous Irish accents, don’t even get me started!

I totally understand why green is associated with St Patrick’s Day, because I had never seen so many shades of green in my life! Which is why I went full cliche with this choc-mint slice and made it a vibrant shade of green. It pained me slightly because I’m so fond of pastel hues, but I’m super happy with the result, so I’m glad I powered through!

Do you celebrate St Patrick’s Day? Maybe you like things a little less hulk-coloured? If that’s the case, check out my Guinness Cake, Baileys Bundt or Baileys Buttercream Biscuits.

St Patrick's day mint chocolate slice (3 of 9)

Base

  • 1 3/4 cups plain flour
  • 1/3 cup cocoa powder
  • 1/2 cup icing sugar
  • 200g butter, melted
  • 1/4 cup coconut

Mint filling

  • 3 tbsp milk
  • 160g butter
  • 3 1/2 cups icing sugar
  • 4-5 tsp peppermint essence
  • 1/2 tsp green food colouring

Chocolate topping

  • 3 tbsp coconut oil
  • 275g dark chocolate
Start with your filling. Put the milk and butter in a heavy-bottomed saucepan over a medium heat until melted. Remove from the heat and sift in the icing sugar. Return to the heat for 3-4 minutes, allowing it to simmer slightly. Make sure you’re mixing continuously so that the mixture doesn’t catch on the bottom. Pour this mixture into a bowl and pop into the fridge to cool for 30 minutes. While the filling cools, make a start on your base.


Preheat oven to 180°C fan and grease a 20cm fluted tart tin with a removable bottom.


Sift together your flour, cocoa and icing sugar into a large bowl. Mix in your melted butter and your coconut until it’s well combined. The mixture should be in large clumps, rather than a giant ball – don’t worry, you’ll flatten them out later. Scoop your mixture into your greased pan and press down with your fists (or a spatula) until you have a smooth, even base. Pop into the oven for 15-18 minutes.


Remove from the oven when the top of the base looks dry – don’t leave it any longer than the 18 minutes, you don’t want it drying out. Plus, it’s actually better when it’s a little underdone. Set it to one side until it is cool enough that you can touch it comfortably.


Remove your green filling from the fridge, pour it out onto the base and smooth it out with a spatula. You shouldn’t need to help it fill out the sides too much, it will spread by itself. Return to the the fridge for another half hour.


While the slice is chilling in the fridge, melt your chocolate in a heatproof bowl set over a pan of simmering water and scoop the coconut oil into it – the heat in the chocolate should melt the coconut oil. Mix until you’ve got a lovely, glossy mixture. Set to one side to cool for 15 minutes.


Remove your base from the fridge and pour the chocolate mixture over the top. If you’ve got any chocolate left over, reserve for drizzling over the edges before serving. Return to the fridge for at least 2.5 hours.


(If you choose to drizzle the extra chocolate over the edges, remove it from the fridge 30 minutes before serving, put the chocolate mixture in a snap lock bag and snip off a small section of the corner and pipe onto each flute indentation, making little wave movements around the circumference of the slice and then return to the fridge.)


St Patrick's day mint chocolate slice (2 of 9)


Allow the slice to rest at room temperature for at least 15 minutes before serving.


Want to know the trick to stopping your chocolate from cracking when you cut it?


Take an extra sharp, thin knife and point the tip into the centre of the slice, then place your hand on the top of the blade and push down gently.  Repeat with each slice to get perfectly straight slices without cracking the chocolate.


St Patrick's day mint chocolate slice (7 of 9)


St Patrick's day mint chocolate slice (6 of 9)


St Patrick's day mint chocolate slice (4 of 9)


St Patrick's day mint chocolate slice (9 of 9)
Are you making this dish of a dessert? Tag me on Instagram and use #bakingwithgab so I can see your bright green creations!

Mini egg Easter doughnuts and a healthy Easter

mini egg doughnuts (14 of 14)
I told people who lingered over the plate of these delights that they were healthy doughnuts – there’s yoghurt in them and they’re baked! Most people laughed at me, so I explained that they’re healthy-ish…healthier than a regular fried doughnut, anyway.

They’re kind of like a little cake doughnut, which you’ll know I’m a fan of if you’ve seen my earl grey or Nutella doughnuts.
I like the idea that you can eat seconds because they’re a tiny bit better for you. I stress teeny tiny. Did I mention that I’ve started a little health kick? Continue reading “Mini egg Easter doughnuts and a healthy Easter”

Peanut butter nana ice cream and getting things done

I had some issues with editing these photos. I lost the card that they were stored on, then the files were corrupted, then they didn’t want to save the edits that I made to them. In short, they just weren’t cooperating. So I did what any good adult would do, I put them in the too hard basket.

PB nana ice cream edit round 2 (1 of 7)
Because sometimes we need to just have a good cry and try to forget about things until we muster the strength to actually get things finished. My little tantrum surrounding these photos was prolonged – every time I tried to re-edit them, there would be another issue. So I kept finding other more important things to do (subtext: things that were far, far easier) and these photos kept getting bumped down the list.
And here I am, two months later, mustering the strength to get this post up. The photos are edited and I want to frame them because they’re such an achievement in my books.
PB nana ice cream edit round 2 (5 of 7)
It’s so ironic, because the recipe could not be simpler. You freeze, you blend, then you freeze again.
It’s actually a recipe that I use quite frequently – it’s delicious and quick and much better for you than ice cream. A variation of this is sitting in my fridge right now, actually.
Whatever you’re going through right now, or tasks is sitting in that too hard basket, I hope you’re building up the strength to overcome the mental roadblocks so that you can get things done!
I believe in you.
PB nana ice cream edit round 2 (7 of 7)

Peanut butter nana ice cream

Makes 6
  • 550g banana, chopped (about 5 medium bananas)
  • 1/4 cup milk
  • 4 tbsp crunch peanut butter
  • Ice cream moulds (mine are from Sunny Life Australia)
Chop up your bananas into coins and pop them into the freezer in a tupperware container for about 2 hours. I freeze all of my overripe bananas now because they’re perfect for this recipe.
Bananas close up peanut butter nana ice cream

Whip them out of the fridge and blend them up wth the milk and peanut butter for 2-5 minutes until smooth, then pour into your ice cream moulds. Gently insert the stalk/base and make sure they’re all secure.

PB nana icecream (5 of 5)
Place the moulds in the freezer for at least two hours, then serve and devour immediately.
Tip: when filling your icecream mould, don fill it all the way to the top – leave a tiny gap so that when you put the base in, the mixture doesn’t splurt everywhere.
PB nana ice cream edit round 2 (2 of 7)
My friends at Appliance Kitchen gave me the this blender to play around with, and I have to say, it exceeded my expectations! In the past I’ve had issues with blenders where only the bottom 2cm of my food gets blended, but I didn’t have the same issue with this baby! It’s a George Forman blender, and it’s on sale (at the time of writing) here. I also used it for my mango custard in this Summery eton mess. 
Also, I can definitely vouch for the the fact that these babies will bring all the dogs to your yard. It was a very hot, humid day when I did the shoot for these ice-cool treats (side note: the steaminess getting kind of old, Sydney!) and all three dogs were super intrigued. None of them were at their most photogenic unfortunately, I’d blame the heat!
PB nana ice cream edit round 2 (6 of 7)

Chocolate covered strawberry sandwiches and the anti-Valentine

I know that I’ve said I’m the anti-Valentine in previous posts, but I can’t help but be drawn towards heart-shaped things. I’m a sucker for the twee; floral tea sets, polka dots, pastel coloured foods, I can’t help myself! I spent much of my childhood being a tomboy, slicking my long blonde hair back into a bun, wearing shorts and t-shirts, copying my older brother. It wasn’t until I was about 15 that I realised that I actually liked “girly” things. I refused to wear makeup until about 16 and didnt realise that I loved patterned fabrics until about 17. Looking back, I wonder how I survived without them. I sometimes feel like I’m making up for those drab, boyish years now, cramming in as many tea parties and patterned dresses as I can!


Valentine's day choc strawberry sandwiches (3 of 6)


Continue reading “Chocolate covered strawberry sandwiches and the anti-Valentine”

Bejewelled hearts and Valentine’s day treats

These jewelled delights make me so happy. They’re delicious, adorable and ridiculously easy to make! I seem to be making a habit of creating easy recipes for Valentine’s Day – I wonder what that says about the amount of effort I put into it!

Valentine's day chocolates (7 of 7)

I’ve never been a big believer in Valentine’s Day, but I am a sucker for heart-shaped things. I’ve got heart-shaped doughnut tins, heart-shaped chocolate molds, heart ice cube trays, cake tins, tart tins, marshmallows… The list goes on!

Continue reading “Bejewelled hearts and Valentine’s day treats”

Healthy veggie bites and back to school lunch ideas

The Reject Shop asked me to come up with some back to school ideas for them recently. It really got me thinking.


About how my eating habits have changed since I was at school. And to be honest, they’ve pretty much stayed the same. I still LOVE food, I don’t think I’ve ever been a fussy eater.


It helped that my mum always made the best lunches. I was the girl at school with lunches that other people envied – leftover schnitzel wraps, salad sandwiches piled high with delicious fresh vegetables, spag bol… she set such a high precedent that I worry that I’ll disappoint my future children! My own mother set the lunch bar so high that it makes me evaluate my work lunch choices much more harshly than most.

Continue reading “Healthy veggie bites and back to school lunch ideas”

Berry mango Eton mess and Summer fruit

Has this month gotten away from you? It has absolutely flown by for me! And I’ve been a little lax – I’ve got a backlog of recipes to share with you and I just don’t know where to begin!

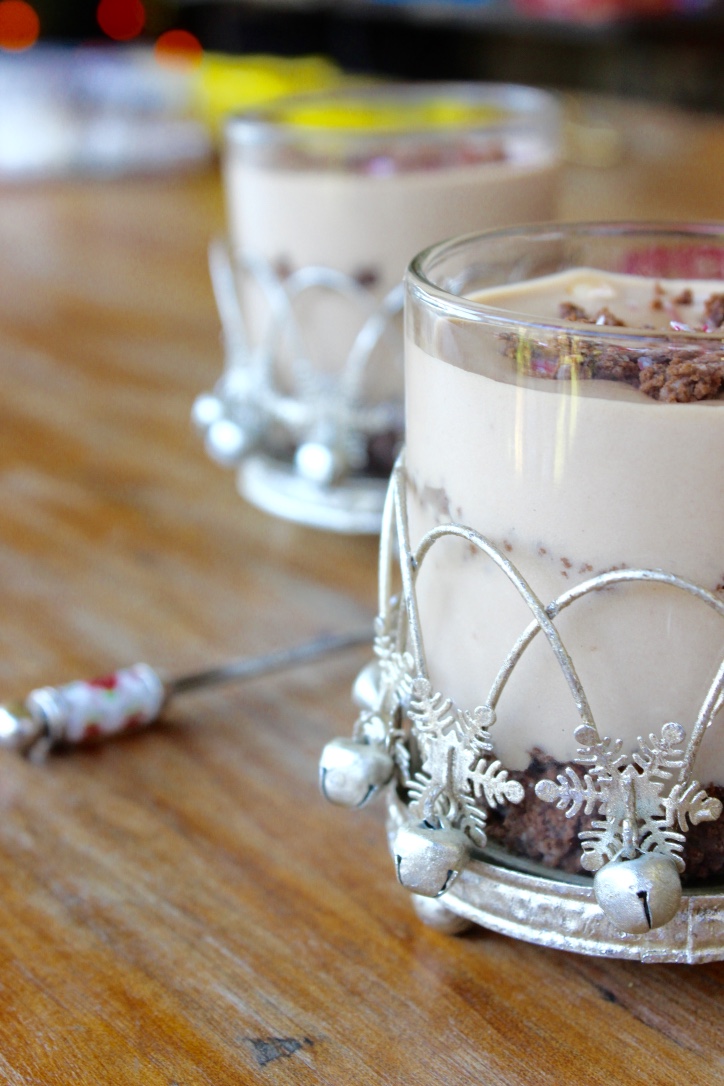
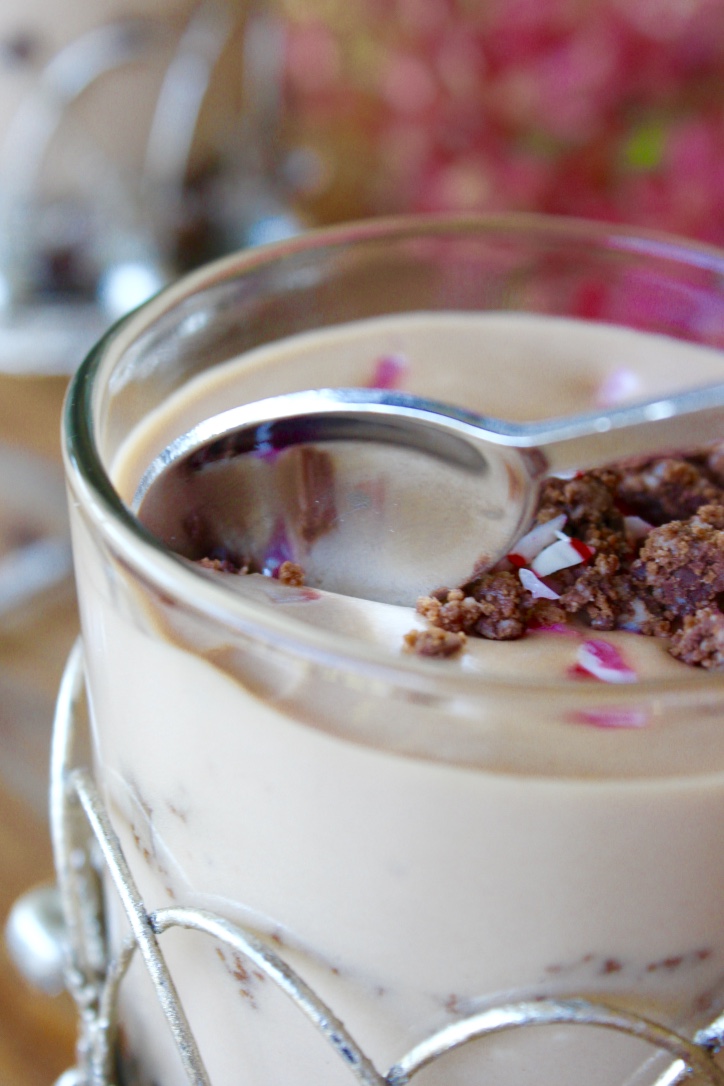
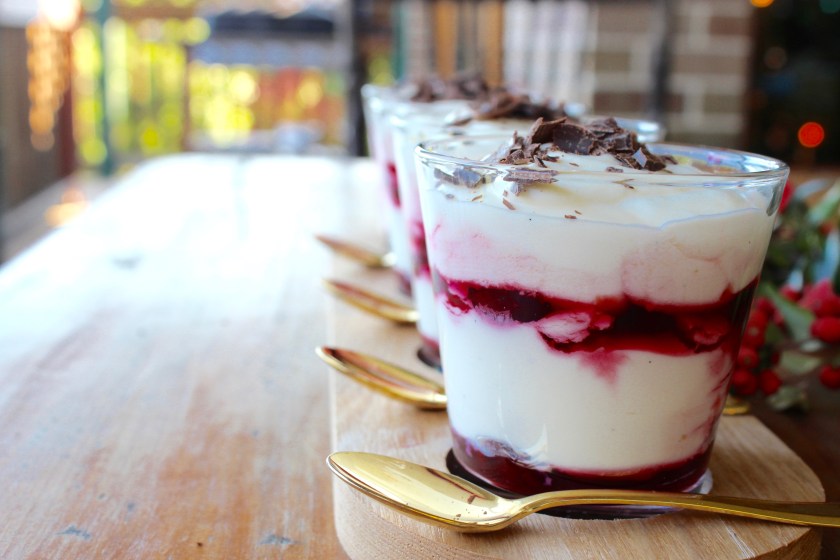
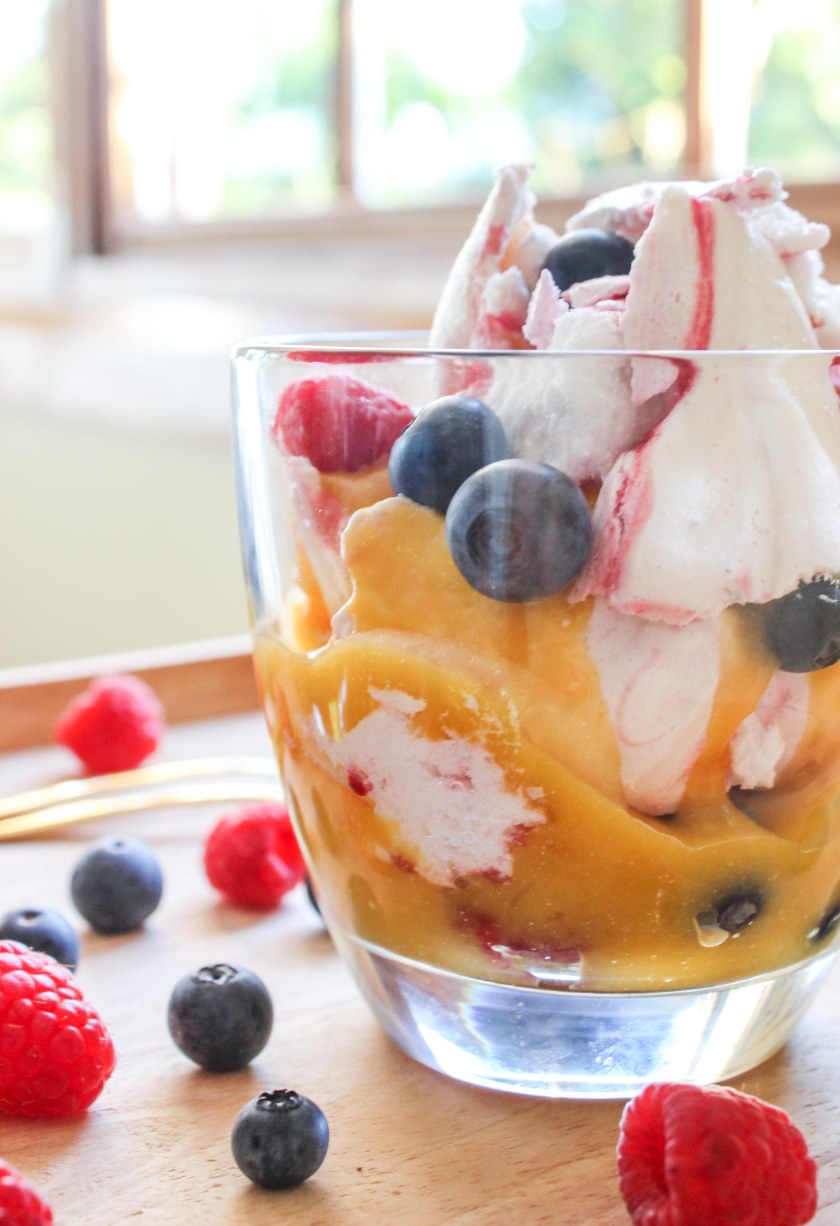
These awesome little layered desserts seem like the best place to start. They’re a stunning, Summery take on a classic Eton mess, and they’re sure to impress anyone you serve them to.

Raspberry mango mess (1 of 4)

I’m swooning over the berries available at the moment – they’re coming down in price a little bit because they’re so abundant, and they’re absolutely delightful. I’ve been eating berries like they’re going out of fashion.

The mangoes are amazing at the moment as well. This mango custard was a spark of inspiration that came to me as a result of having too many eggs and mangoes in the house. This is obviously not a problem for many people, but in my house it was a real head scratcher.

So, instead of the traditional cream, I thought a light, fruity custard would be a great addition to my eton messes. And so the mango custard was born.

It is legitimately so good that I had to restrain myself from drinking it.

(You’ll have some mango custard left over from this recipe, so I’d recommend drizzling it on icecream or filling doughnuts with it.)

Berry mango Eton mess

Makes 10

Mango custard

Makes 3 cups
  • 600g mango flesh (about three medium-sized  mangoes)
  • 2 tsp lemon juice
  • 1 1/3 cups sugar
  • 150g butter
  • 6 egg yolks
  • 1 tbsp hot water
  • 1/2 tsp gelatine

Pavlova

  • 80g raspberries
  • 3/4 tbsp sugar
  • 6 egg whites
  • 1 1/2 cups castor sugar
  • 2 tsp cornflour
  • 3/4 tsp white vinegar
  • 4 cups berries of your choice, I used blueberries and raspberries

Grab your mango flesh and pop it into a blender with the lemon juice and blend for about 30 seconds until you have a nice puree*. Even though it’s glorious, resist the urge to drink it. Put your mango puree, sugar and butter in a pyrex bowl and place over a boiling pan of water. Mix until the butter has melted, then remove the water from the heat.

Take your egg yolks, lightly beat them, then pour some of the mango mixture into the egg yolks so as not to cook the yolks. Now pour all of the egg yolk mixture into the mango mixture and mix well. Turn up the heat to high and stir for 12-15 minutes so that the mango mixture reduces slightly. Remove from the heat and set to one side. Mix together your hot water and gelatine, making sure all the granules are dissolved, then stir into the mango mixture. Pop the mixture into the fridge for at least an hour so that it cools and firms up slightly.

Raspberry mango mess (8 of 1)

While the mango custard is in the fridge, make a start on the pavlova by mashing together your raspberries and sugar until they’re nice and combined – they should be part liquid, part lumps of raspberries. Set them to one side.

In a separate bowl, whip your egg whites on a medium-high speed for 1-2 minutes until the egg whites froth up slightly. Next, with the eggs still whipping, slowly pour in the castor sugar. Once you’ve poured in all of the sugar, turn up to high and whip for 5-10 minutes until your meringue is thick, glossy and holds peaks. If you rub some of the meringue between your fingers, it should be smooth – if it is gritty, mix for a little longer.

Preheat your oven to 120C and line a baking tray with baking paper and set to one side.

Mix the cornflour into the meringue, then the white vinegar until just combined.

Grab a dinner plate and trace its outline on the baking paper with a pencil. Flip it upside down so that the pencil doesn’t come into contact with the meringue. To help your baking paper stay in place while you spread the meringue, dab a small amount of meringue under each of the corners of baking paper. Raspberry mango mess (7 of 1)

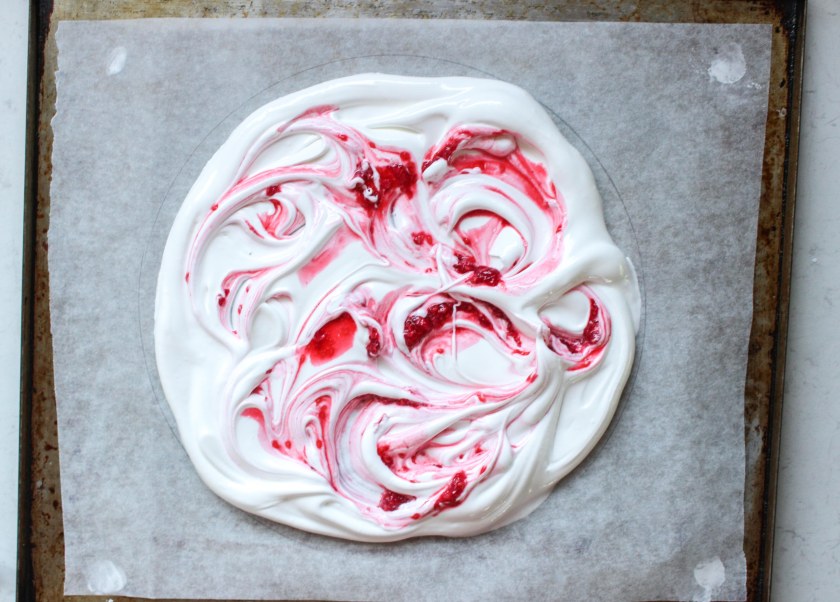
Scoop out half of the meringue and spread it in the outline of the plate. Dribble some of the raspberry mixture out over the meringue, then swirl with a fork. Repeat with the remaining meringue, then the remaining raspberry. Pop in the oven for 80-90 minutes, until the top loses its stickiness. Set to one side to cool for at least 15 minutes.

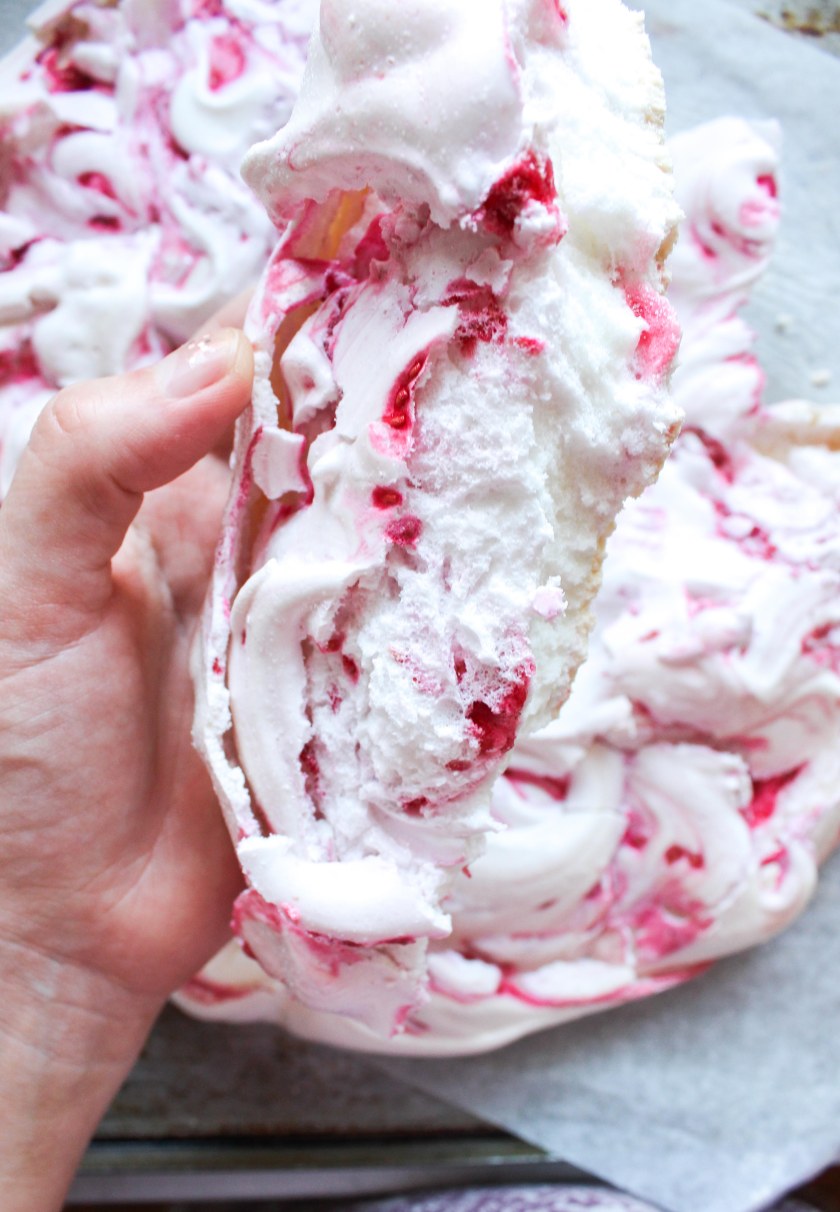
To assemble, break apart your meringue (it should be a lovely mix of crusty outside and fluffy inside) and start layering. I went berries, mango custard, pavlova, repeat, but you can do it in whatever order you fancy.

Raspberry mango mess (6 of 1)

Raspberry mango mess (3 of 4)

Raspberry mango mess (2 of 4)

* I used the George Foreman Mix & Go Pro, which was loaned to me by my new friends at Appliance Kitchen. I actually didn’t know that George Foreman had branched out of grills, so was pleasantly surprised by this little blender!

Coconut ice slice and New Year resolutions

Who made a resolution to get fit for 2016? I commend you, if you did. I know that most people make healthy resolutions, usually, but I plan on challenging myself with my baking instead. I’m going to take more classes – there is no better way to get inspired than to learn from experts. I’m taking a cookie painting class in two weeks and will report back. Hopefully you’ll be seeing tiny edible masterpieces soon!

Coconut ice slice-9

And I’m going to work on my photography as well. If you’ve got any recommendations for cooking and/or food photography classes, send them my way, I’m all ears.

I’m also going to make Daisy a super obedient dog. The Boy and I have been struggling with her behaviour (she’s an angel for us, but a massive jerk  to strangers!) so we’re going to take her to a doggy specialist!

I’m also verbalising more of my plans. Or writing them here, at least. Because that way I’m less likely to forget about them/change my mind when they get too hard. I read recently that humans find it harder to go back on their plans once they’ve told them to other people. So let’s try and use that to my advantage.

AND I’m going to give my props the loving they deserve – I’ve got a rapidly growing collection and I neglect the oldies sometimes. Expect these floral tea cups to be making regular appearances, they were a Christmas present from my gorgeous mother and I’m smitten.

Coconut ice slice-6

The baking side of my resolutions I’ve already started. This winner of a recipe, which I appropriated from a gorgeous cook book I was given for Christmas, is the perfect start to my new year.

Now I’ve only got to get started on all of those other things I just committed to…


Coconut ice slice

Serves 12

Base

  • 170g butter
  • 1 1/3 cups white sugar
  • 2 tbsp cornflour
  • 1 1/3 cups desiccated coconut
  • 1 egg
  • 1 1/2 cups plain flour
  • 1 tsp bicarb

Filling

  • 115g butter
  • 5 cups icing sugar
  • 1/3 cup milk
  • 1 3/4 cups desiccated coconut
  • 2 1/2 tsp vanilla bean paste
  • Chocolate shavings to decorate
Preheat your oven to 180°C.
Beat together your butter and sugar until pale and creamy. Mix in your cornflour, followed by the desiccated coconut. Add in your egg and beat until combined, followed by your plain flour and bicarb. Only mix in the flour until just combined so you keep the mixture nice and soft.
Grease and line a 25cm round tin (I used a Baker’s Secret high wall crispy tart pan because I love the shape – it’s non-stick, so I only lined the bottom because it has holes for aeration) and press the base evenly around the pan. If you can’t get a smooth enough finish, use your fingers or a straight-sided tumbler to even things out.
Pop the mixture into your oven for 25-30 minutes. When you pull the base out of the oven it will fall instantly. If it doesn’t sink evenly, stab remaining air pockets with a fork. Set to one side to cool.
While the base is cooling, make a start on your filling by mixing the butter with one cup of icing sugar until combined. Add the remaining icing sugar, one cup at a time, followed by the milk, coconut and vanilla.
Scoop your filling into the cooled base and spread it gently. It should do most of the spreading out by itself. Top with chocolate shavings, or whatever chocolate decorations you like. Pop into the fridge for at least two hours to set properly.
Coconut ice slice-8
Coconut ice slice-11

No-bake choc-mint cheesecake and leftovers

Is anyone else still thinking about Christmas? We had so much food on Christmas Day that there are still leftovers hanging around. We had to toss out the last of the Christmas bush, which made me rather sad – as beautiful as it is, it was definitely past its best.

thumb_IMG_8642_1024

The last of the ham was finished yesterday, chocolate covered nuts are readily available for mid-afternoon snacking, and there are lollies everywhere! Specifically, candy canes. If you’ve got some of those red and white striped beauties sitting around the house, I would thoroughly recommend using them up with this recipe.

We also have a tonne of cream in our house. Deliciously thick cream that I was lucky enough to be invited to try by Anchor Cream. And, rather than using it to drown my leftover Christmas pudding, I thought I’d put it to good use.

thumb_IMG_8556_1024

This recipe is cool and refreshing and requires very little effort as it’s a no-bake cheesecake. It’s an entertainer’s dream – delicious, stunning and so simple! Even if you haven’t got candy canes, you can use mints of any type, or leave them out completely. Did I mention that it only has six ingredients? 6 ingredient cheesecake – get this in your belly right now!

No-bake choc-mint cheesecakes

Makes: 4 servings

  • 240g (about 15) mint slice biscuits
  • 250g cream cheese, at room temperature
  • 150g milk chocolate
  • 1 1/4 cups thickened cream (I used Anchor Cream)
  • 2/3 cup icing sugar
  • 2 candy canes, for decoration

Blitz your mint slices in a food processor for about two minutes, until they’re crumbs. Set to one side.

thumb_IMG_8549_1024

Beat your cream cheese at a  medium speed for 3-4 minutes, until smooth. Add in a small amount of your cream and mix it well with the cream cheese. Pour in the rest of your cream and continue to beat for your cream for 2 minutes. I’m a little in love with the fact that the Anchor Cream bottles have cup markings on them so that you can pour straight from the bottle into your mixture – they’re a baker’s dream come true!

Sift in the icing sugar and whip on a high speed for 3 minutes.

Melt your chocolate and slowly stir it into your creamy mixture. If the mixture is lumpy, pour it through a strainer. Set to one side.

Grab your candy canes and crush them – leave some large chunks, a bit of size variation is nice. I did this by unwrapping the candy canes, popping them in snap lock bags and hitting them with a heavy knife.

Layer 3 1/2 tbsp of mint slice crumbs in the base of your glasses and compact lightly with the back of a soup spoon. Pour your cheesecake mixture about halfway up each glass and allow the air bubbles to escape – pop them with a spoon if they need help. Sprinkle 1 1/2 tbsp of mint slice crumbs evenly over your cheesecake mixture to create a little seam, then top with more cream cheese mixture.

thumb_IMG_8589_1024

Repeat with remaining three glasses, then sprinkle candy cane shards and any leftover mint slice crumbs over the top and set in the fridge for two hours.

thumb_IMG_8652_1024

Tip: Use slim, straight sided glasses so that you can layer to your heart’s content.

thumb_IMG_8669_1024

If you’re after some Anchor Cream of your own, you can find it at Woolworths. Keep an eye out for the cow on the packaging!

thumb_IMG_8567_1024

If you’re a fan of choc-mint recipes, I’ve got some doozies for you:

Mint chocolate crackles

single

Mint slice cupcakes

bite


Cherry syllabub and Christmas cheer

It’s Christmas Eve and I can’t help but feel contemplative. A year of big changes is almost at a close and I’m super excited about next year. Baking with Gab has taken me to wonderful places, and put me in touch with amazing people.
Most recently, those amazing people are from Anchor Cream. They approached me to see if I’d like to put together some creamy recipes. Being a dairy lover from way back, I naturally said yes! The cream is deliciously smooth and creamy (duh) and comes in these handy little bottles which make it tempting to stick in a straw and take a few sips. Definitely going to be seeing more Anchor Cream in my fridge in the new year…
I can’t wait to continue making delicious treats next year! Before next year, however, I’ve got Christmas Day!
IMG_8703
I’m spending mine with lots of family and a couple of welcome blow-ins. I love that Christmas at my parents’ house is open to all. It’s this giant free-for-all with kids darting in and out, adults indulging in the lolly bowls that the kids haven’t found, dogs getting underfoot and food EVERYWHERE. Ham and pork and cakes and salads and chicken and bread and dips and cheese and pavlova. You get the point.

Continue reading “Cherry syllabub and Christmas cheer”