I’ve decided that I need to add a little bit of Australia into my blog. I included the wattle in my blog here, but that’s not enough! So starting now, there will be a category of recipes which scream Australiana to me. I’m not promising any kangaroo burgers or emu pies, because I don’t have the slightest interest in eating our national symbols. What I do mean is recipes that taste like my childhood, or my parents childhood – many of these sweets (think lamingtons, cream buns), but I’ll do some research to find other dishes that are Australian. Continue reading “Neenish tarts and Australian bakeries”
Tag: how to
Arancini bites and procrastibaking

The job applying is about to start. I’ve updated my Linkedin, my CV and I’ve had my hair done. I am interview ready…I just need to apply for jobs now! It is with great trepidation that I throw myself (yet again) into the world of job seeking. I would happily stay unemployed in order to bake all day and blog all night, but one needs to have some form of income! I want a job, I am excited about the prospect of a new job…I just don’t like this initial part where I have to put myself out there to be rejected or worse, ignored.
Enter: procrastibaking!
Continue reading “Arancini bites and procrastibaking”
Simple Sunday cinnamon scrolls
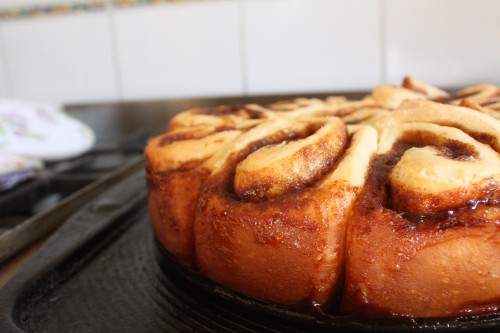
Ever wake up on a Sunday morning craving something super delicious, but can’t be bothered to put loads of effort into whipping up bacon and eggs or pancakes? This is your solution! It’s a little bit hard to resist eating the raw dough when it’s filled with cinnamon butter, but I promise you it is worth the wait. The whole process will take about 50 minutes to an hour to make it from hunger to plate.
I don’t even usually like cinnamon scrolls, I often think they’re too doughy or bland. These little beauties are soft and cinnamon-packed, with the perfect balance of dough and filling. Yum!
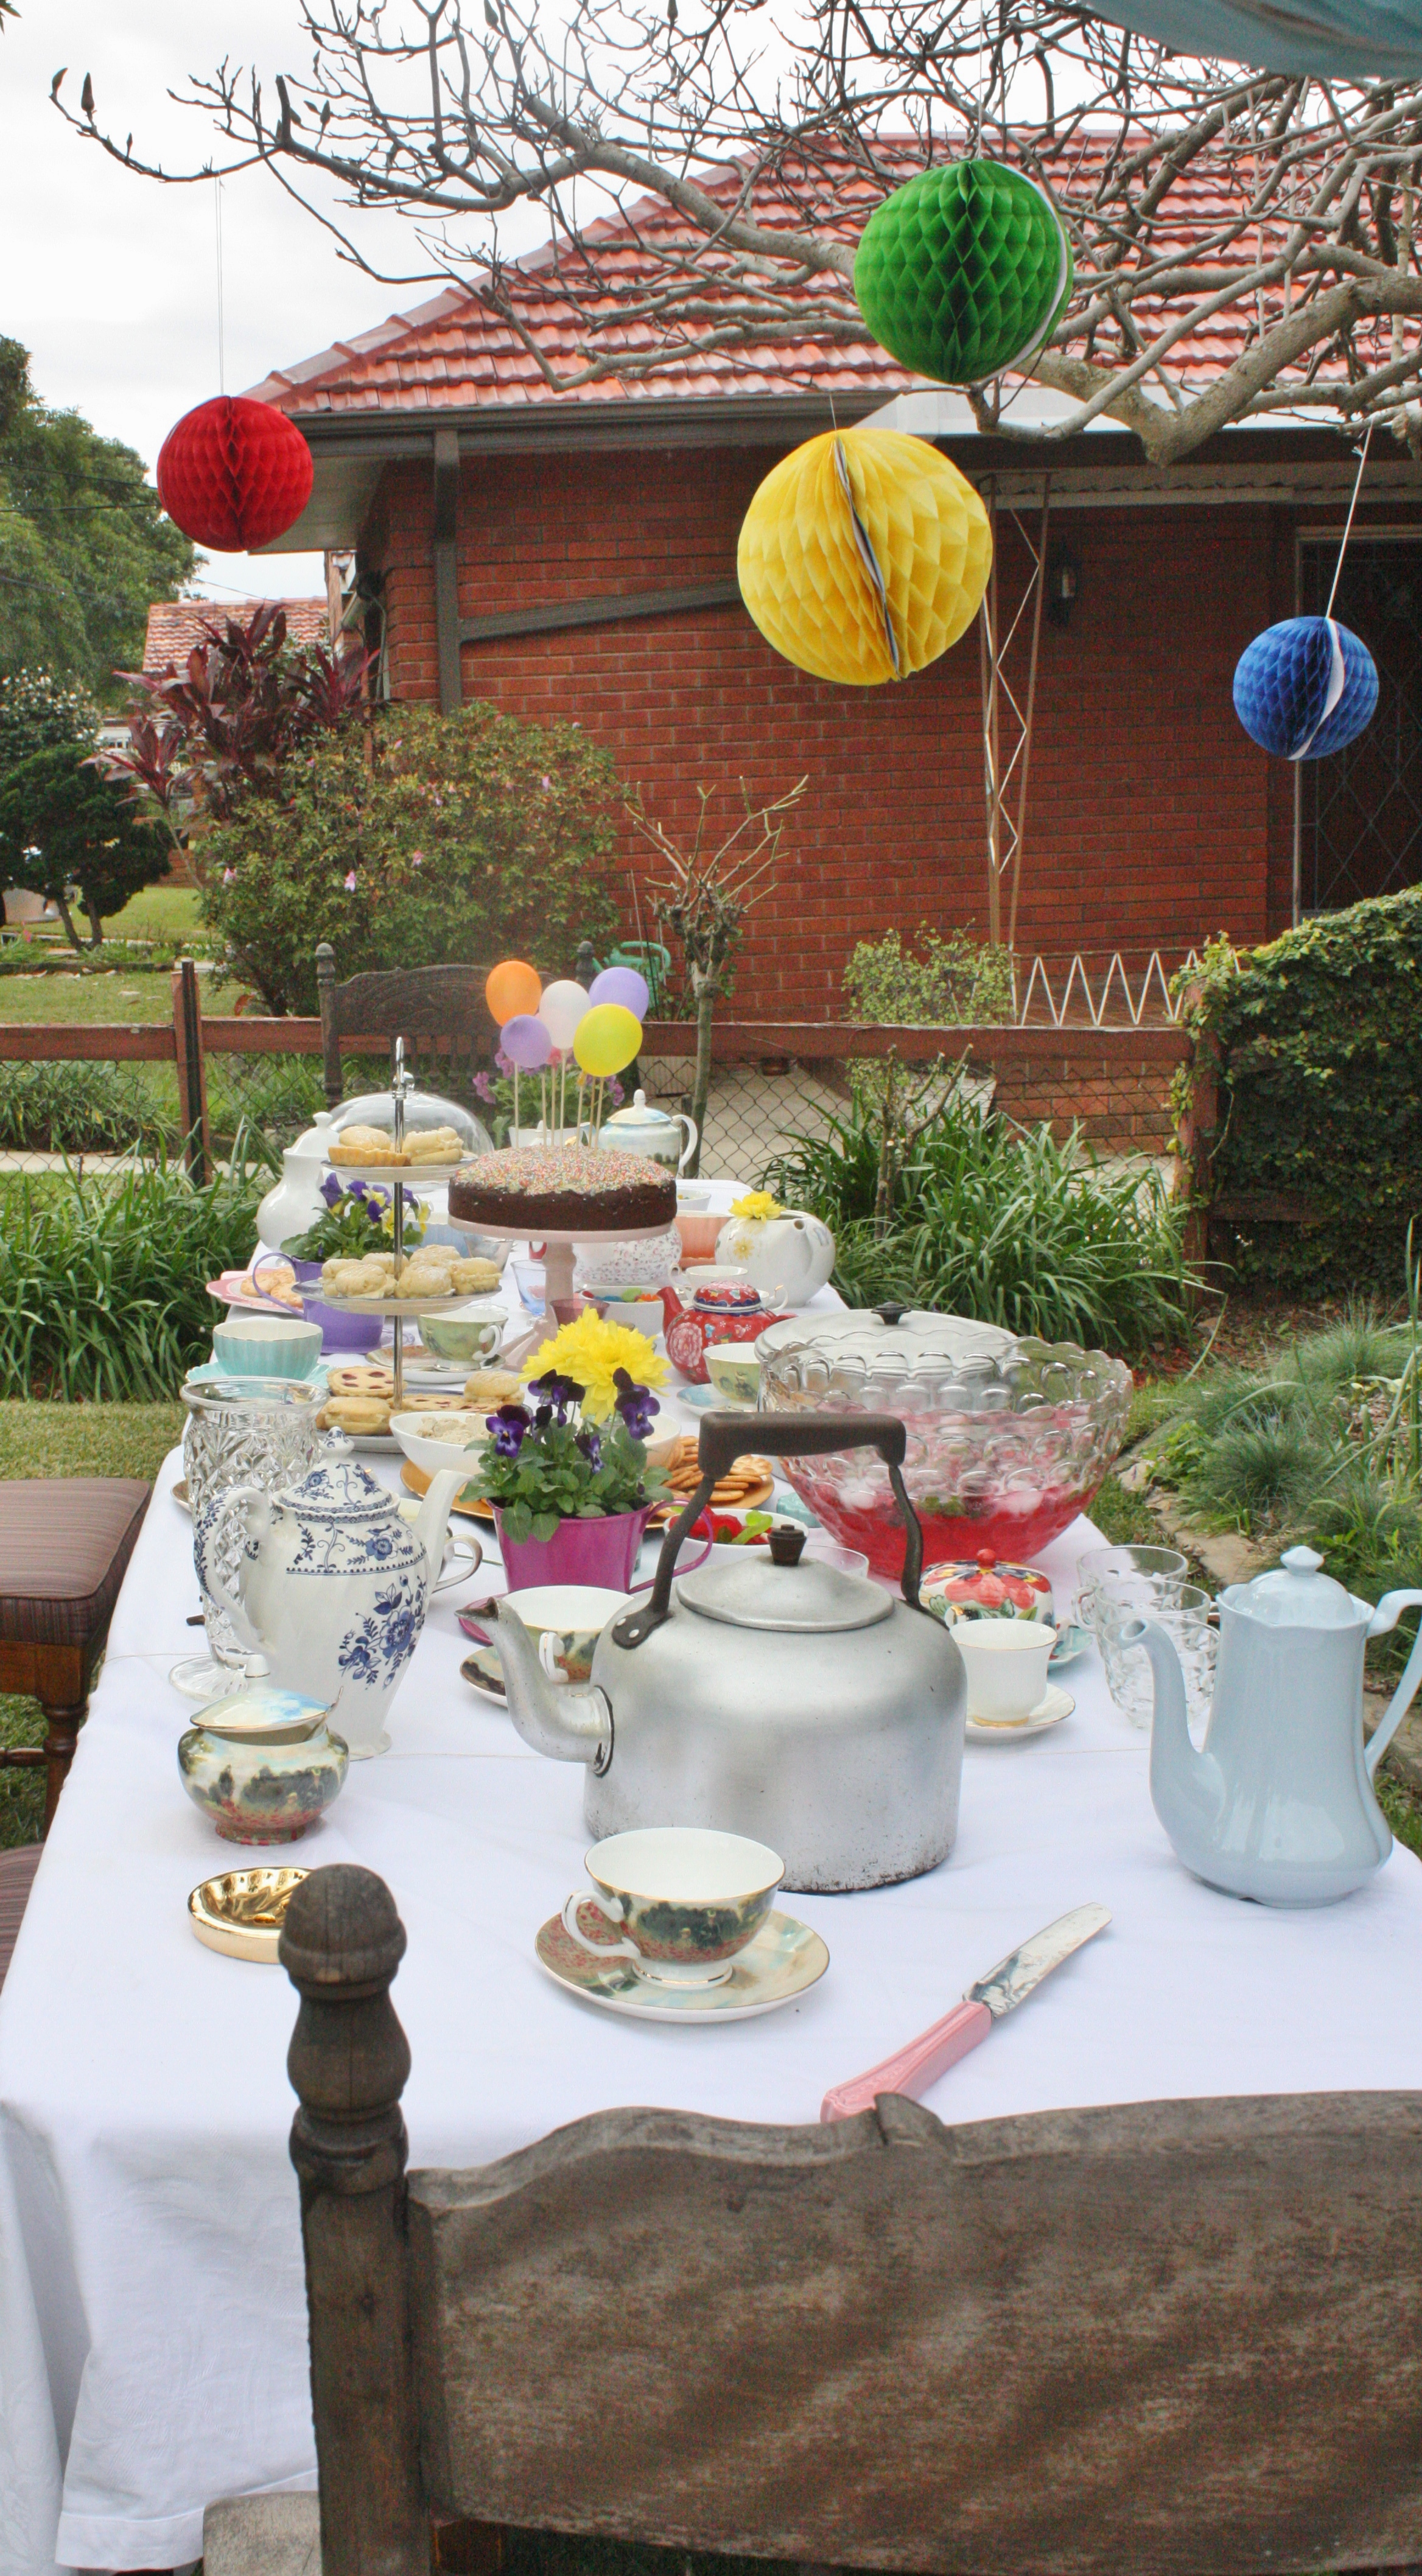
Unbirthdays and tea parties
I hinted last week that there was a friend’s birthday coming up soon. It was on Tuesday. So on Wednesday we threw an unbirthday party. She’s not a fan of birthdays (crazy, I know), but she loves Alice in Wonderland – how could I resist an unbirthday/Mad Hatter’s themed party?!
Recipes in this blog have all been posted before, click the name to get the recipe!
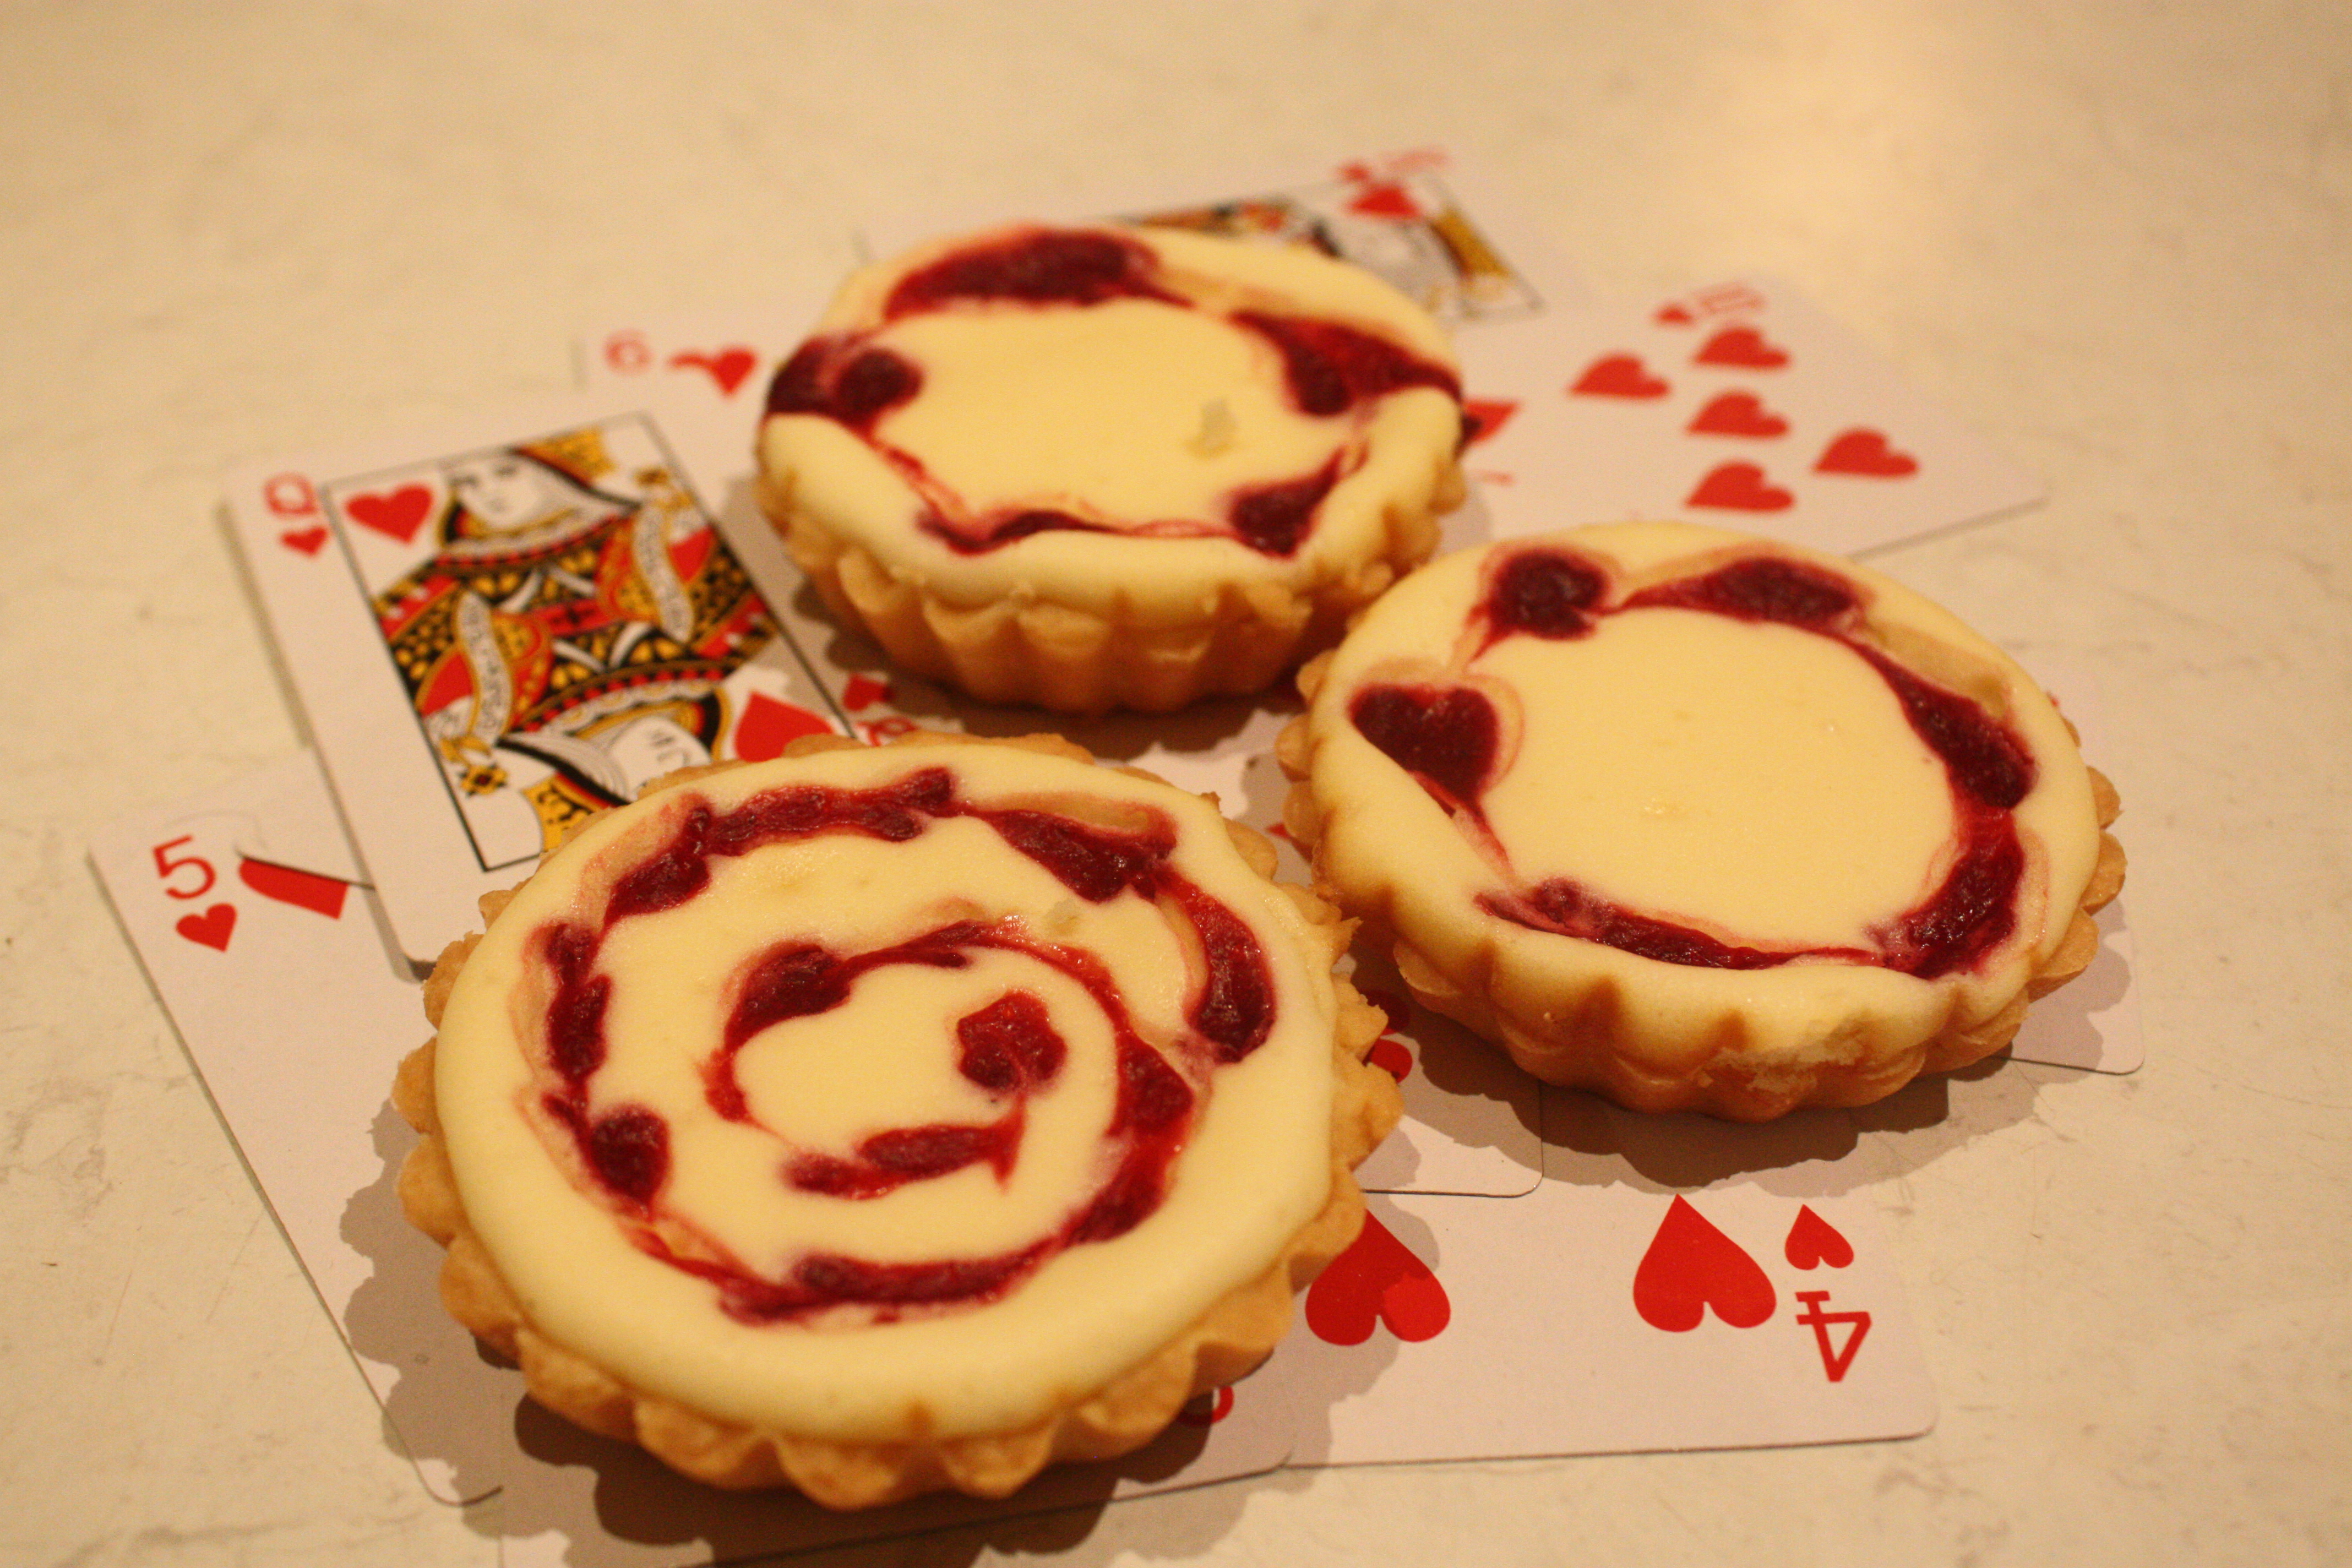
Queen of Hearts Tart (White chocolate cheesecake)
I’ve got a friend’s birthday coming up soon and I’m trying to put together a few recipes to make her party special. It will be a high tea style thing because she’s not a big fan of birthdays. I can’t understand why she doesn’t love birthdays, but I’m loving the challenge of finding recipes that will impress her without seeming too celebratory.
I’m keeping plans a little bit secret, so I won’t blab too much. Keep an eye out for her birthday post later this week, I have a feeling that it’s going to be great!
Before you start the recipe, ensure you’ve got a syringe. Like the ones you give kids medicine with. It sounds odd, but it’s a really simple decorating tool.
I appropriated this recipe from one I found at Cooking Classy.
White chocolate cheesecake tart: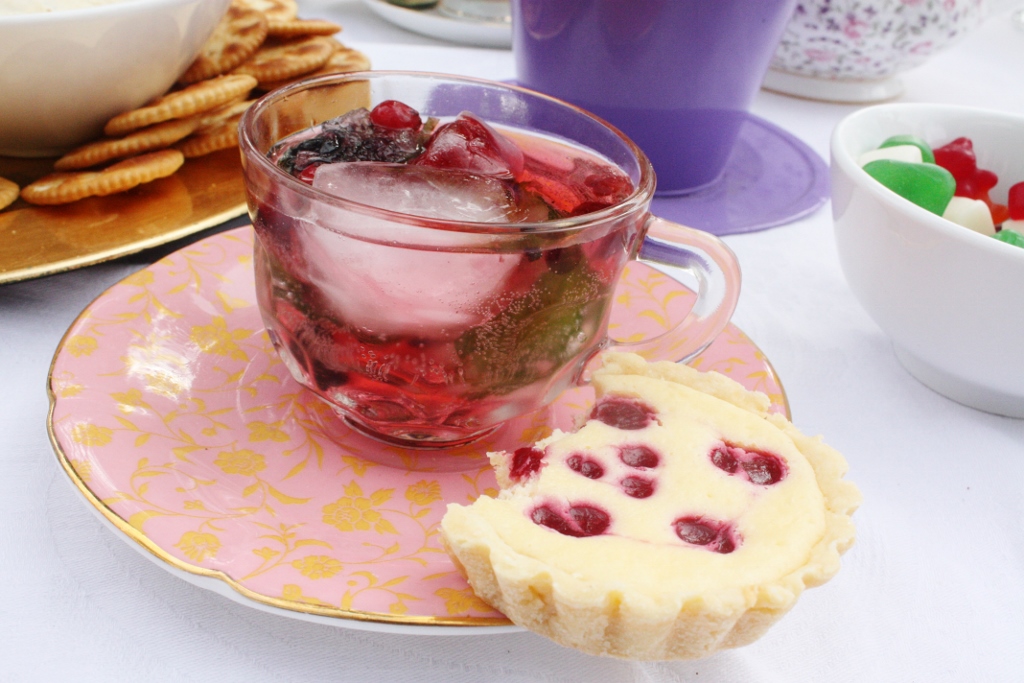
- 2 sheets shortcrust pastry
- 300g cream cheese
- 1/3 cup sugar
- 1 egg
- 1 egg white
- 1 tsp vanilla
- 1 ½ tsp lemon juice
Raspberry puree
- 1 1/2 cups frozen raspberries
- 2 tbsp sugar
- 1 tbsp cornflour
- ¼ cup cold water
Grease six tart tins. Preheat the oven to 180°C.
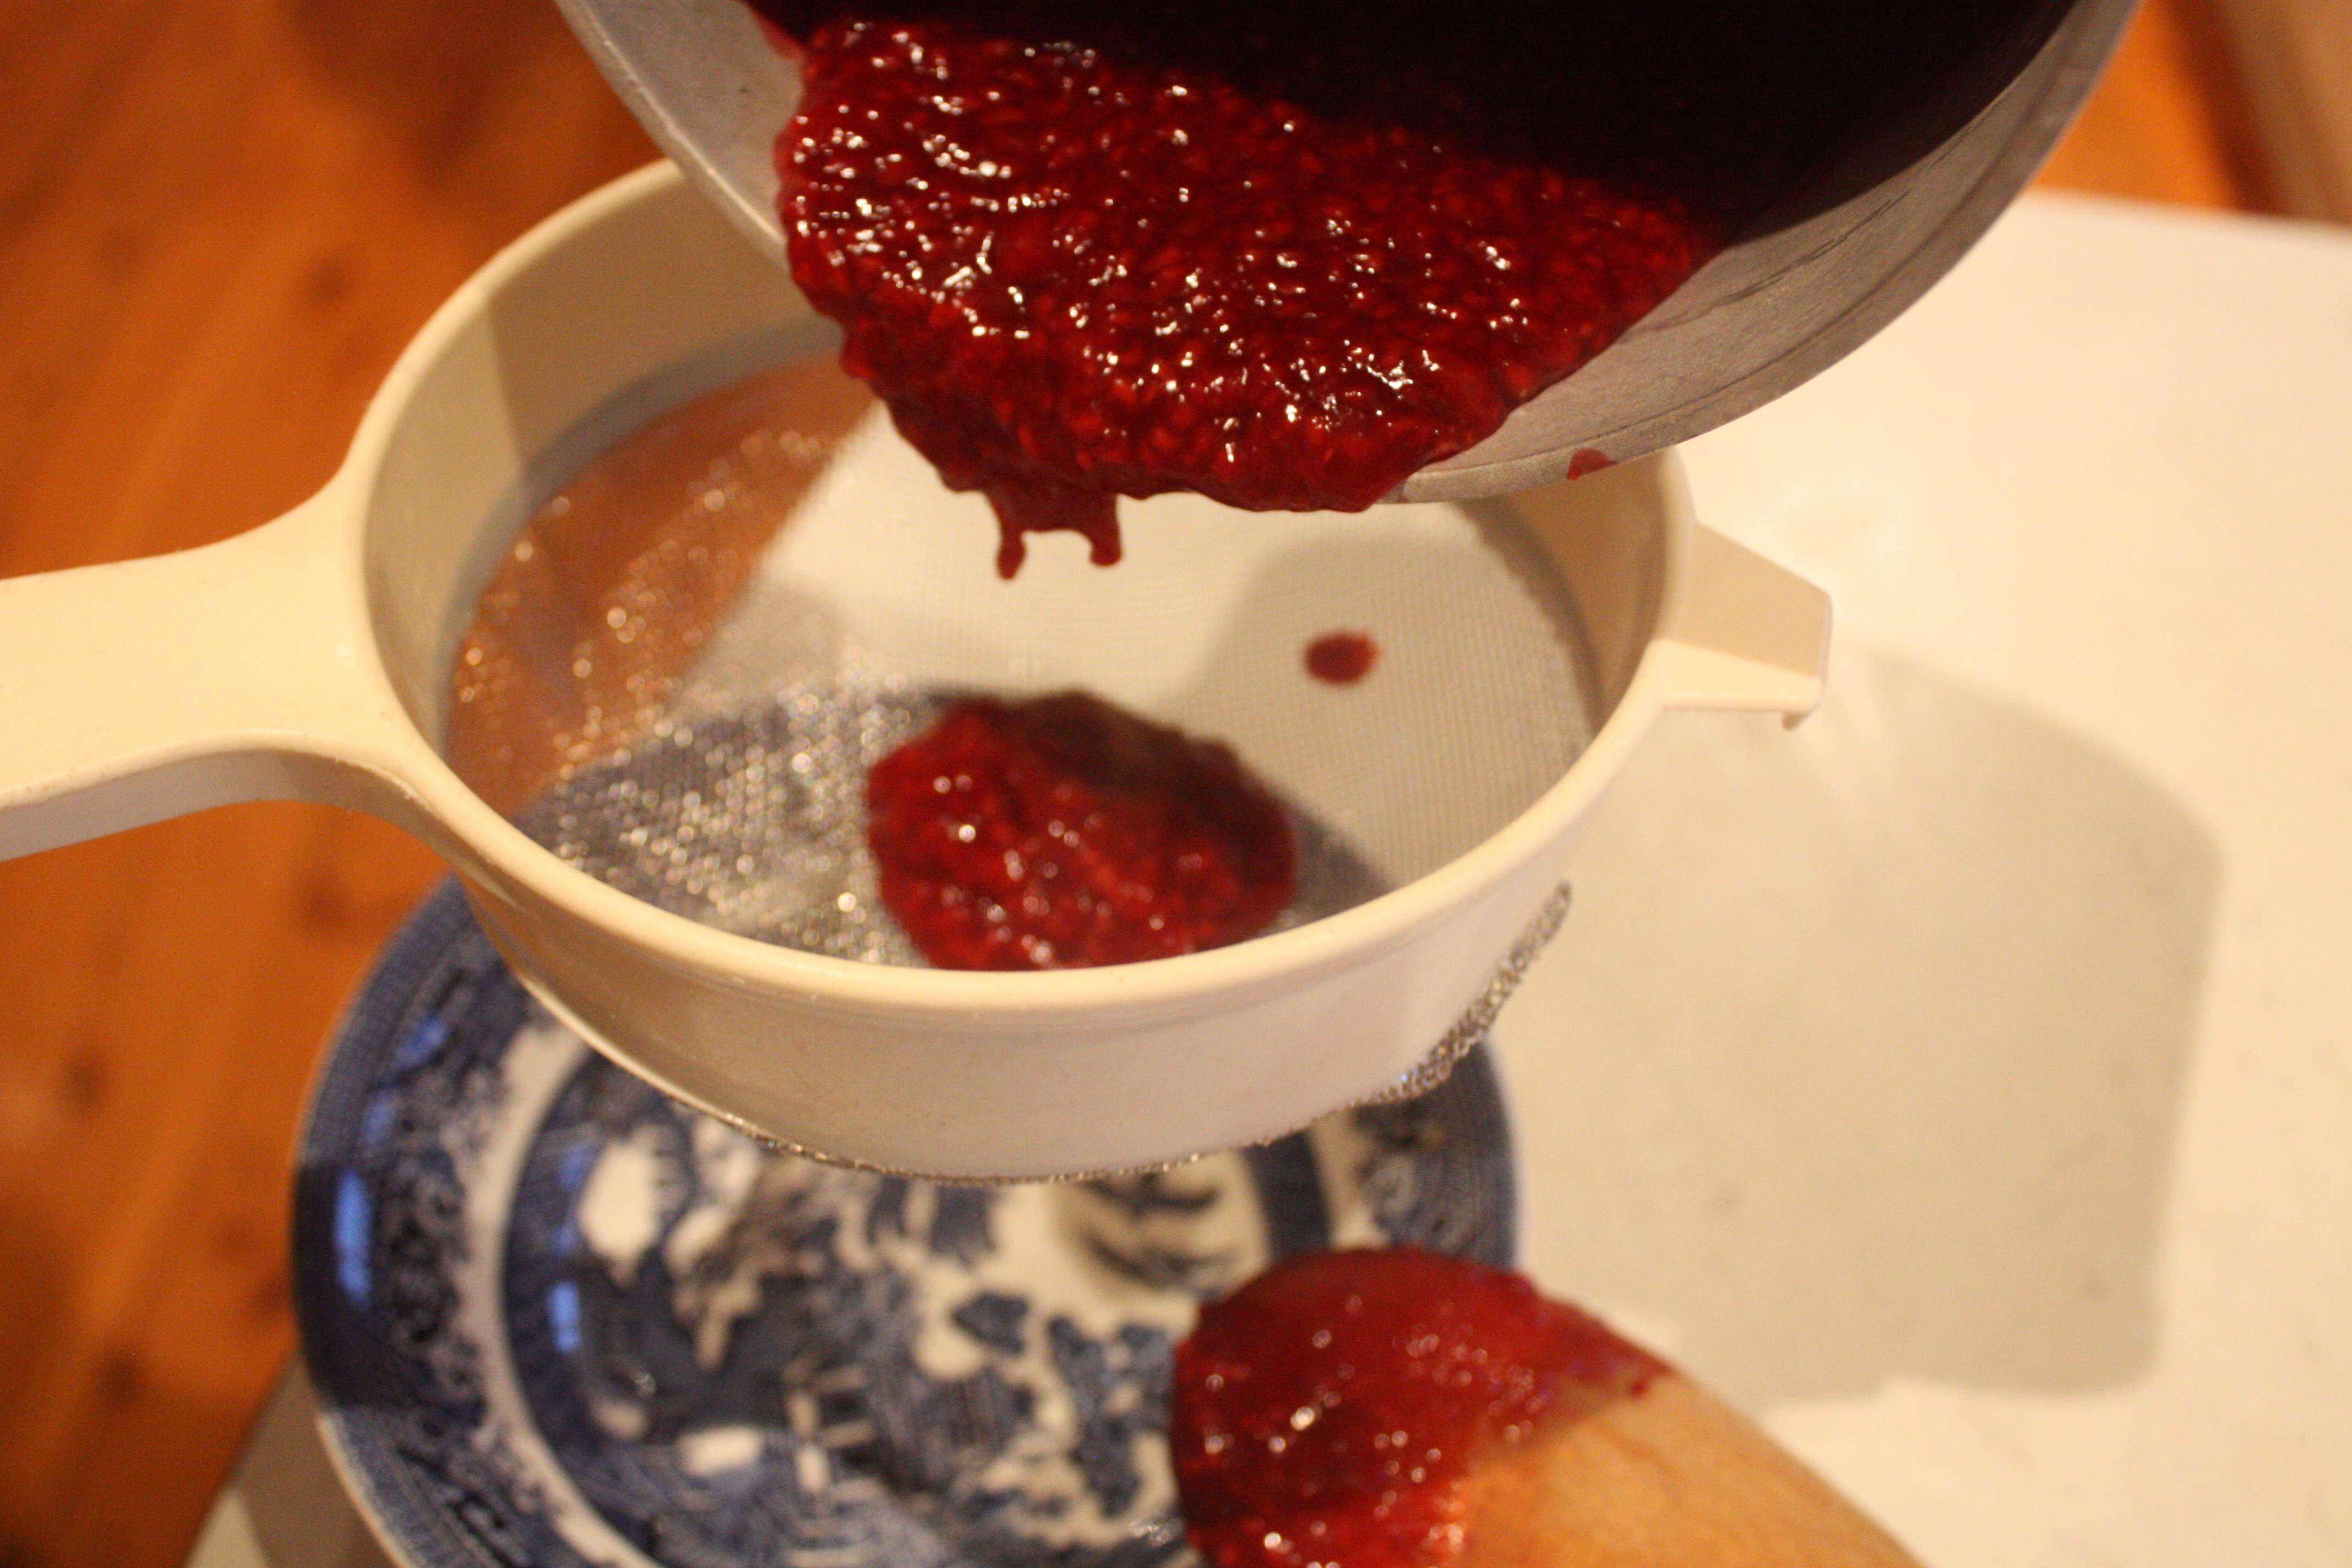 Put your frozen raspberries in a small saucepan over a medium heat and sprinkle the sugar in. When the raspberries start to defrost, add the cornflour and water. Stir it often so that it doesn’t stick to the bottom of the pan and burn. When the raspberries have broken down fully, allow the mixture to come to a boil and thicken for about two minutes. Remove your puree from the heat and put it through a strainer to get rid of all the seeds.
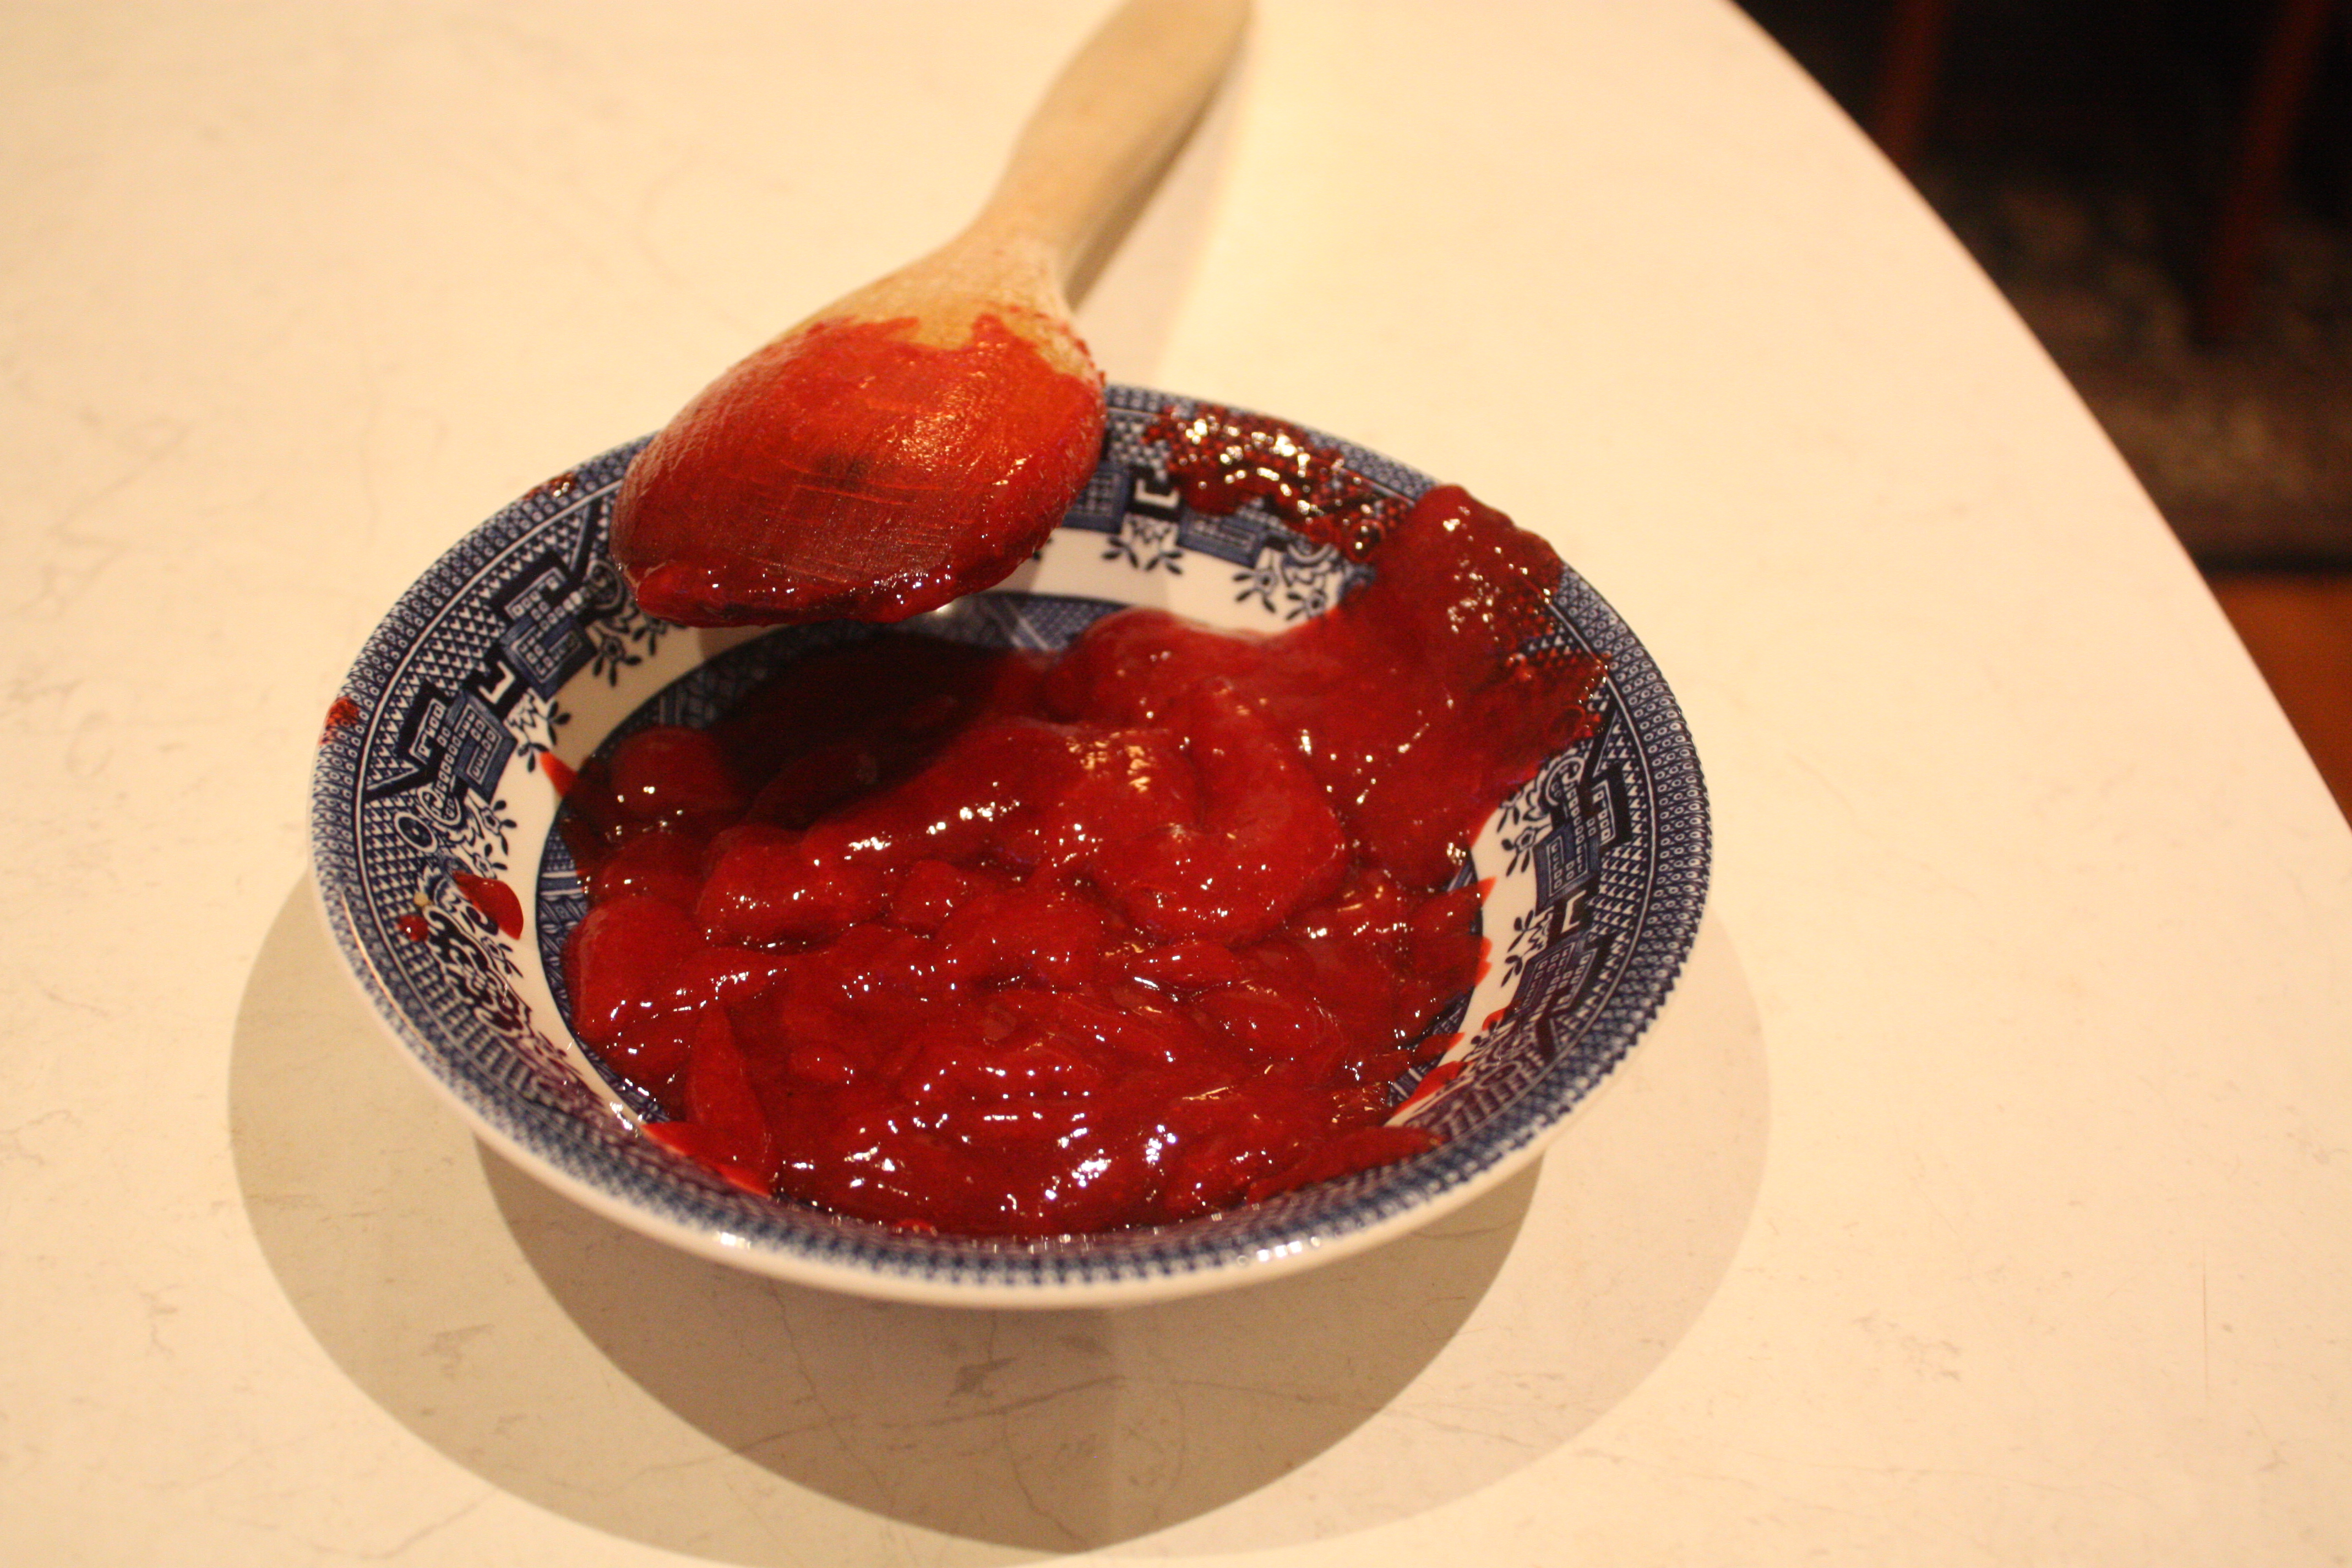
It’s going to look a little bit like something from a bad horror film – all red and gloopy, but it’s delicious. Set your puree aside, you’ll need it in about ten minutes.
Cut your pastry into squares and fit them into your tart tins. You’ll need to do this in two batches, the recipe makes about 12. Pop them into the oven for 10 minutes so that the pastry cooks slightly – you may want to weight them down with baking weights to stop it from bubbling up.
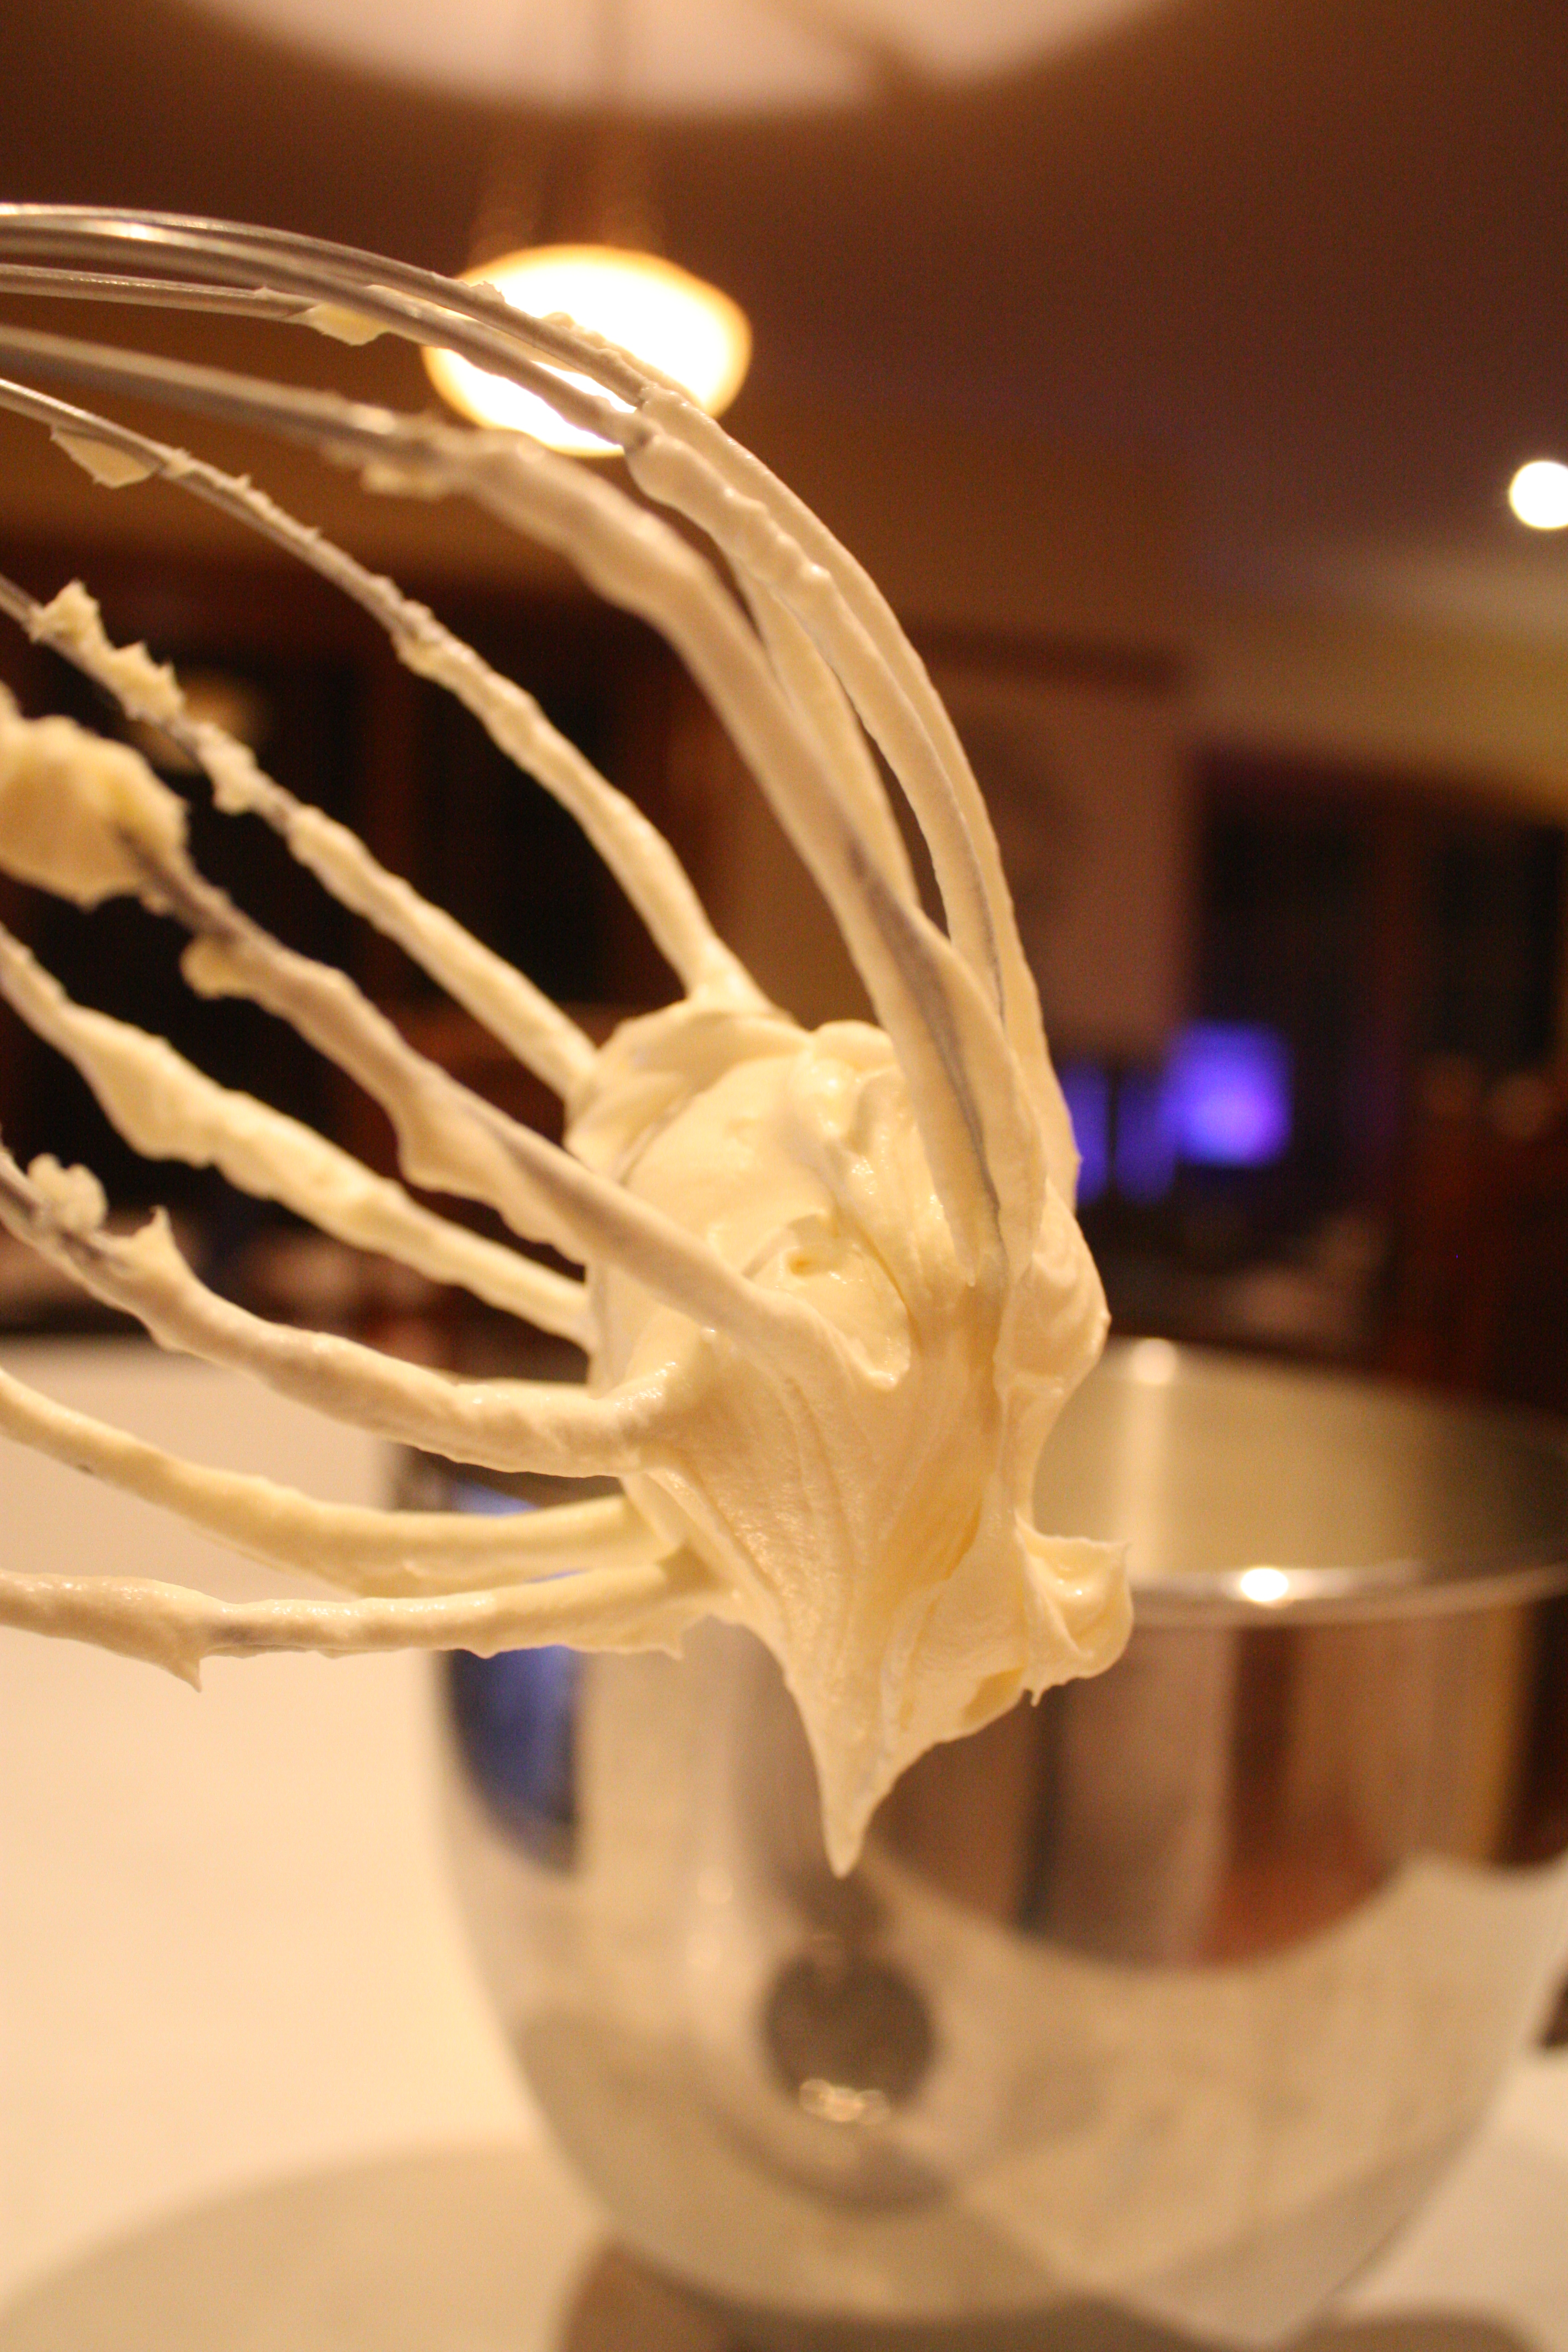 While the tarts cook, beat the cream cheese and sugar together until fluffy in a large mixing bowl (this will take about one minute.) Mix in your egg and egg white, then the vanilla and lemon juice. Melt your white chocolate and stir the cream into the chocolate. When the chocolate and cream are completely combined, add them to the cream cheese mixture and mix thoroughly. It should be a similar consistency to whipped cream – don’t worry, it will cook into a more cheesecakey consistency.
Remove the tart cases from the oven and allow them to cool. Take them out of their cases and put your second batch of cases in to cook. When your second lot of tart dough has come out of the oven and cooled, prepare to put your cheesecake mixture in.
 Spoon the mixture so that the tart cases are about ¾ full (the mixture will rise slightly as it cooks.) Get out your syringe and prepare to get crafty! Grab your bowl of raspberry puree and suck up as much as you can into the syringe. I’d advise you to keep the nozzle moving so you don’t suck up much air, because air bubbles are annoying. Ensure that the tops of your tarts are as smooth as possible and inject small circles of raspberry into them. Don’t crowd the circles because you’ll elongate them later to make the hearts. Once you’ve put circles in all of them, get a toothpick and run it through the centre of each circle in a continuous line. You may want to wipe the toothpick after each tart to make cleaner lines.
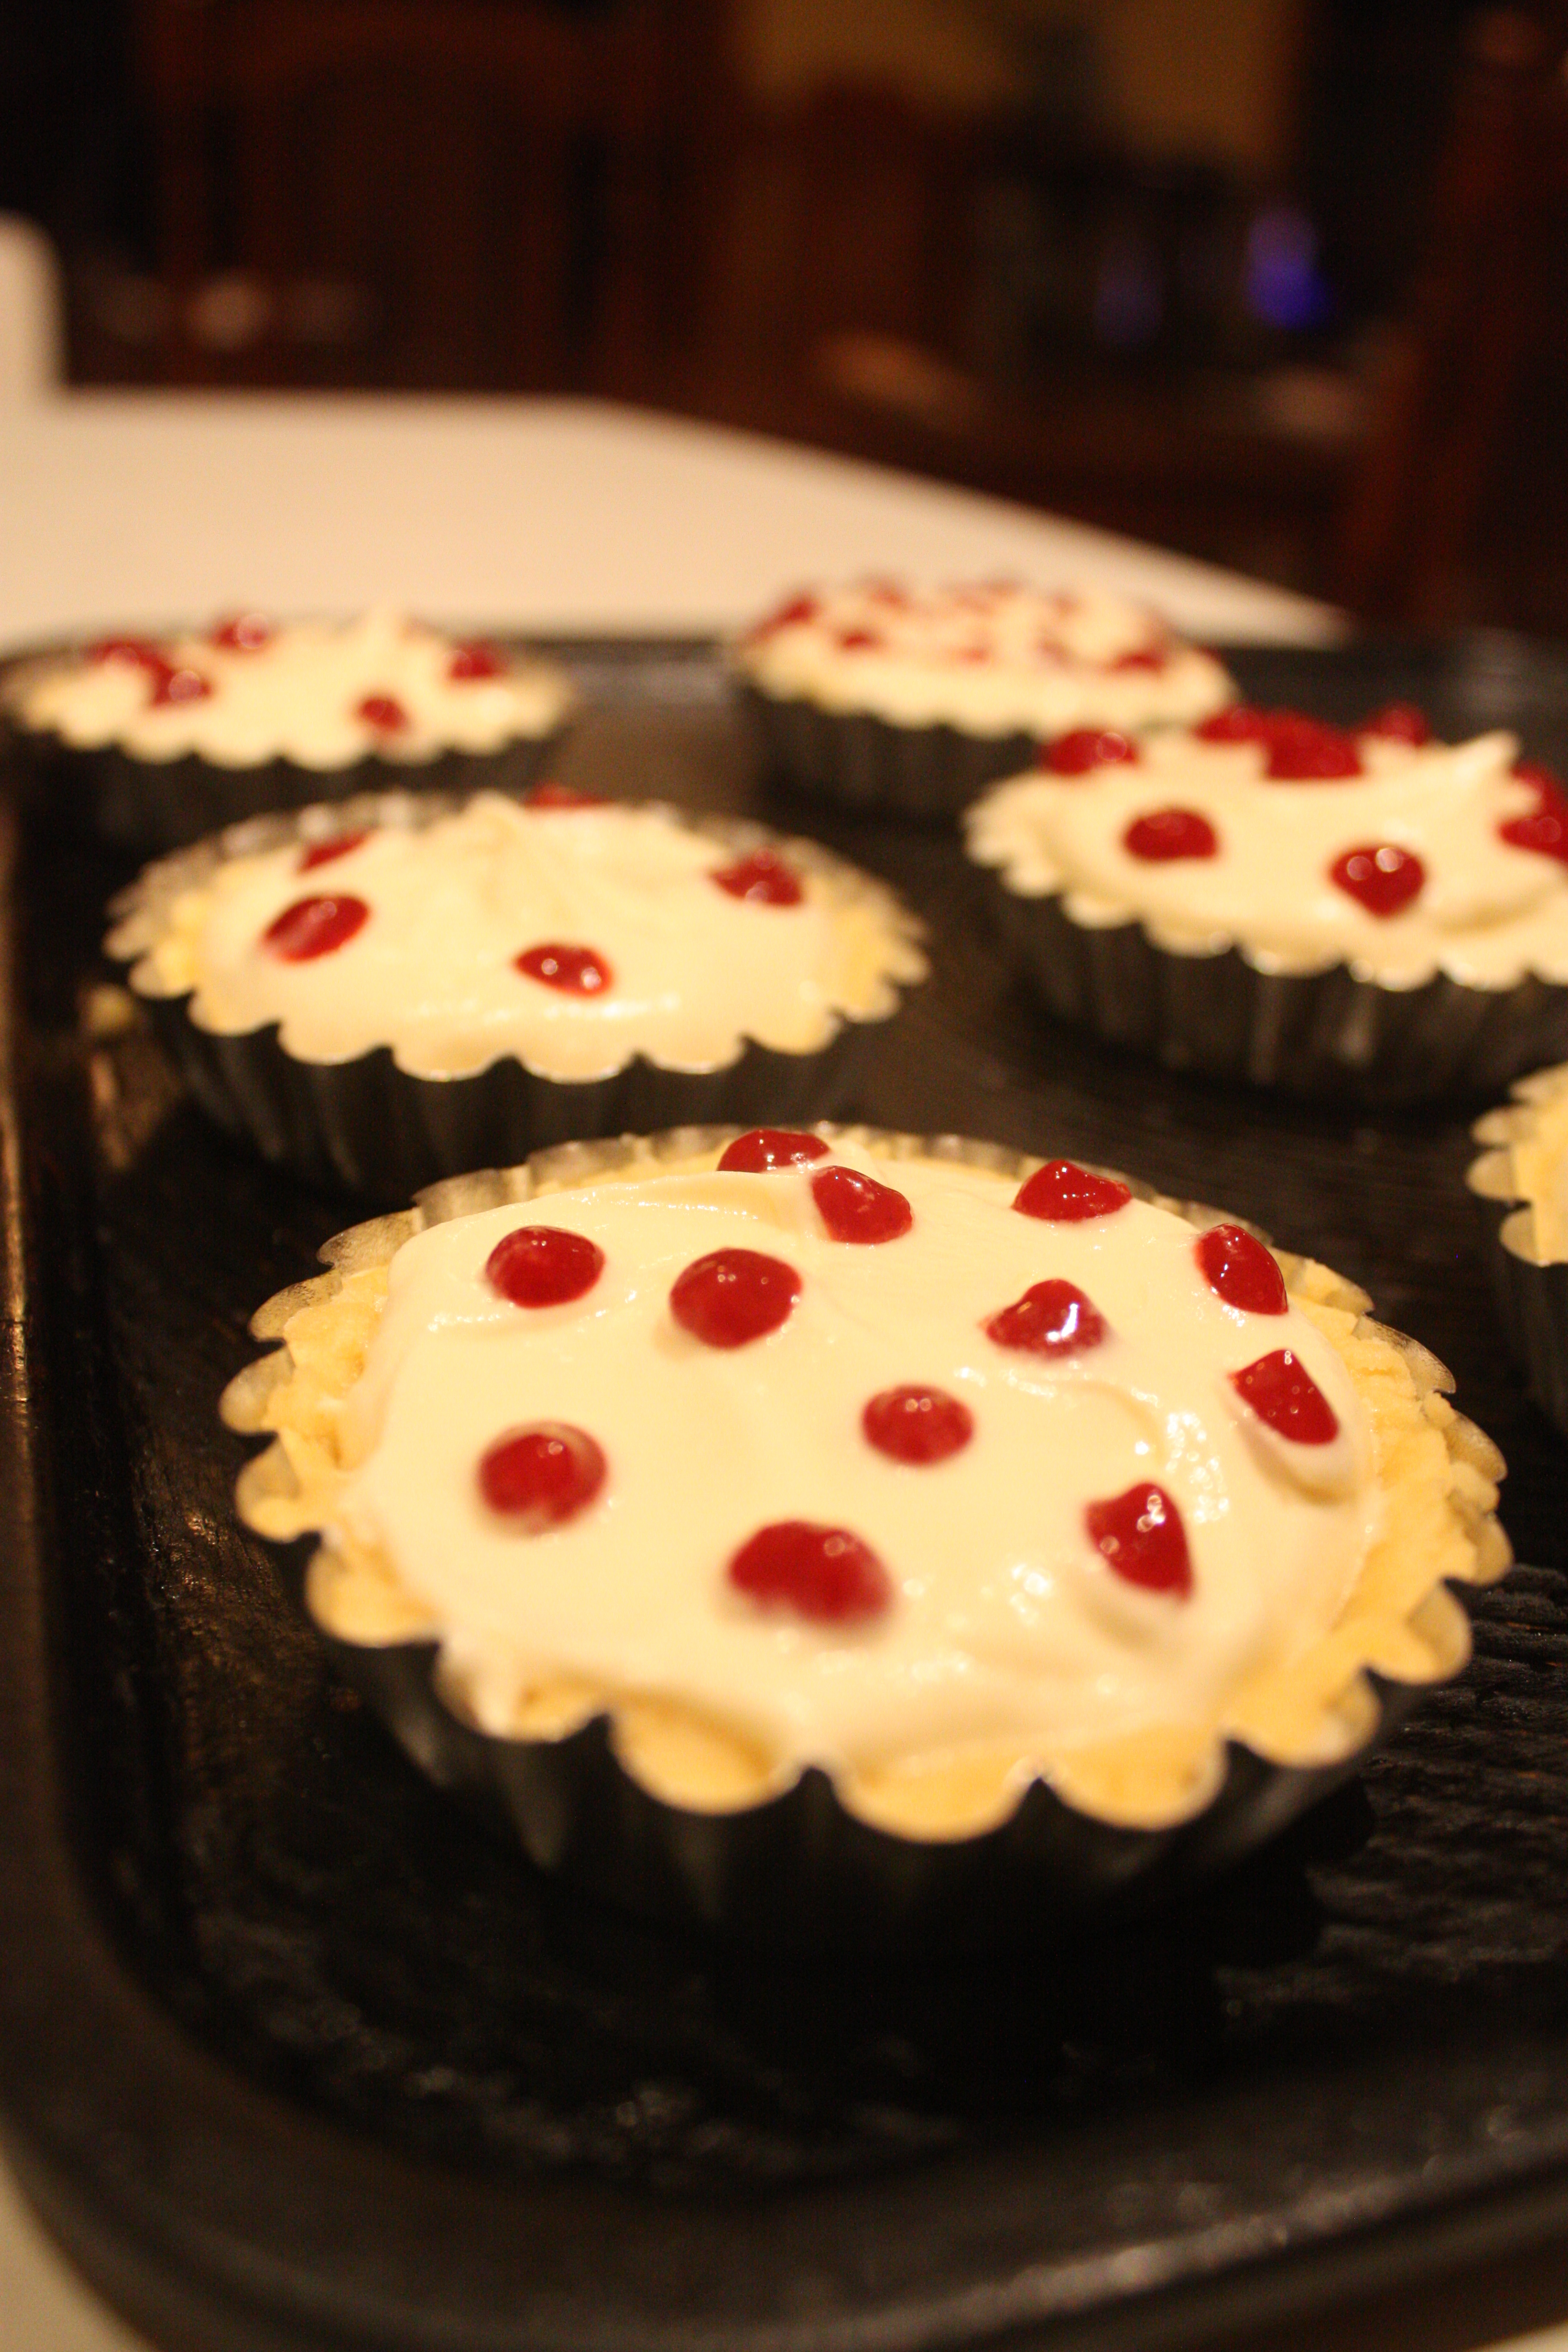

Don’t worry if they’re not completely neat, as long as you run your toothpick through the centre of each circle, they’ll look heart-like. Little tricks like using the syringe or a piping bag may seem fiddly, but get easier with practice, and give your baked goods a professional finish.
Bake tarts back in the oven for 15-20 mins. Take them out of the oven and allow them to cool completely before serving. They’ll set more as they cool, so don’t rush them by eating them warm!
Father’s day cupcake idea
My dad is a pretty good guy. He put up with me in my argumentative years when I was annoying and stubborn (actually, I don’t think much has changed) and he still loves me despite the way we’re prone to disagree on matters.
The thing that many people notice about my dad is his beard. He’s a beardy man, always has been.
I was 16 before I knew what my father’s top lip looked like.
He raised money for Shave for a Cure and promised that he would shave his head and beard in return for donations. I don’t think he, or anyone else for that matter, honestly realised how big a deal this was!
He raised his money and the night dawned. His time for the clippers came with much excitement,. The clippers started at the head, skipped the eyebrows(!), devoured his beard, and finally munched up his moustache.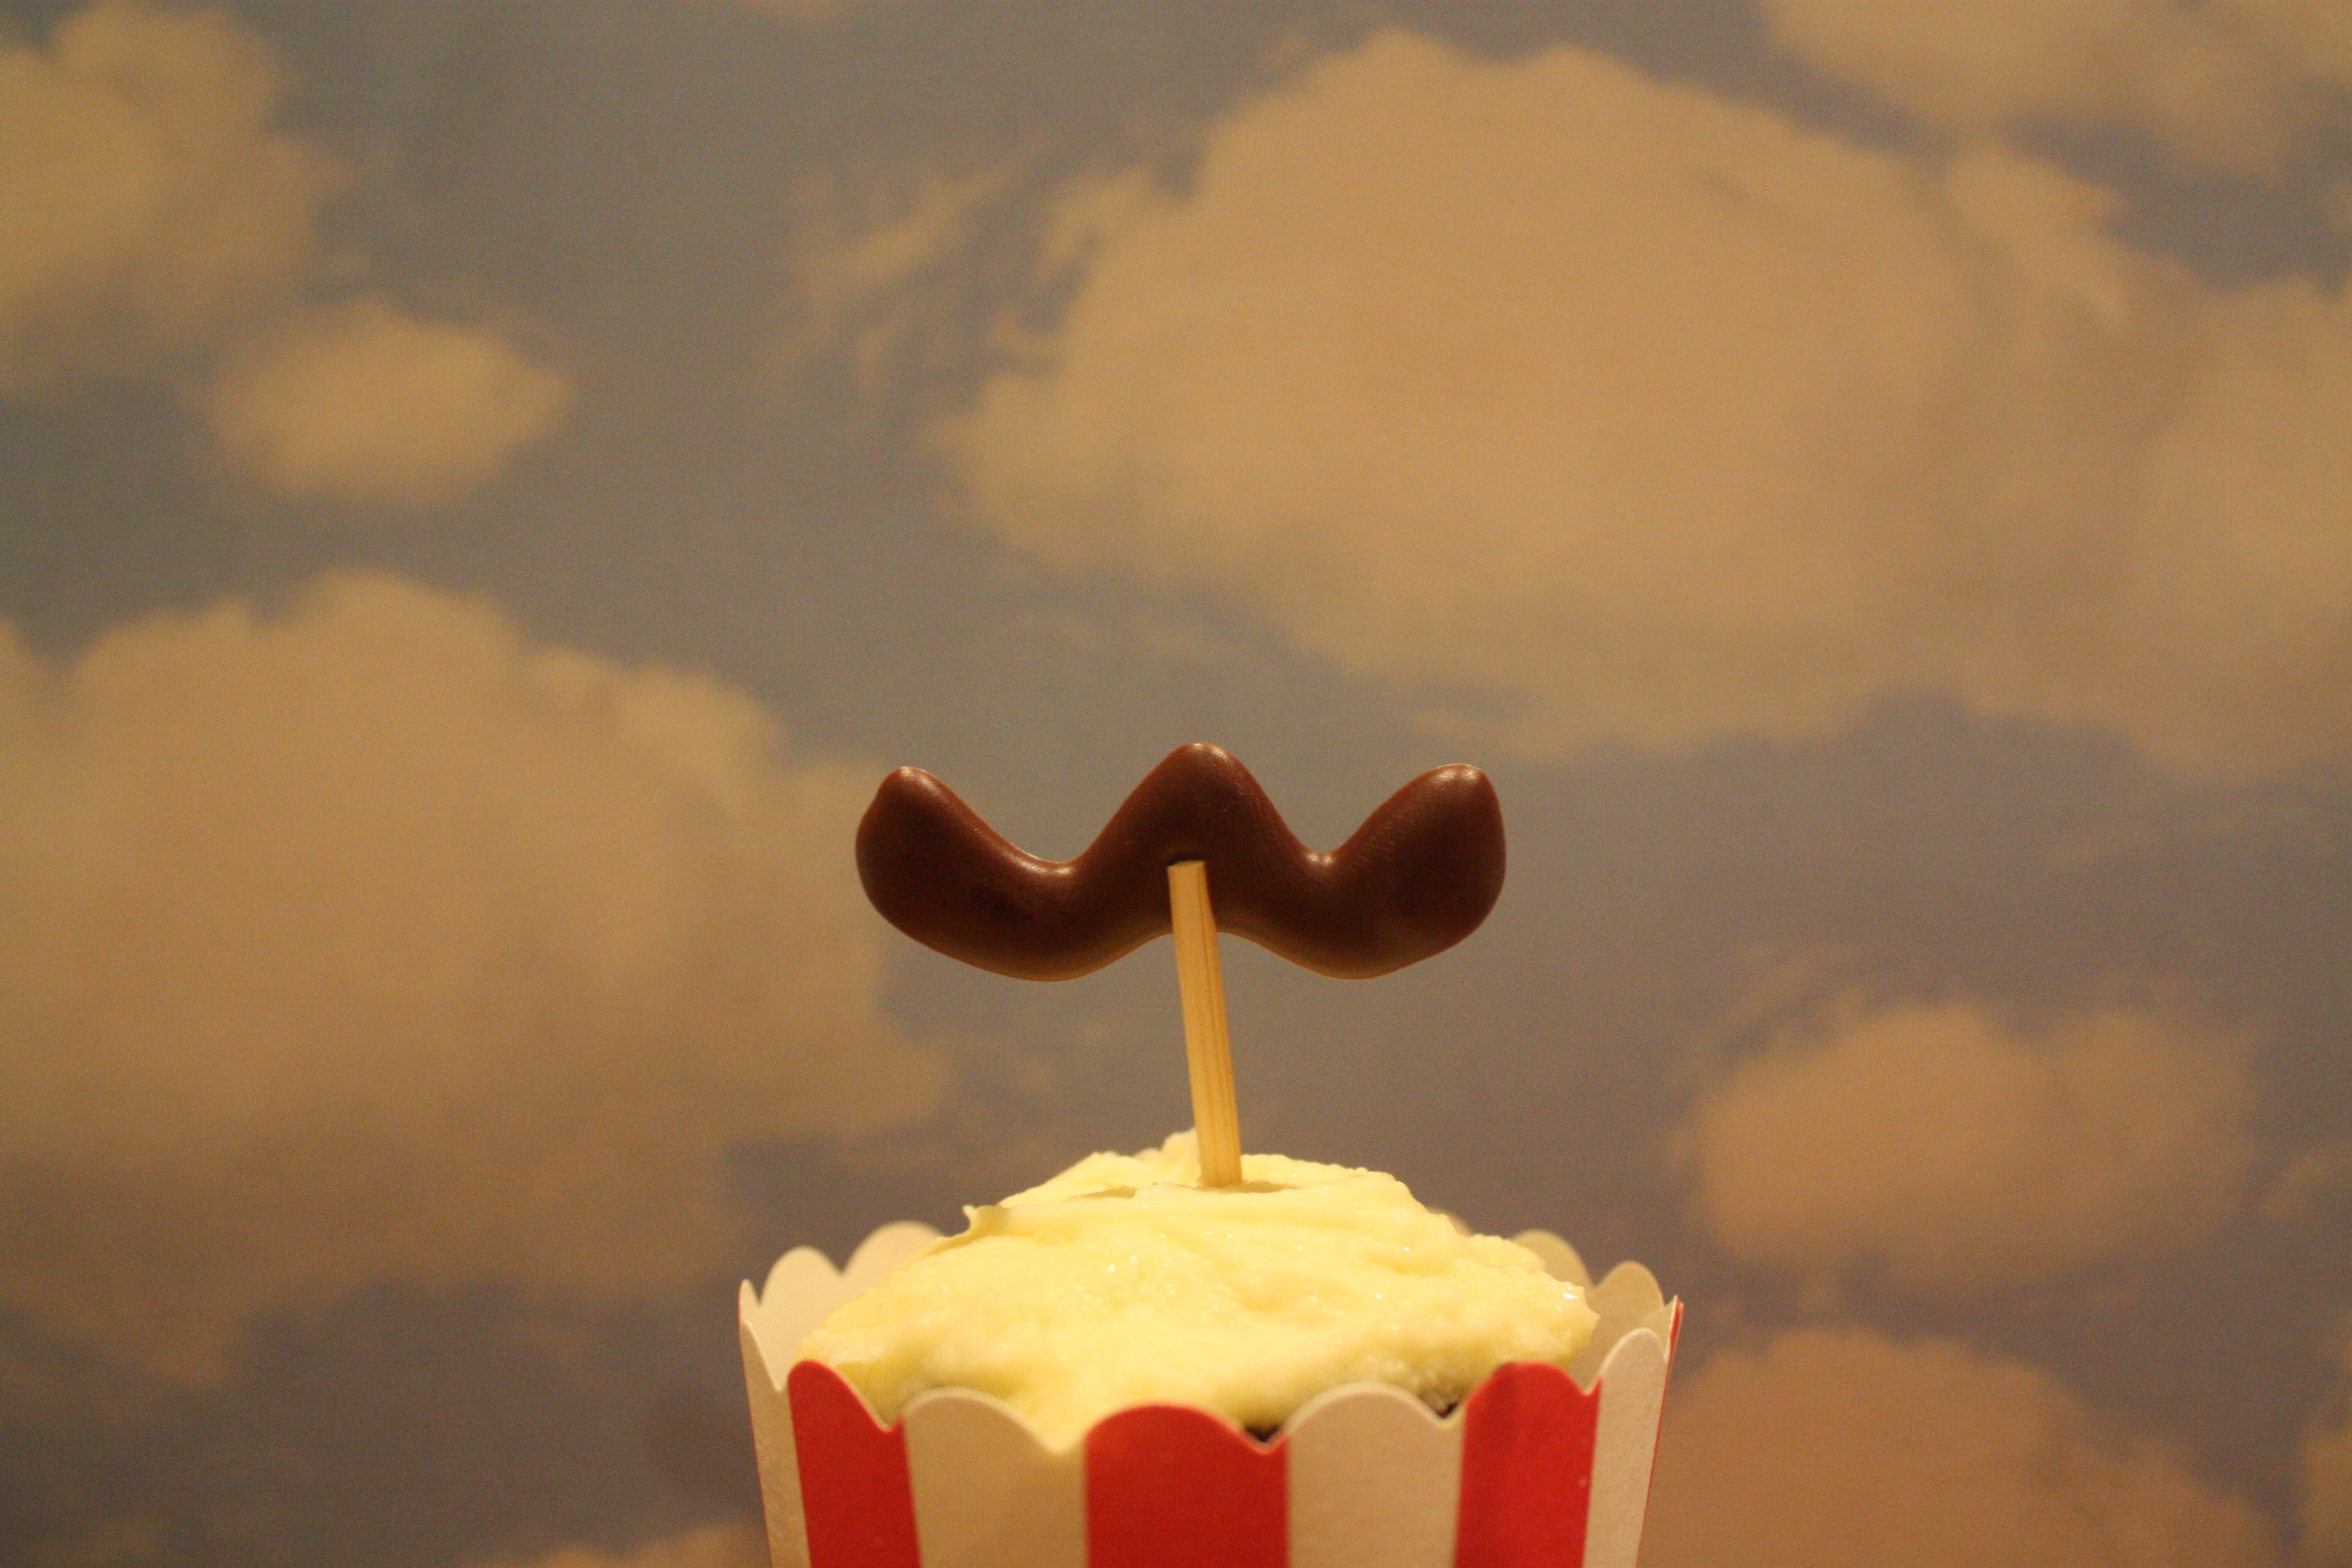
I spoke to him immediately afterwards and was fixated by the funny flap of skin that now resided below his nose. It was pink and fleshy, comically paler than the rest of his face. I watched the flap stretch and wriggle as dad laughed and chatted. I wondered what he was thinking – was his face cold without all of that covering? I can only assume it was.
He’s grown the beard and moustache back. I haven’t seen that flap since I was 16, and I kind of like it that way. Familiarity is comfortable, right?
In honour of my dad’s facial hair, this year, seven years after I laid eyes upon his top lip, I am making him moustachioed cupcakes.
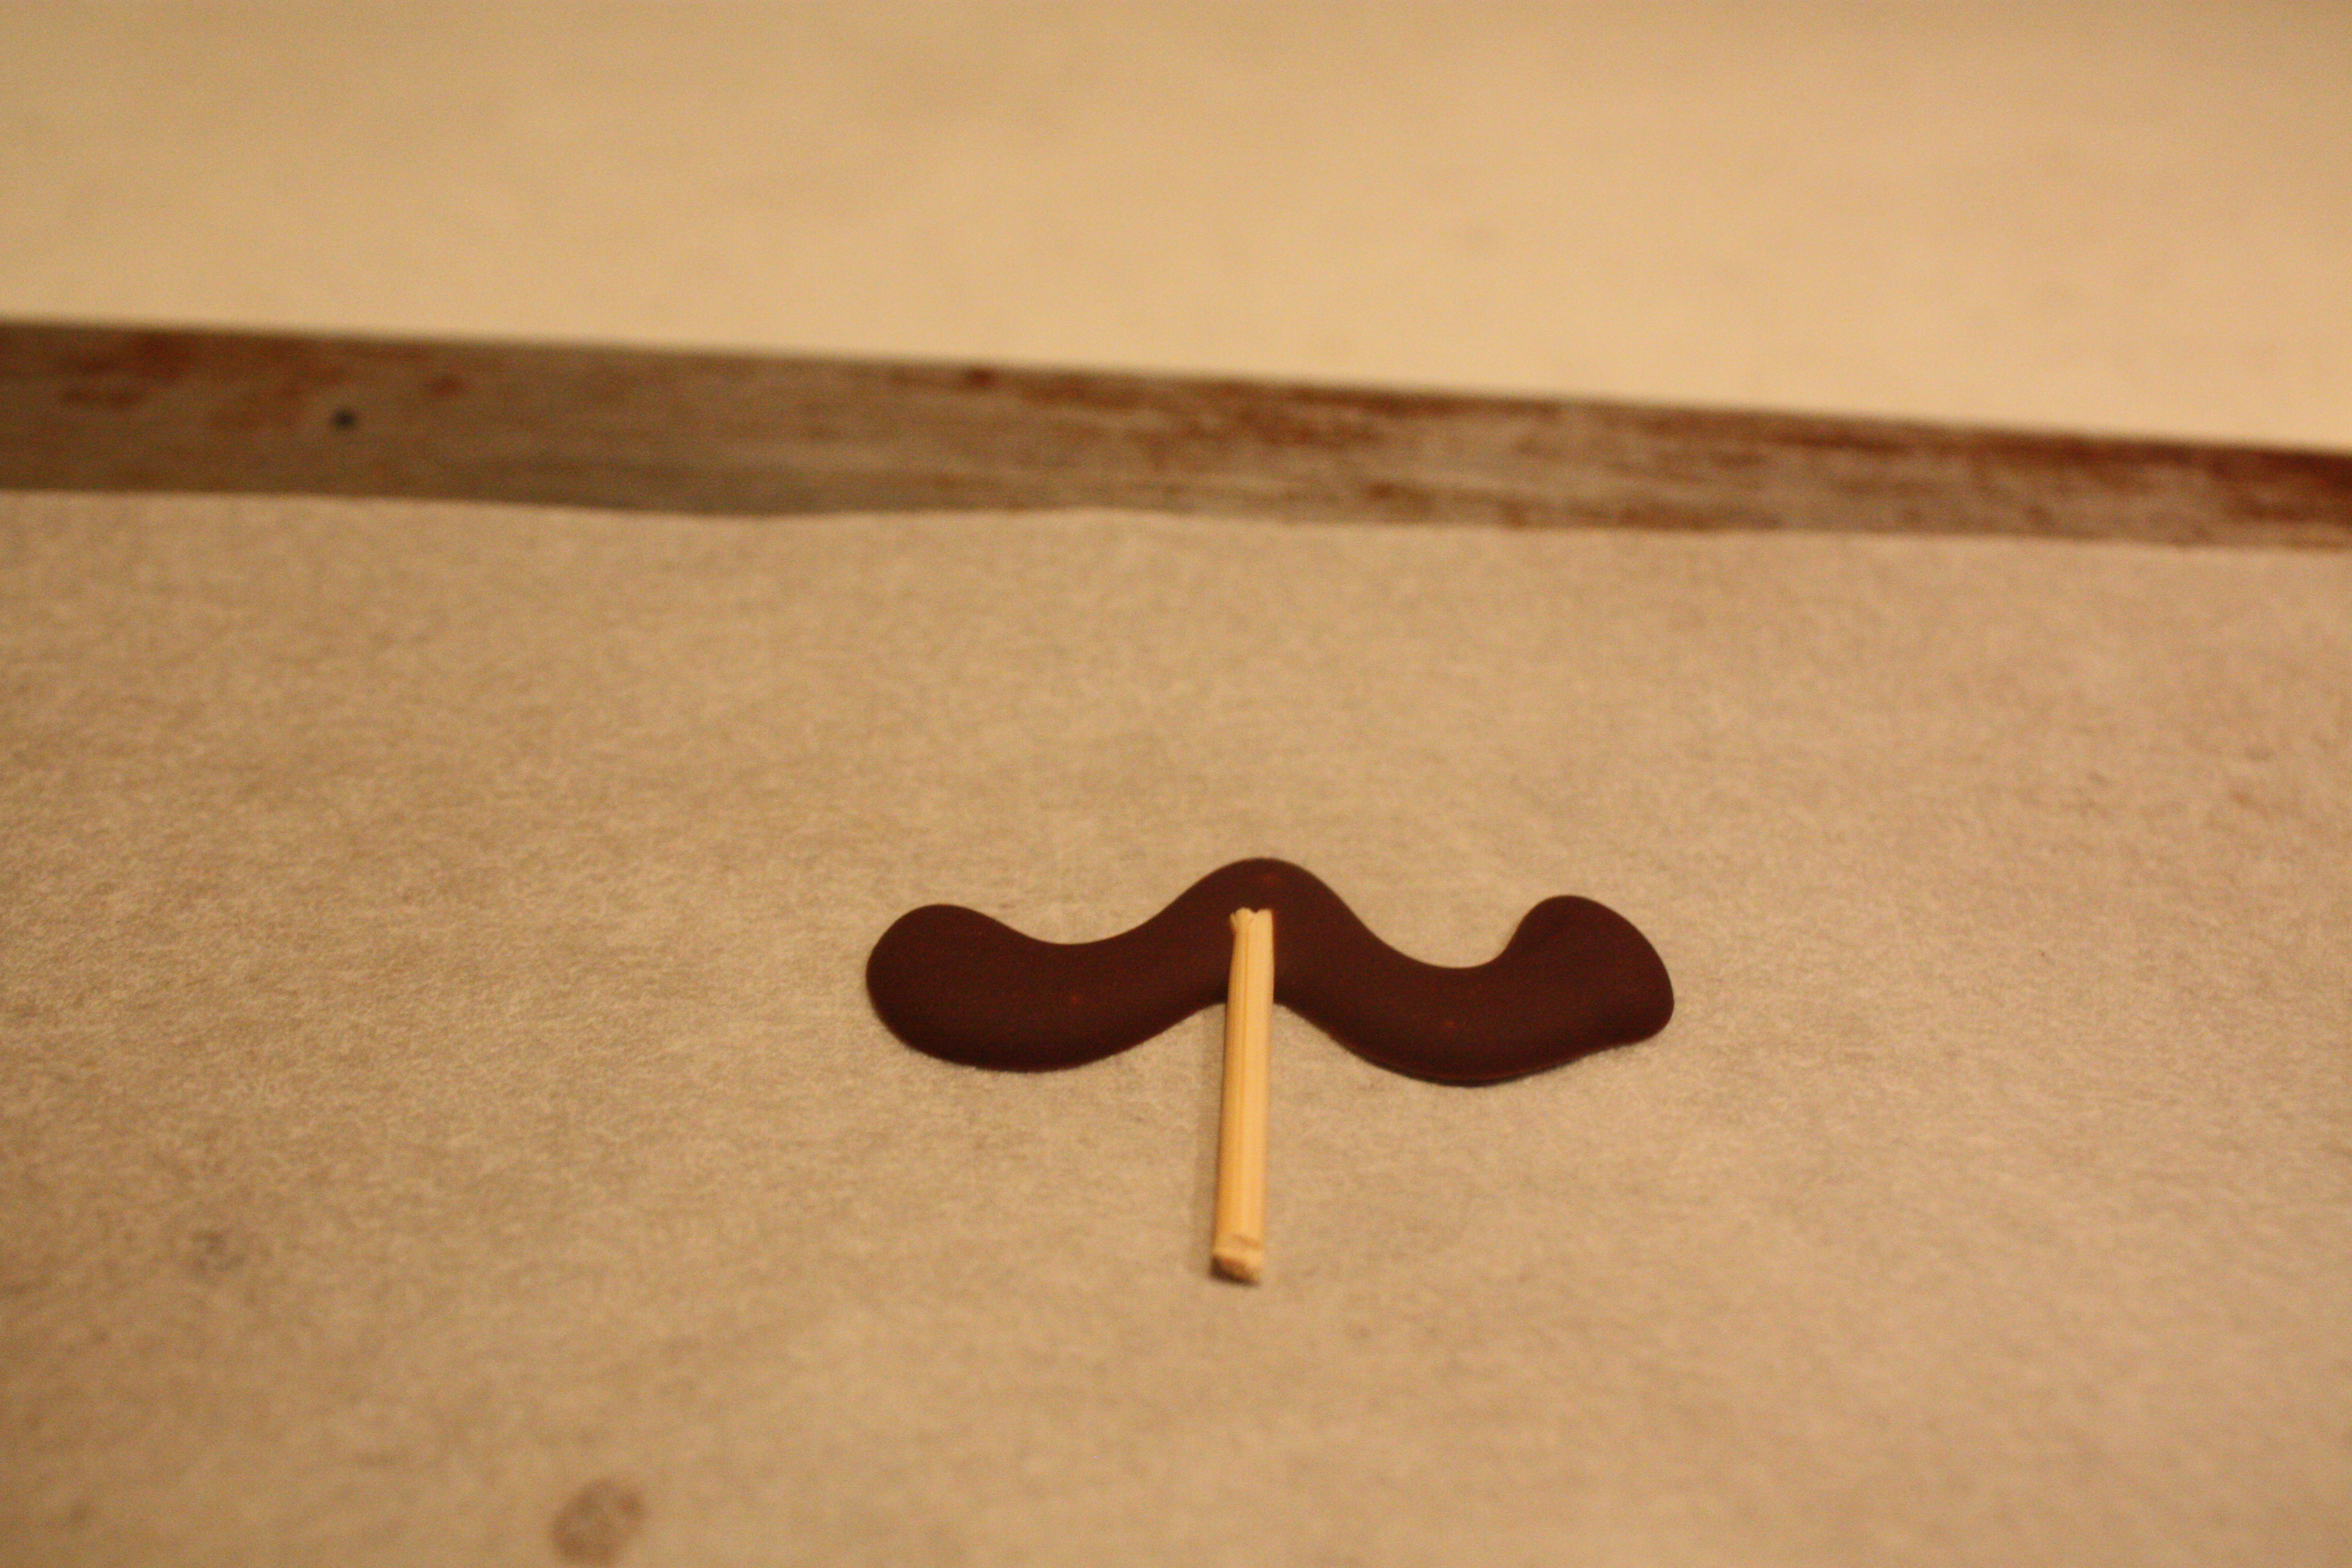
 All you need is 150g of chocolate and a piping bag (which you can craft yourself if you don’t own one!) It can get a little bit fiddly, but these surreal little beauties are so worth it! They reminded me of a Magritte, so I set them against his clouds to heighten the surrealness.
Get some skewers and chop them into 2-3 cm pieces, depending on how tall you want your moustaches to be (what an odd sentence!) When you’re piping make sure that you leave enough space below each piece to put the skewer pieces in. Line a flat baking tray with baking paper.
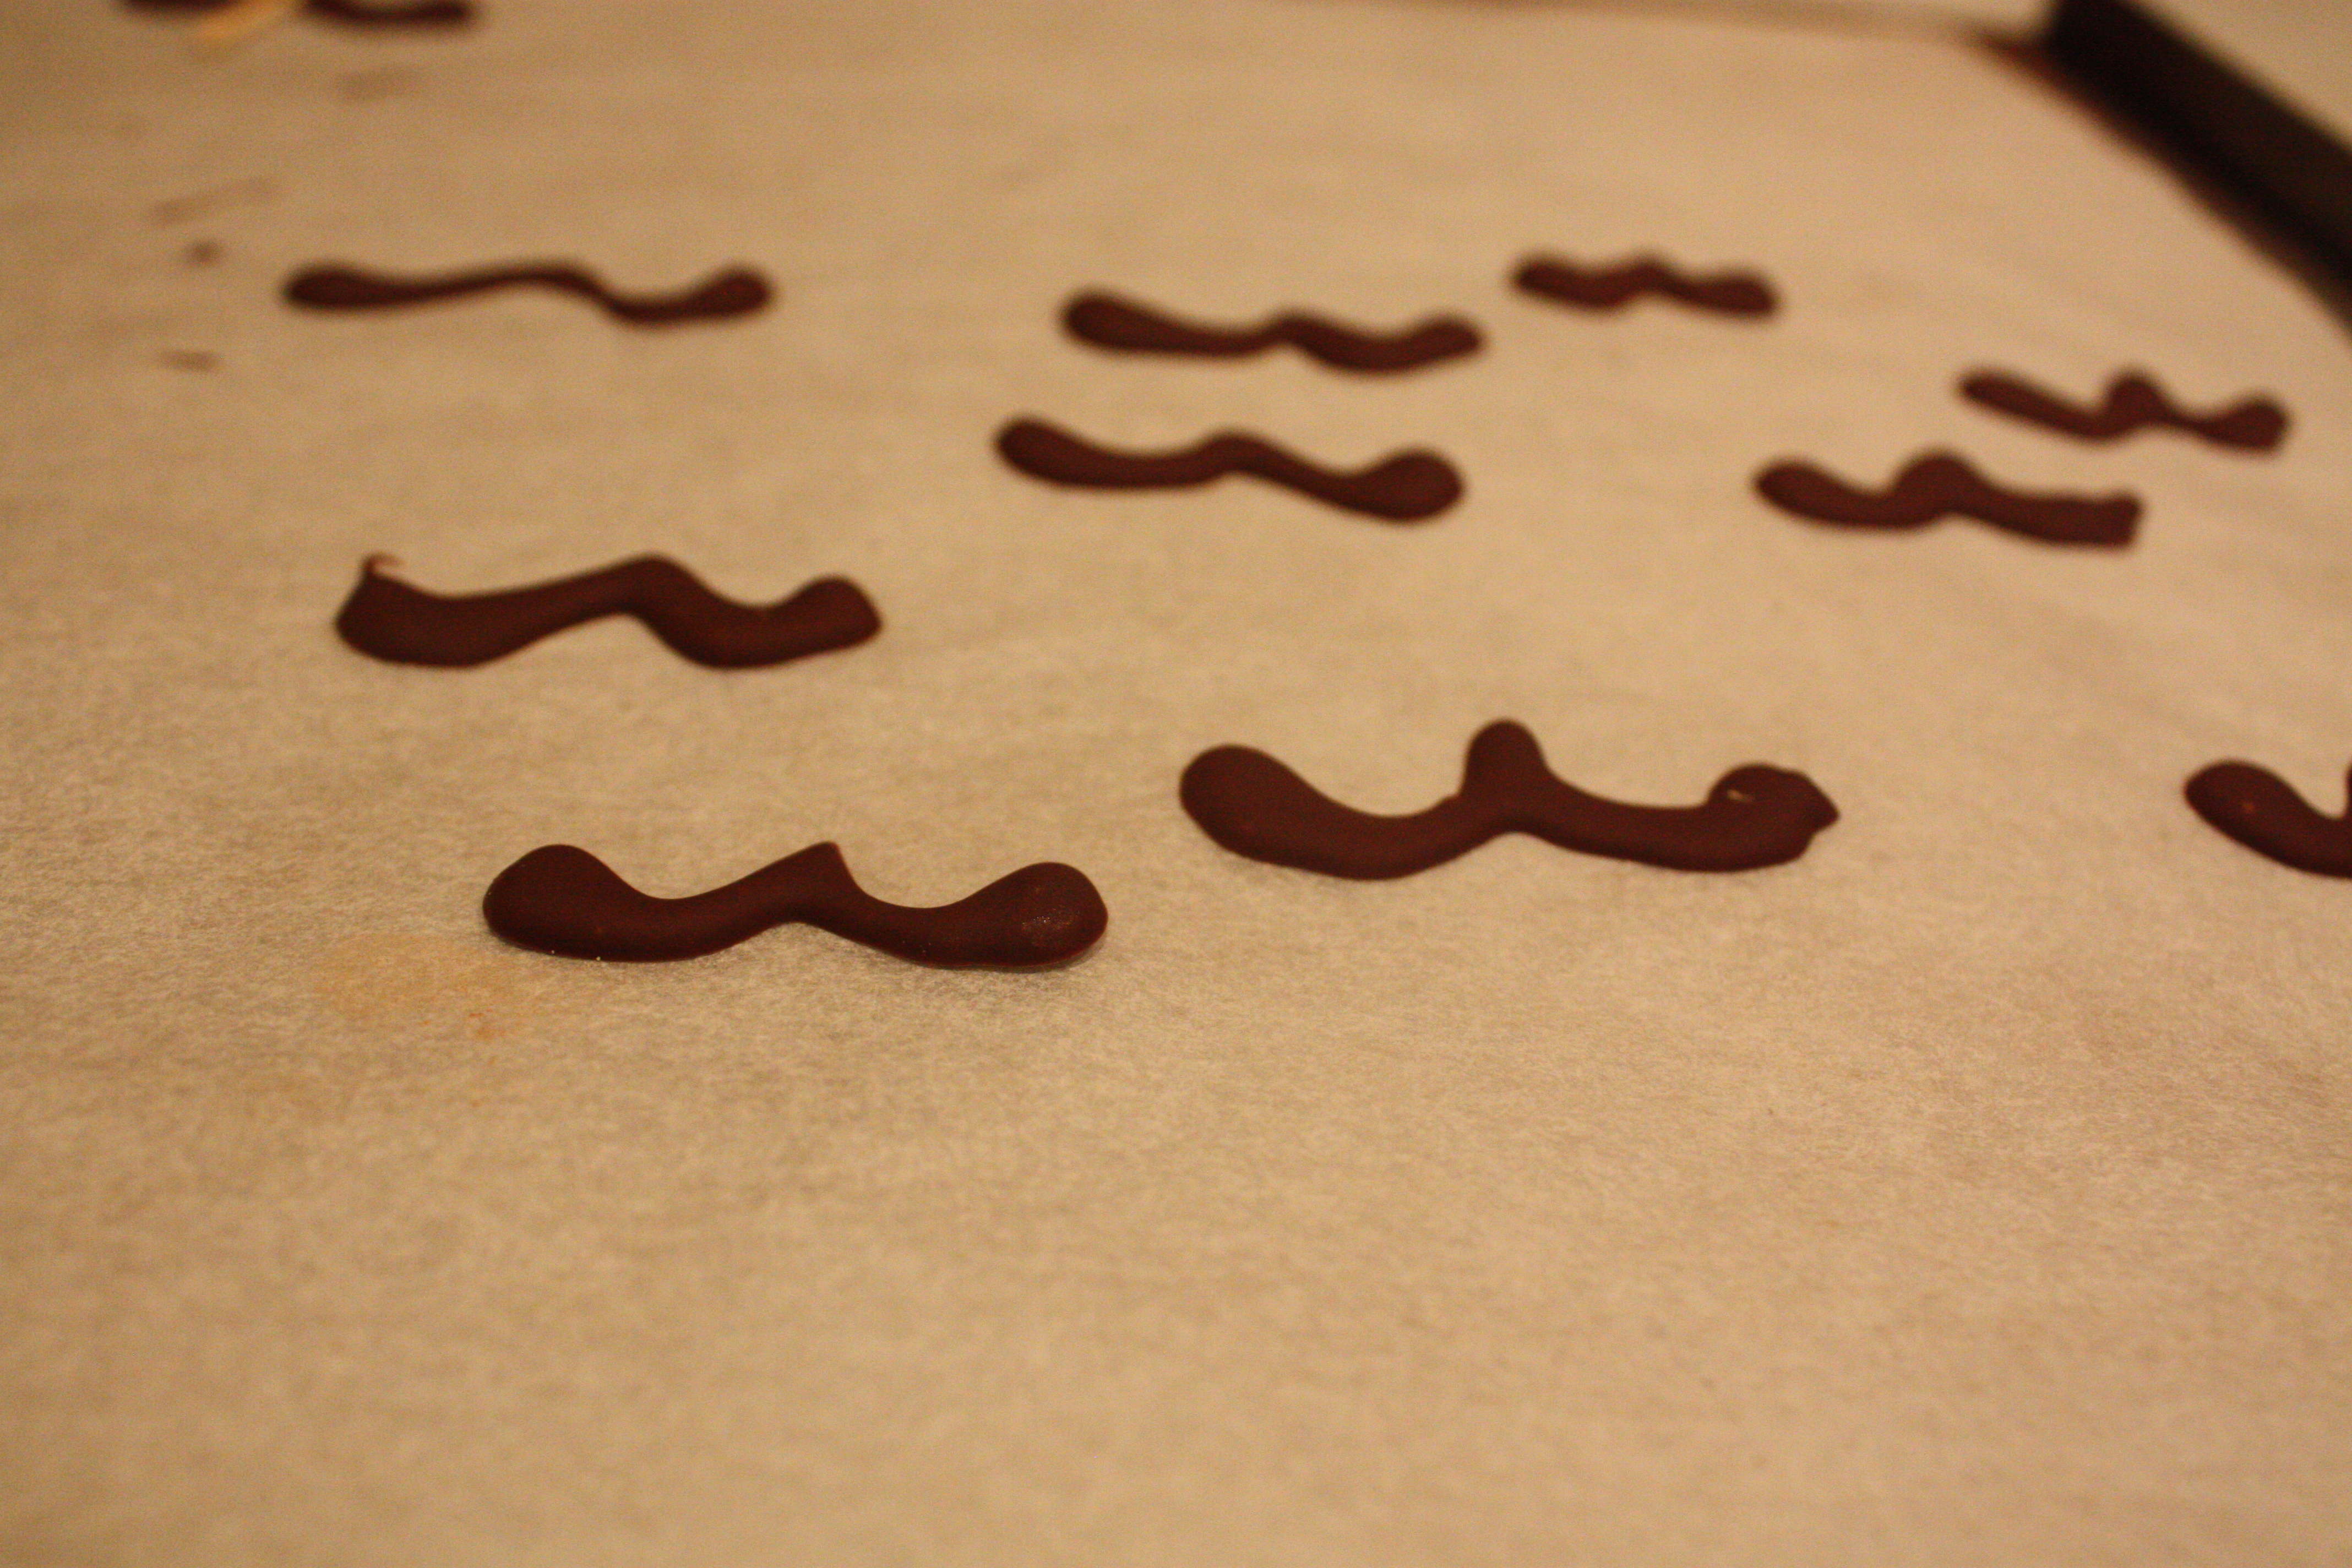 Break up your chocolate pieces and pop them in the microwave until they’re melted. Stir it every 20 seconds or so to avoid burning it. Once it’s all glossy and melted, scoop it into your piping bag and pipe loose ‘m’ shapes onto the baking paper for the moustache. For the tophats, start with a line, then pipe a square on top of it. It’s easiest if you work quickly – the chocolate will be running out of the piping bag quickly, so try to beat it! Don’t worry if it’s a bit messy, you can always eat the reject ones, or melt them down and try again. Once you’ve filled your tray with moustaches and tophats that you’re sufficiently proud of, pop the skewer pieces into the centre of the chocolate. Don’t let them go in wonky or you’ll end up with wonky decorations.
 Put them in the fridge for about 20 minutes then stick them into your cupcakes and prepare to impress dad! I used my chocolate and vanilla cupcakes – my dad is a traditional man, so chocolate cupcakes with vanilla icing suit his tastebuds perfectly. These decorations will suit any cupcakes though, don’t limit yourself!
Would your dad like these?  Have you tried giving your cupcakes moustaches and top hats? Let me know!
Smarties cupcakes and nostalgia
This evening’s post was prompted by a request. And I’m so happy that I made them! I’m a solo worker; I choose my own recipes and prefer to make them in a kitchen with as few people around as possible. I love company, just not when I’m bustling about in my own world in the kitchen. My baking is for sharing, always, but the process is a personal one.
So when it was suggested that I make Smarties cupcakes I wondered whether I should acquiesce or not. I hadn’t had a Smarties cupcake since my childhood.
And therein lies their brilliance.
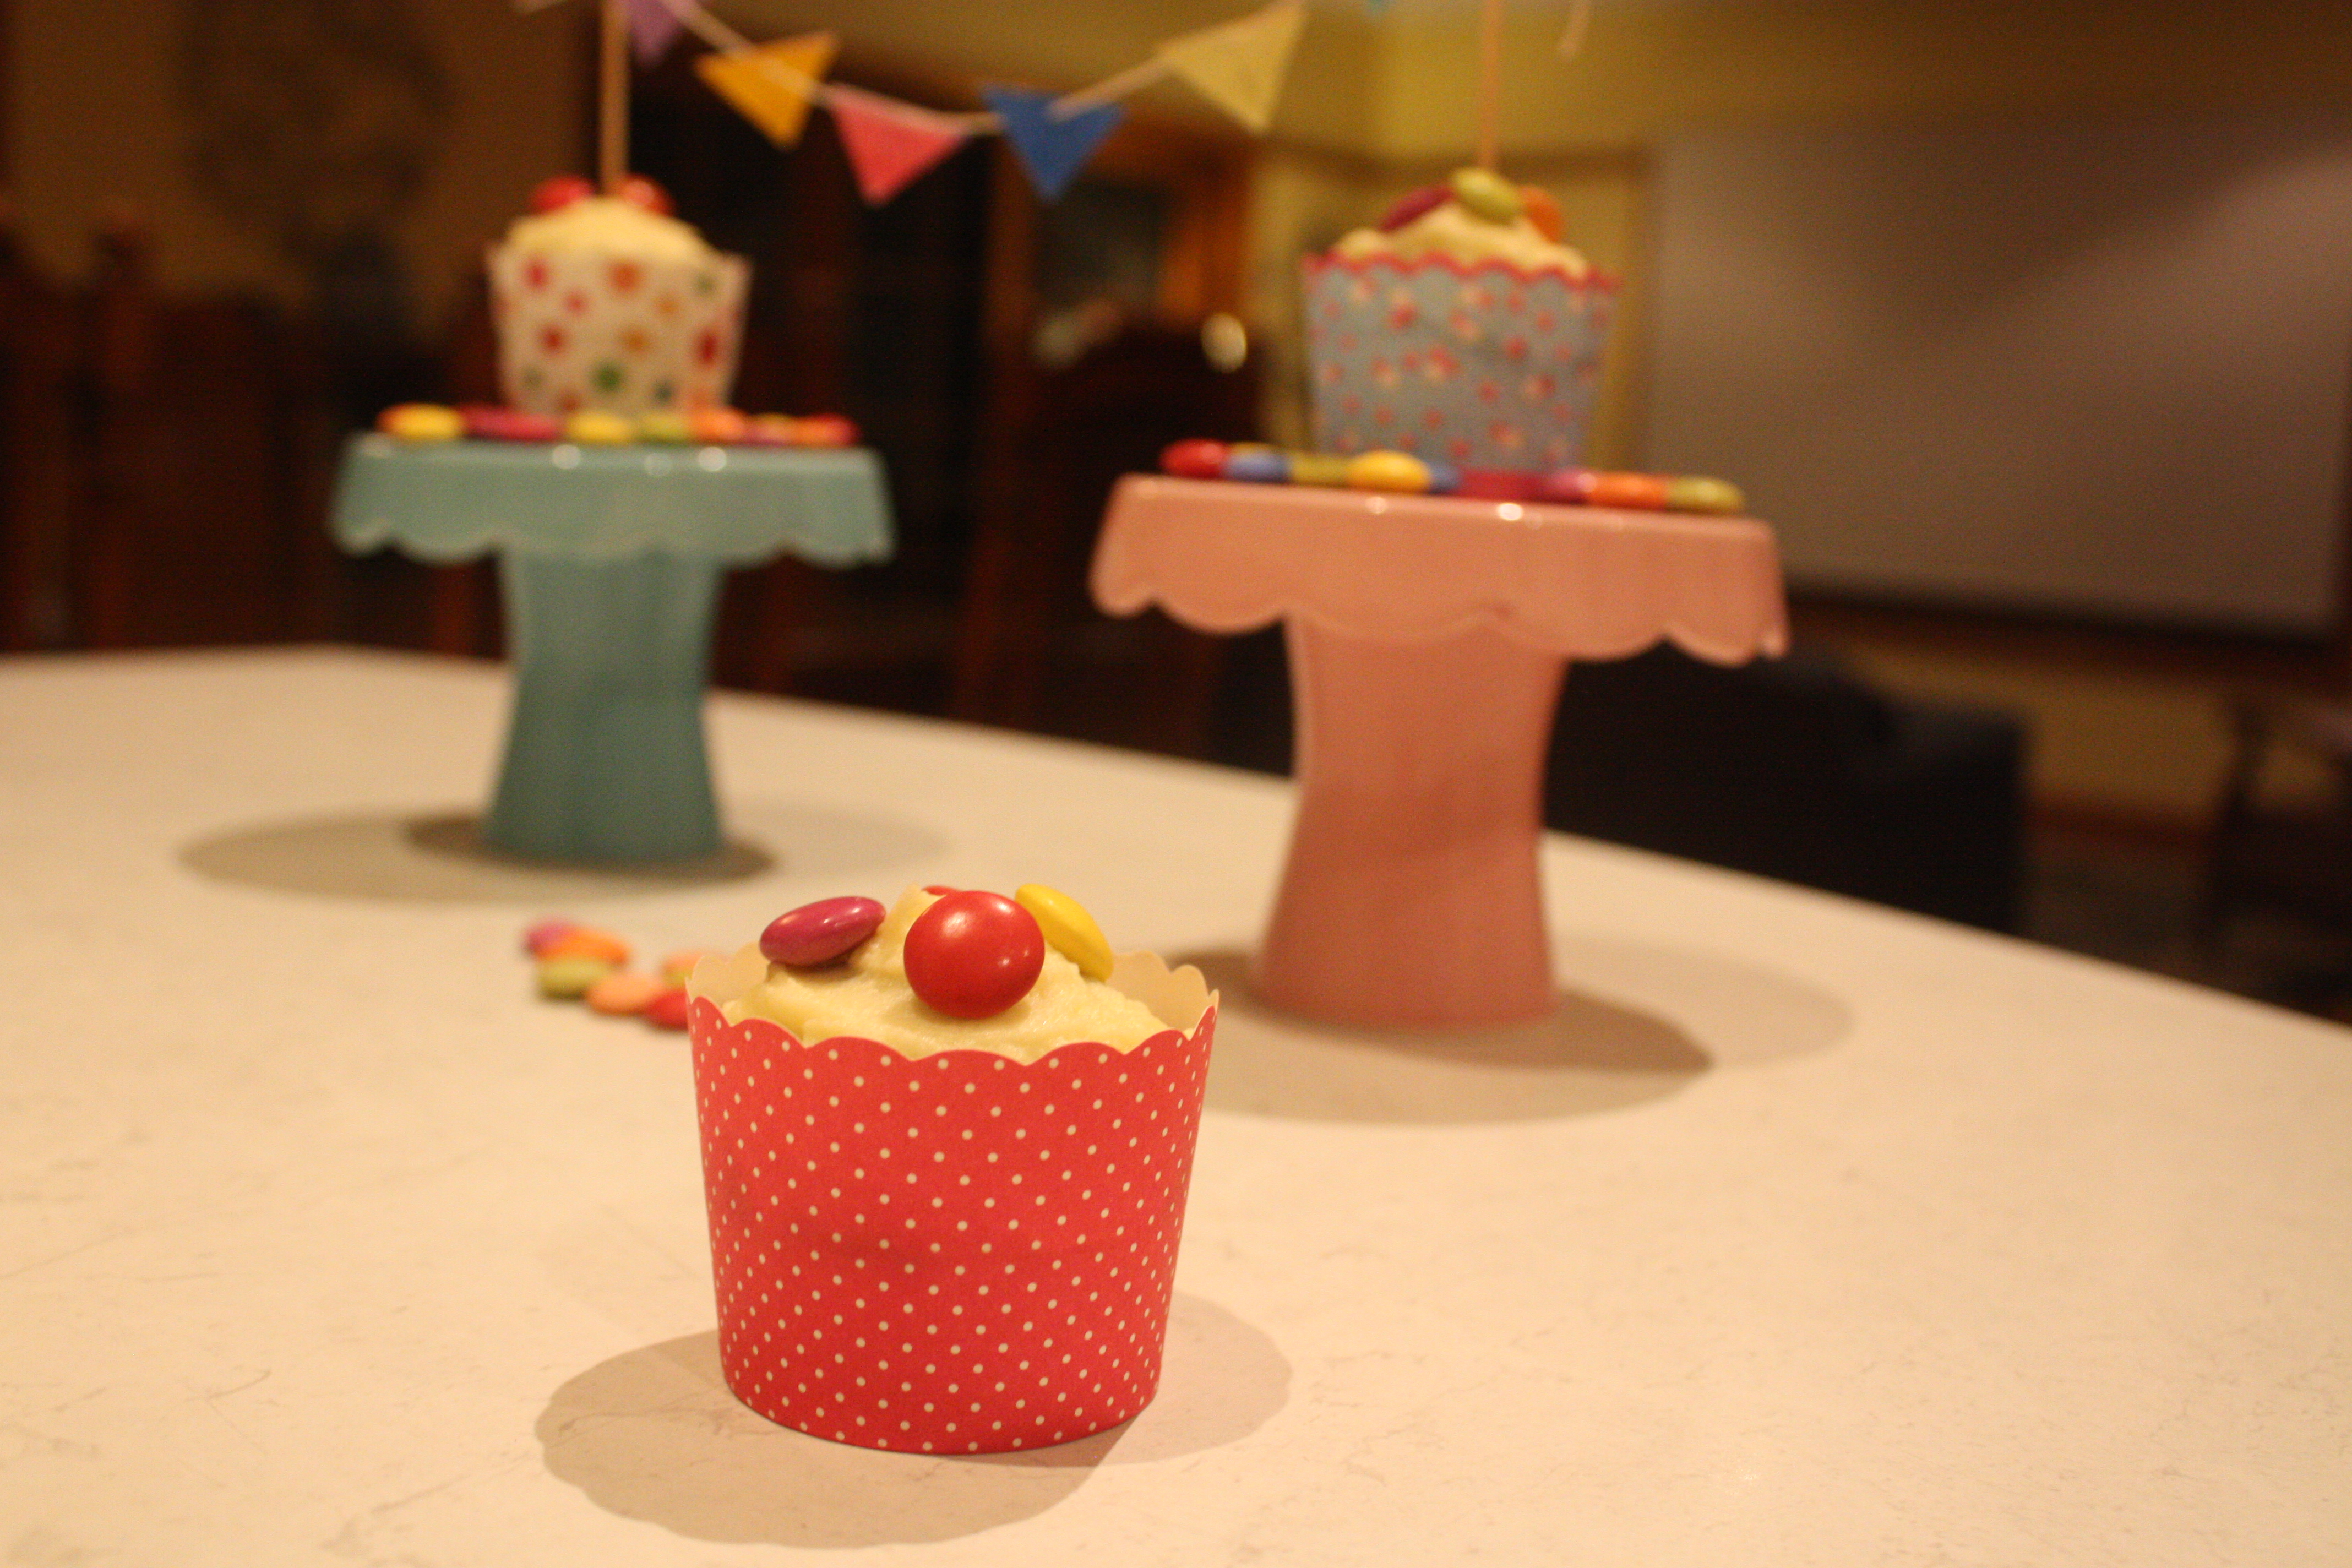
The colouring of Smarties may be less intense than it used to be, but their flavour is still the same. Complemented by a soft vanilla buttercream and chocolatey cupcake, these concoctions just work.
They taste of childhood and nostalgia. I half wished I’d made up lolly bags to go along with these cupcakes, it felt wrong to serve such festive cupcakes without a lolly bag for people to take home!
 Some teddy bears joined me for the photo shoot because it had been a while since they’d been played with. They enjoyed the trip back to childhood and what appeared to be a child’s birthday party.
Cook them for their colour, their easy charm and the memories they’ll bring back for you.
Just make sure you buy extra Smarties.
 Chocolate cupcakes

- 1 ½ cups self raising flour
- ½ cup cocoa
- 100g butter
- 3/4 cup sugar
- 2 eggs
- ½ cup milk
- ½ tsp vanilla
Vanilla butter cream
- 1 ½ cups icing sugar
- 100g butter
- 3 tpsb milk
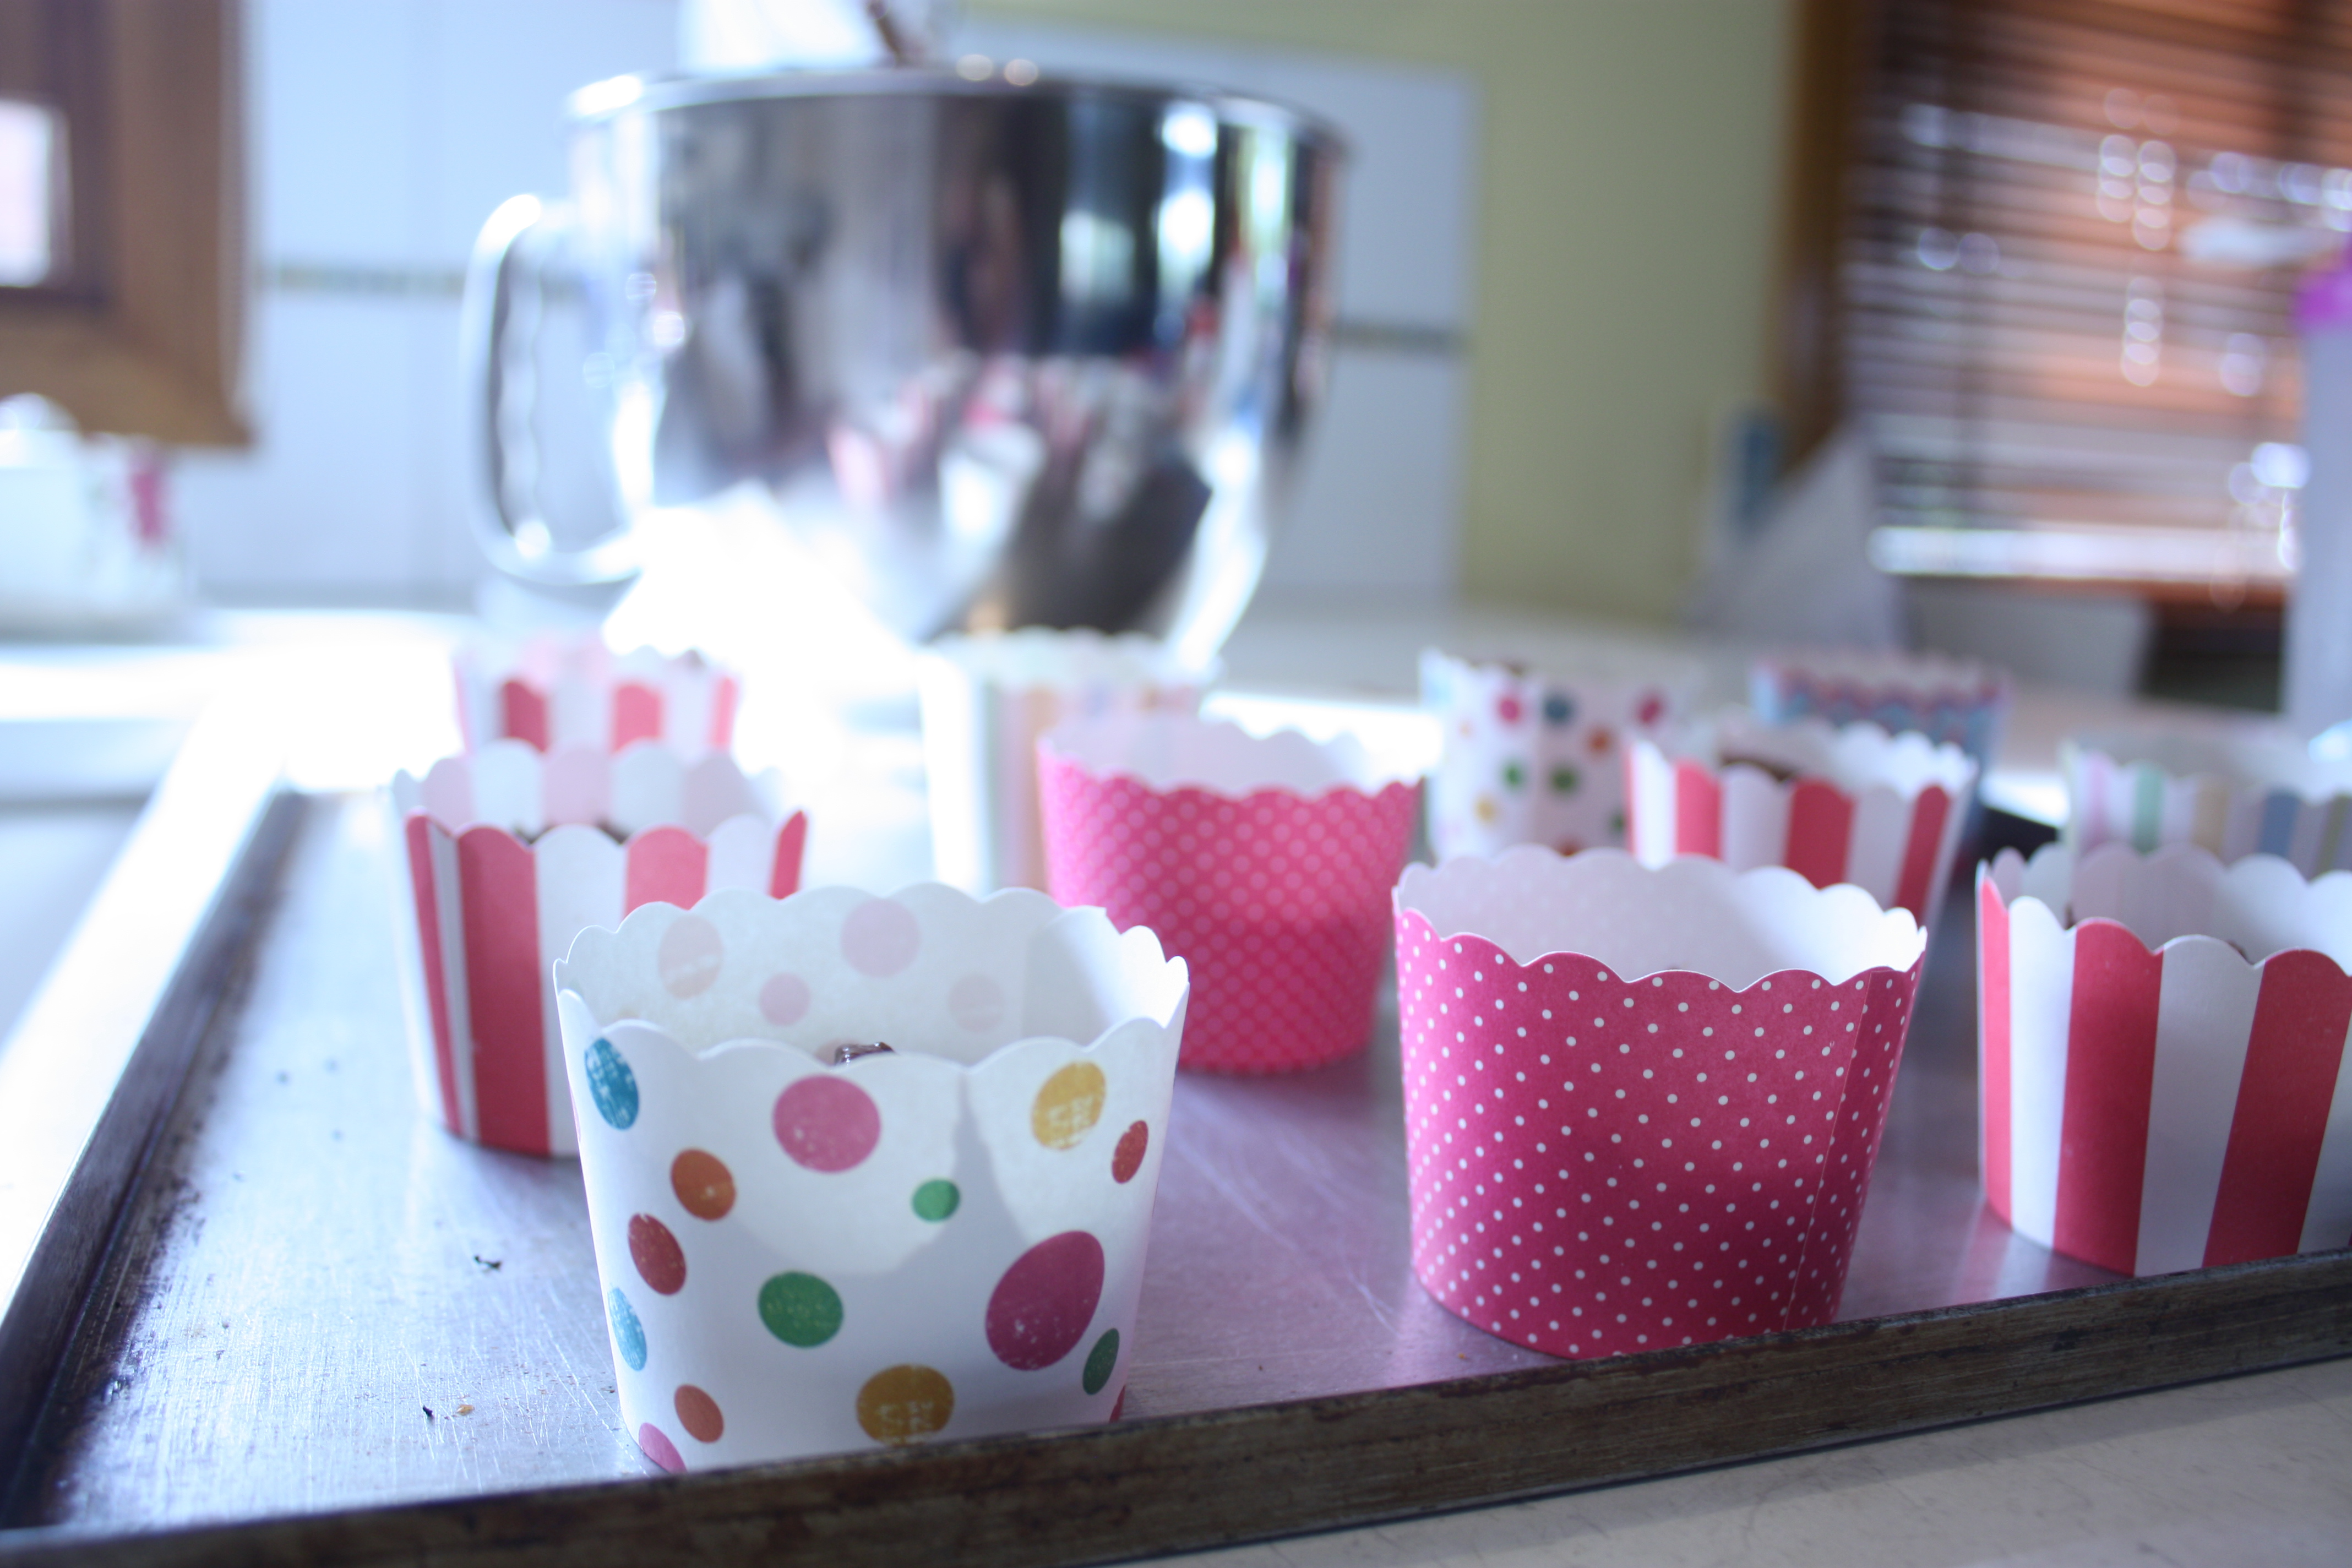
Preheat your oven to 190°C. Grease your muffin tins, or use cardboard cupcake cases like me if you’re feeling lazy.
Cream your butter and sugar together until pale and fluffy. Add your eggs and vanilla, mixing them well.
 Fold in the cocoa and half of the flour flour, adding your milk when it gets too hard to mix. Fold in the next half of the flour and make sure everything is combined.
Scrape the sides of the bowl down regularly so that the cocoa reaches every part of the mixture, nobody likes streaky cupcakes!
Fill your cupcake cases or muffin tins about 3/4 full and try some of the mixture, it’s delish!
Pop them on a baking tray (or not, if you’re using a muffin tin) and bake for 16 minutes or until you can insert a skewer into the cupcake and it comes out cleanly.
 While the cupcakes cool, beat the butter until it’s pale and soft. Add the icing sugar and milk and mix until it is smooth. Wait until the cupcakes are completely cook to ice them, you don’t want the icing sliding off.
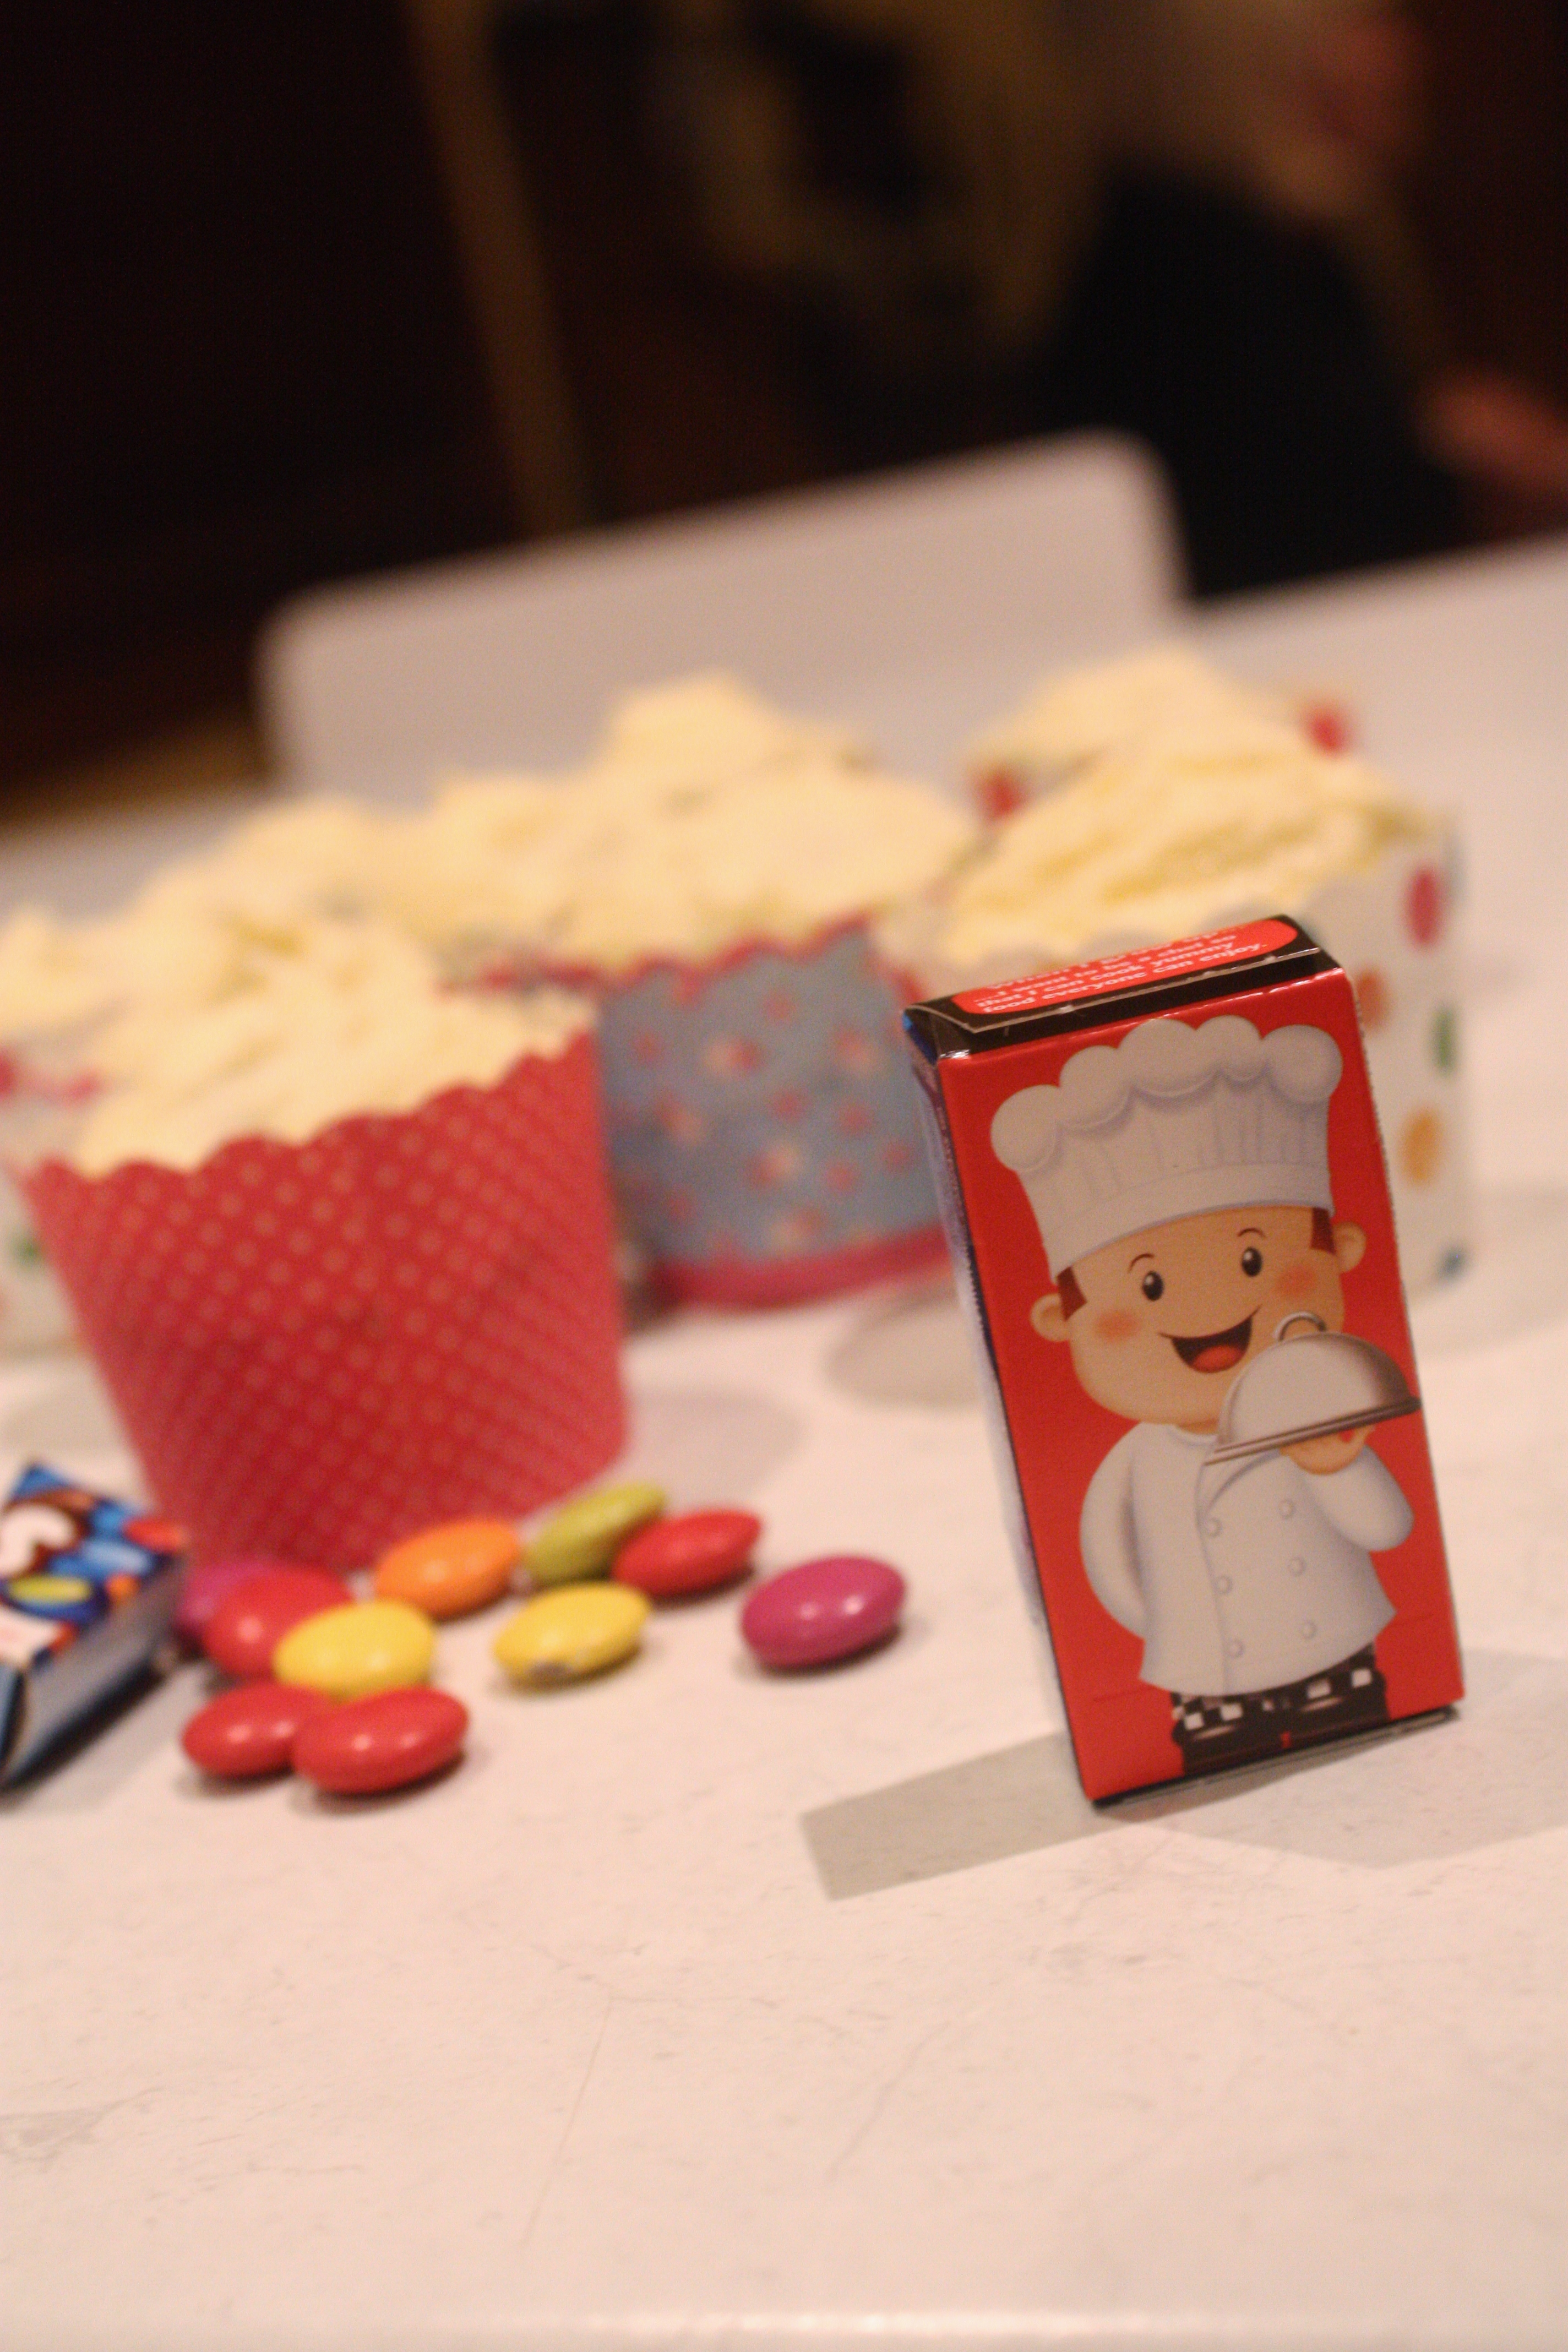
Toss a handful of Smarties over the cupcakes and feed the waiting children (or sentimental adults.) The Smarties packet had a chef on it – I appreciated the appropriateness of the character on the box!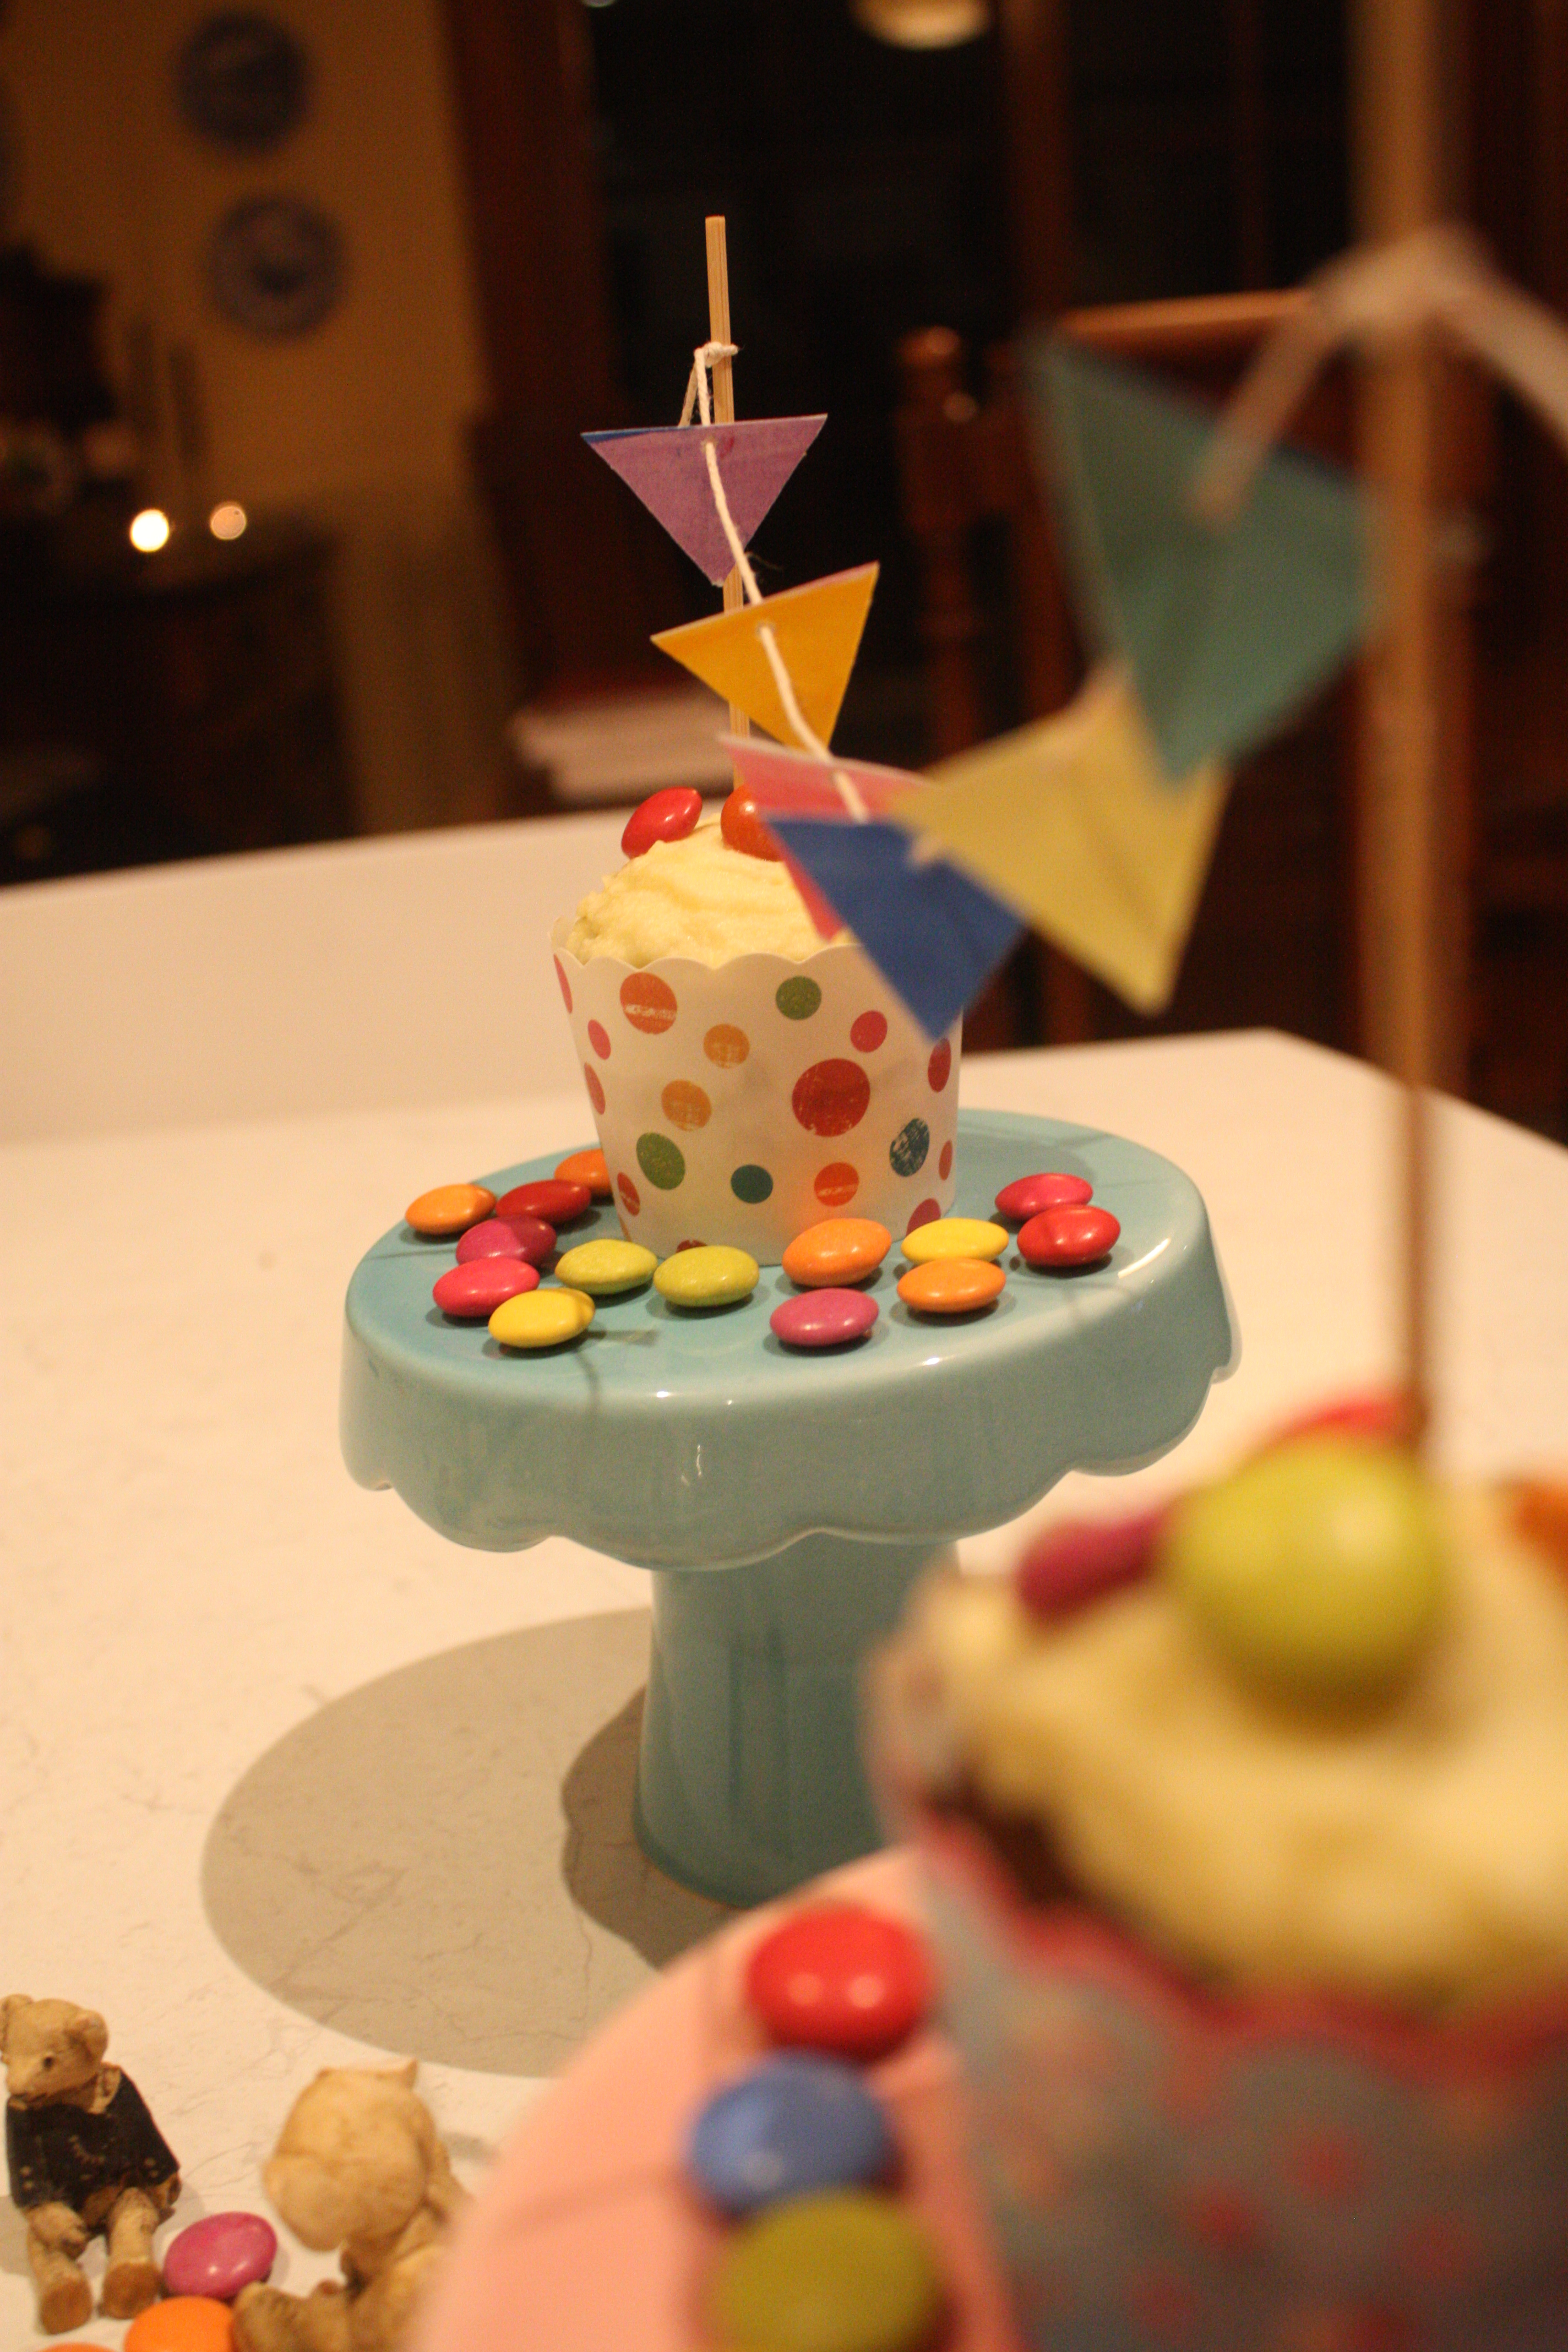
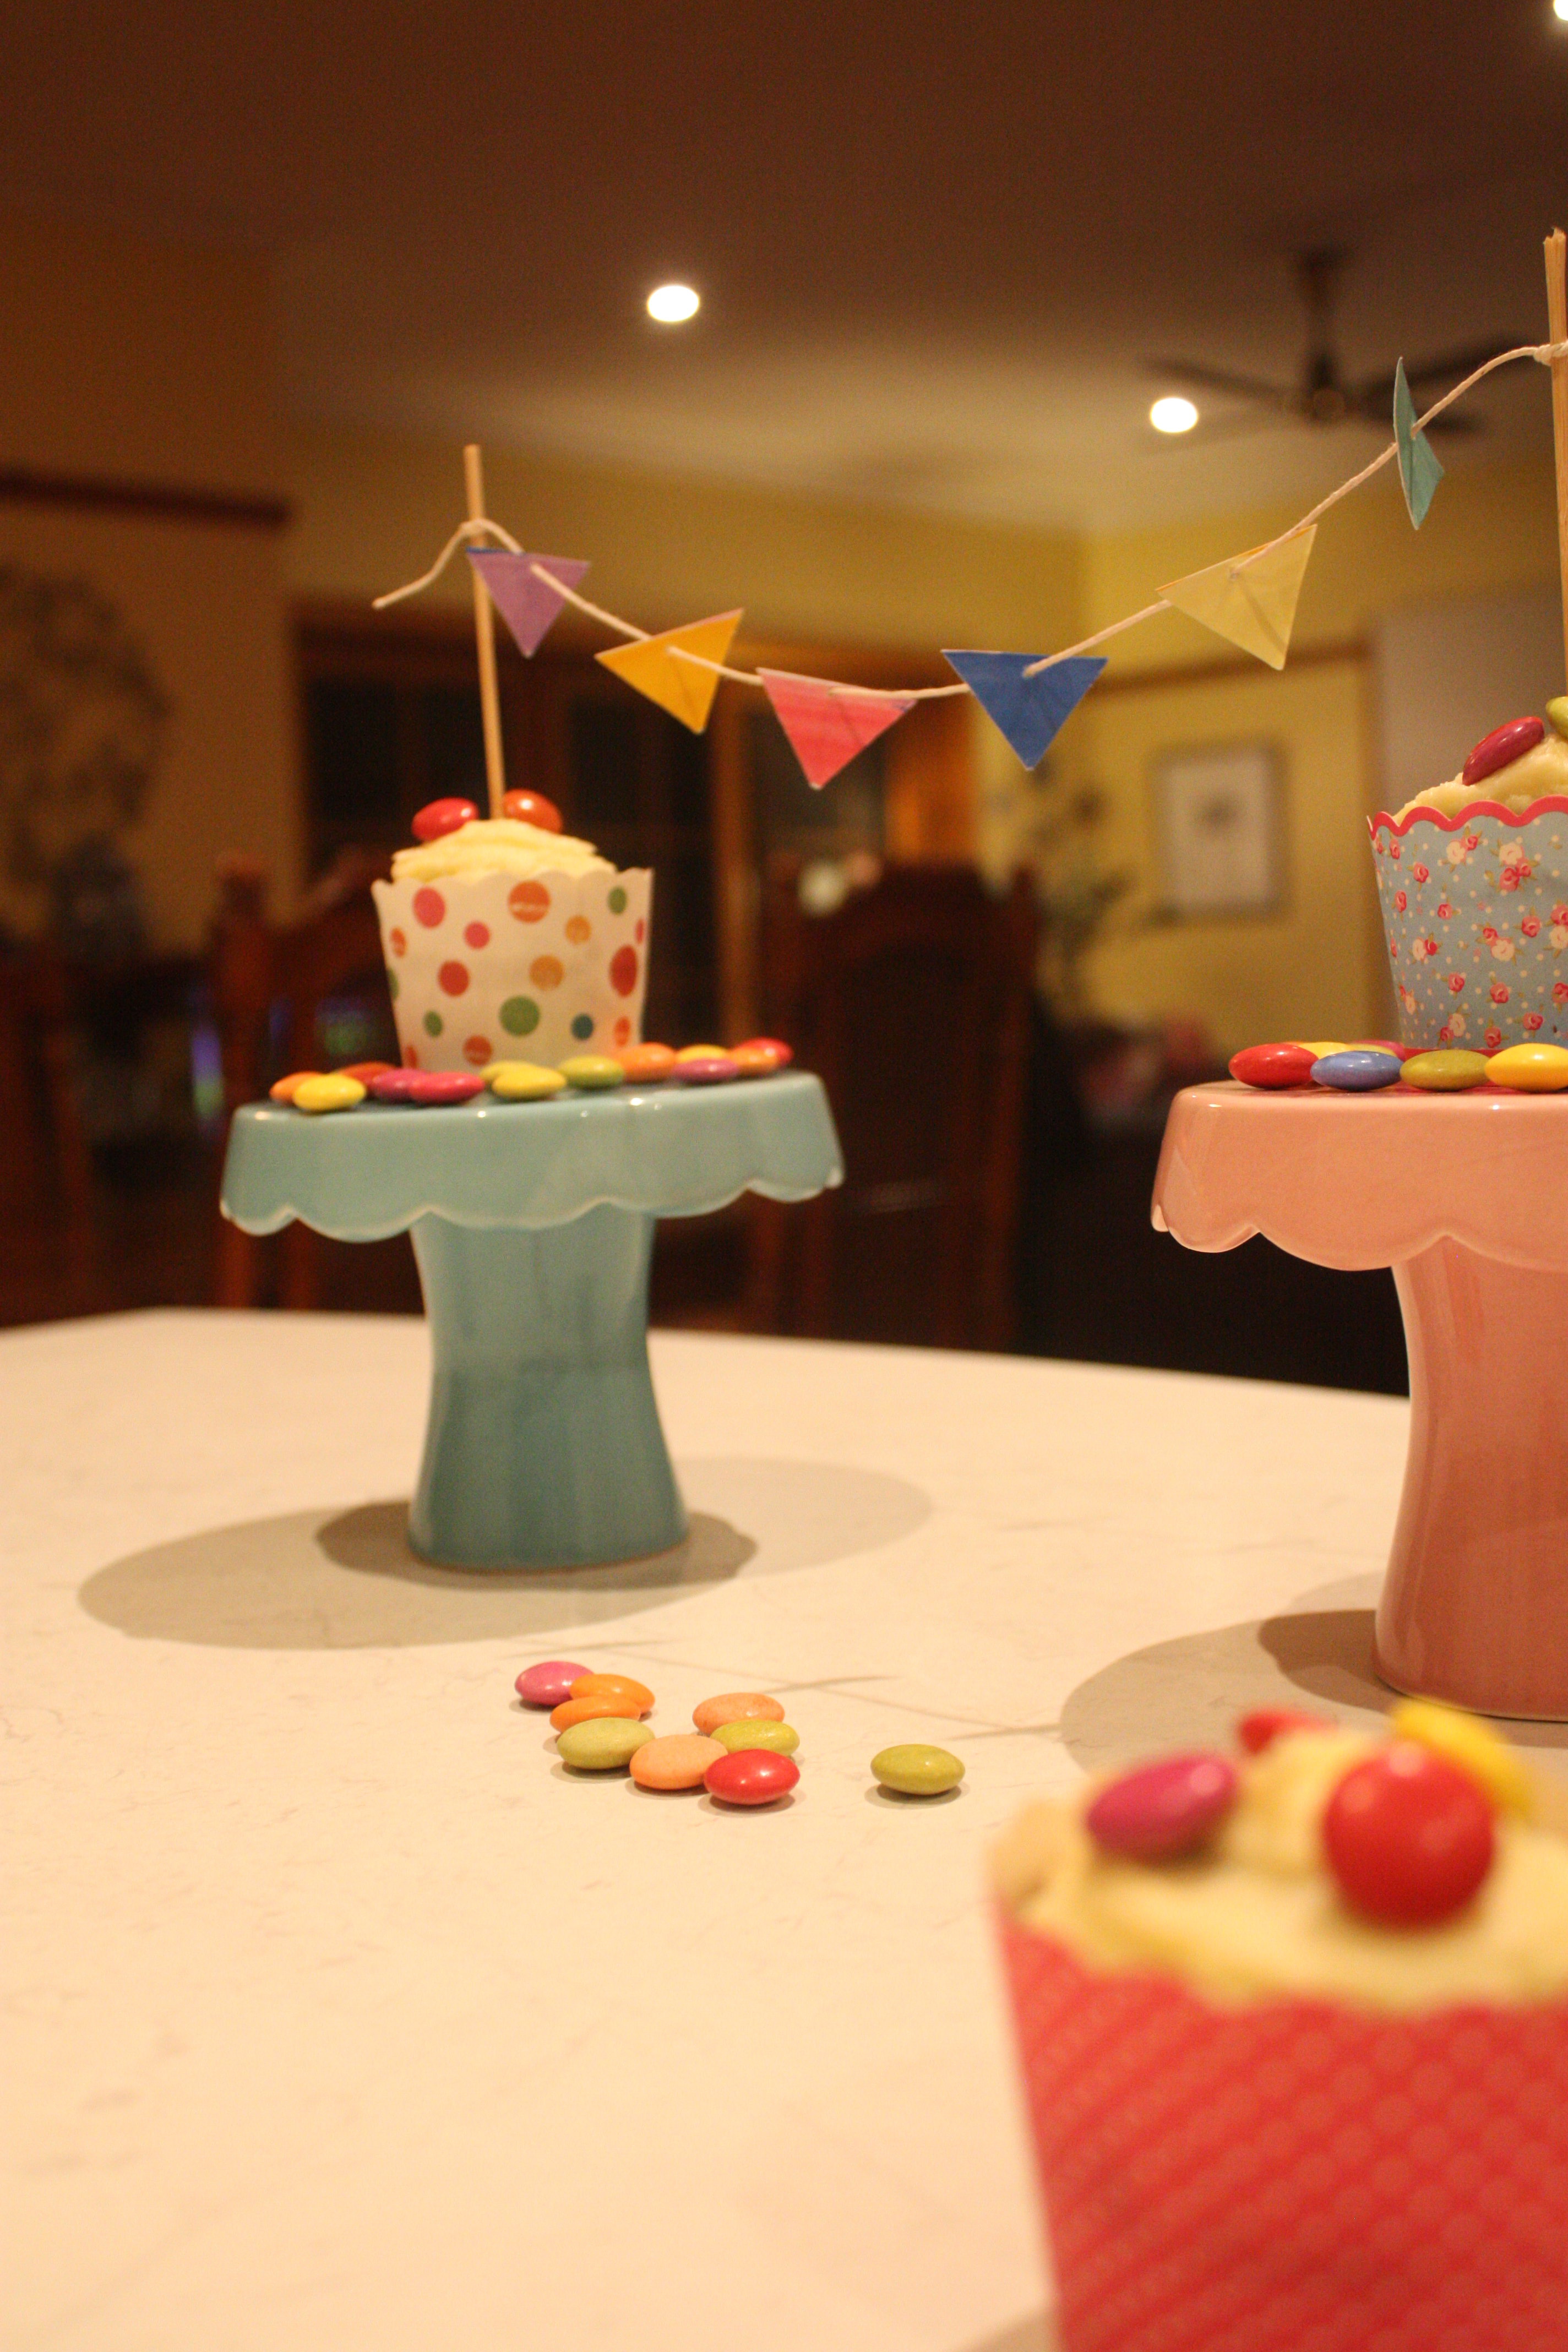
These little gems are perfect for a child’s party – no child is going to turn down a smarties covered cupcake! Add some bunting for decoration if you’re feeling especially fun – mine was made by stringing coloured triangles in between a skewer cut into halves. A little bunting makes a big difference to presentation!
* I doubled this recipe to make a cake – results are here.
Danah’s Red Bull Doughnut Cake and Surprises
During the week it was a friend’s birthday. Danah is tiny, but has an insatiable appetite for sweet things – she eats like a fat person, but never shows it! As a fat skinny person, one of her favourite things in the entire world is Red Bull. When I asked her what kind of cake she’d like, she said a dessert based around Red Bull.
You can imagine my face – it was something like this =S
But then I thought it might not be too crazy an idea. I’d heard of cola cakes before, which are apparently moist and delicious, but Red Bull? For those of you unacquainted with it, Red Bull is an energy drink which is weirdly sweet and sour at the same time…kind of like drinking sour gummy worms. It’s a toxic-looking, intense yellow liquid that should only be consumed (in my opinion) when you require a ridiculous hit of sugar.
I had reservations about putting it in the cake, but I’m glad I did.

It made a thick but well aerated cake that was surprisingly floral in taste. The sourness of the energy drink was taken away in the baking process, leaving a delicate sweetness to the cake which is unlike any other I’ve tasted before. I thought the Red Bull would overwhelm the cake, so I made a heavy chocolate icing in case the taste needed masking! Next time I would serve the cake with a dusting of icing sugar and cream, or with an orange syrup drizzled over the top.
I am thoroughly impressed. And utterly surprised.
Danah’s Red Bull Doughnut Cake:
- 1/2 cup caster sugar

- 80g butter
- 1 teaspoon Vanilla
- 1 teaspoon bicarb soda
- 2 eggs
- 2 cups plain flour
- 1 ¼ cups Red Bull
Preheat oven to 180 degrees. Grease your cake tin and line the base with a circle of baking paper.
Mix the butter and sugar together until pale and creamy. Add in the vanilla and bicarb, followed by the eggs. The mixture will be pretty sloppy at the moment, so add half of your flour and give it a good mix. Add ¼ cup of Red Bull, the final cup of flour and then the final cup of red bull, stirring in between each addition. The cake batter will smell very strongly of Red Bull, and I don’t advise eating the batter (which is unusual for me), but persevere, it can only go uphill from here!
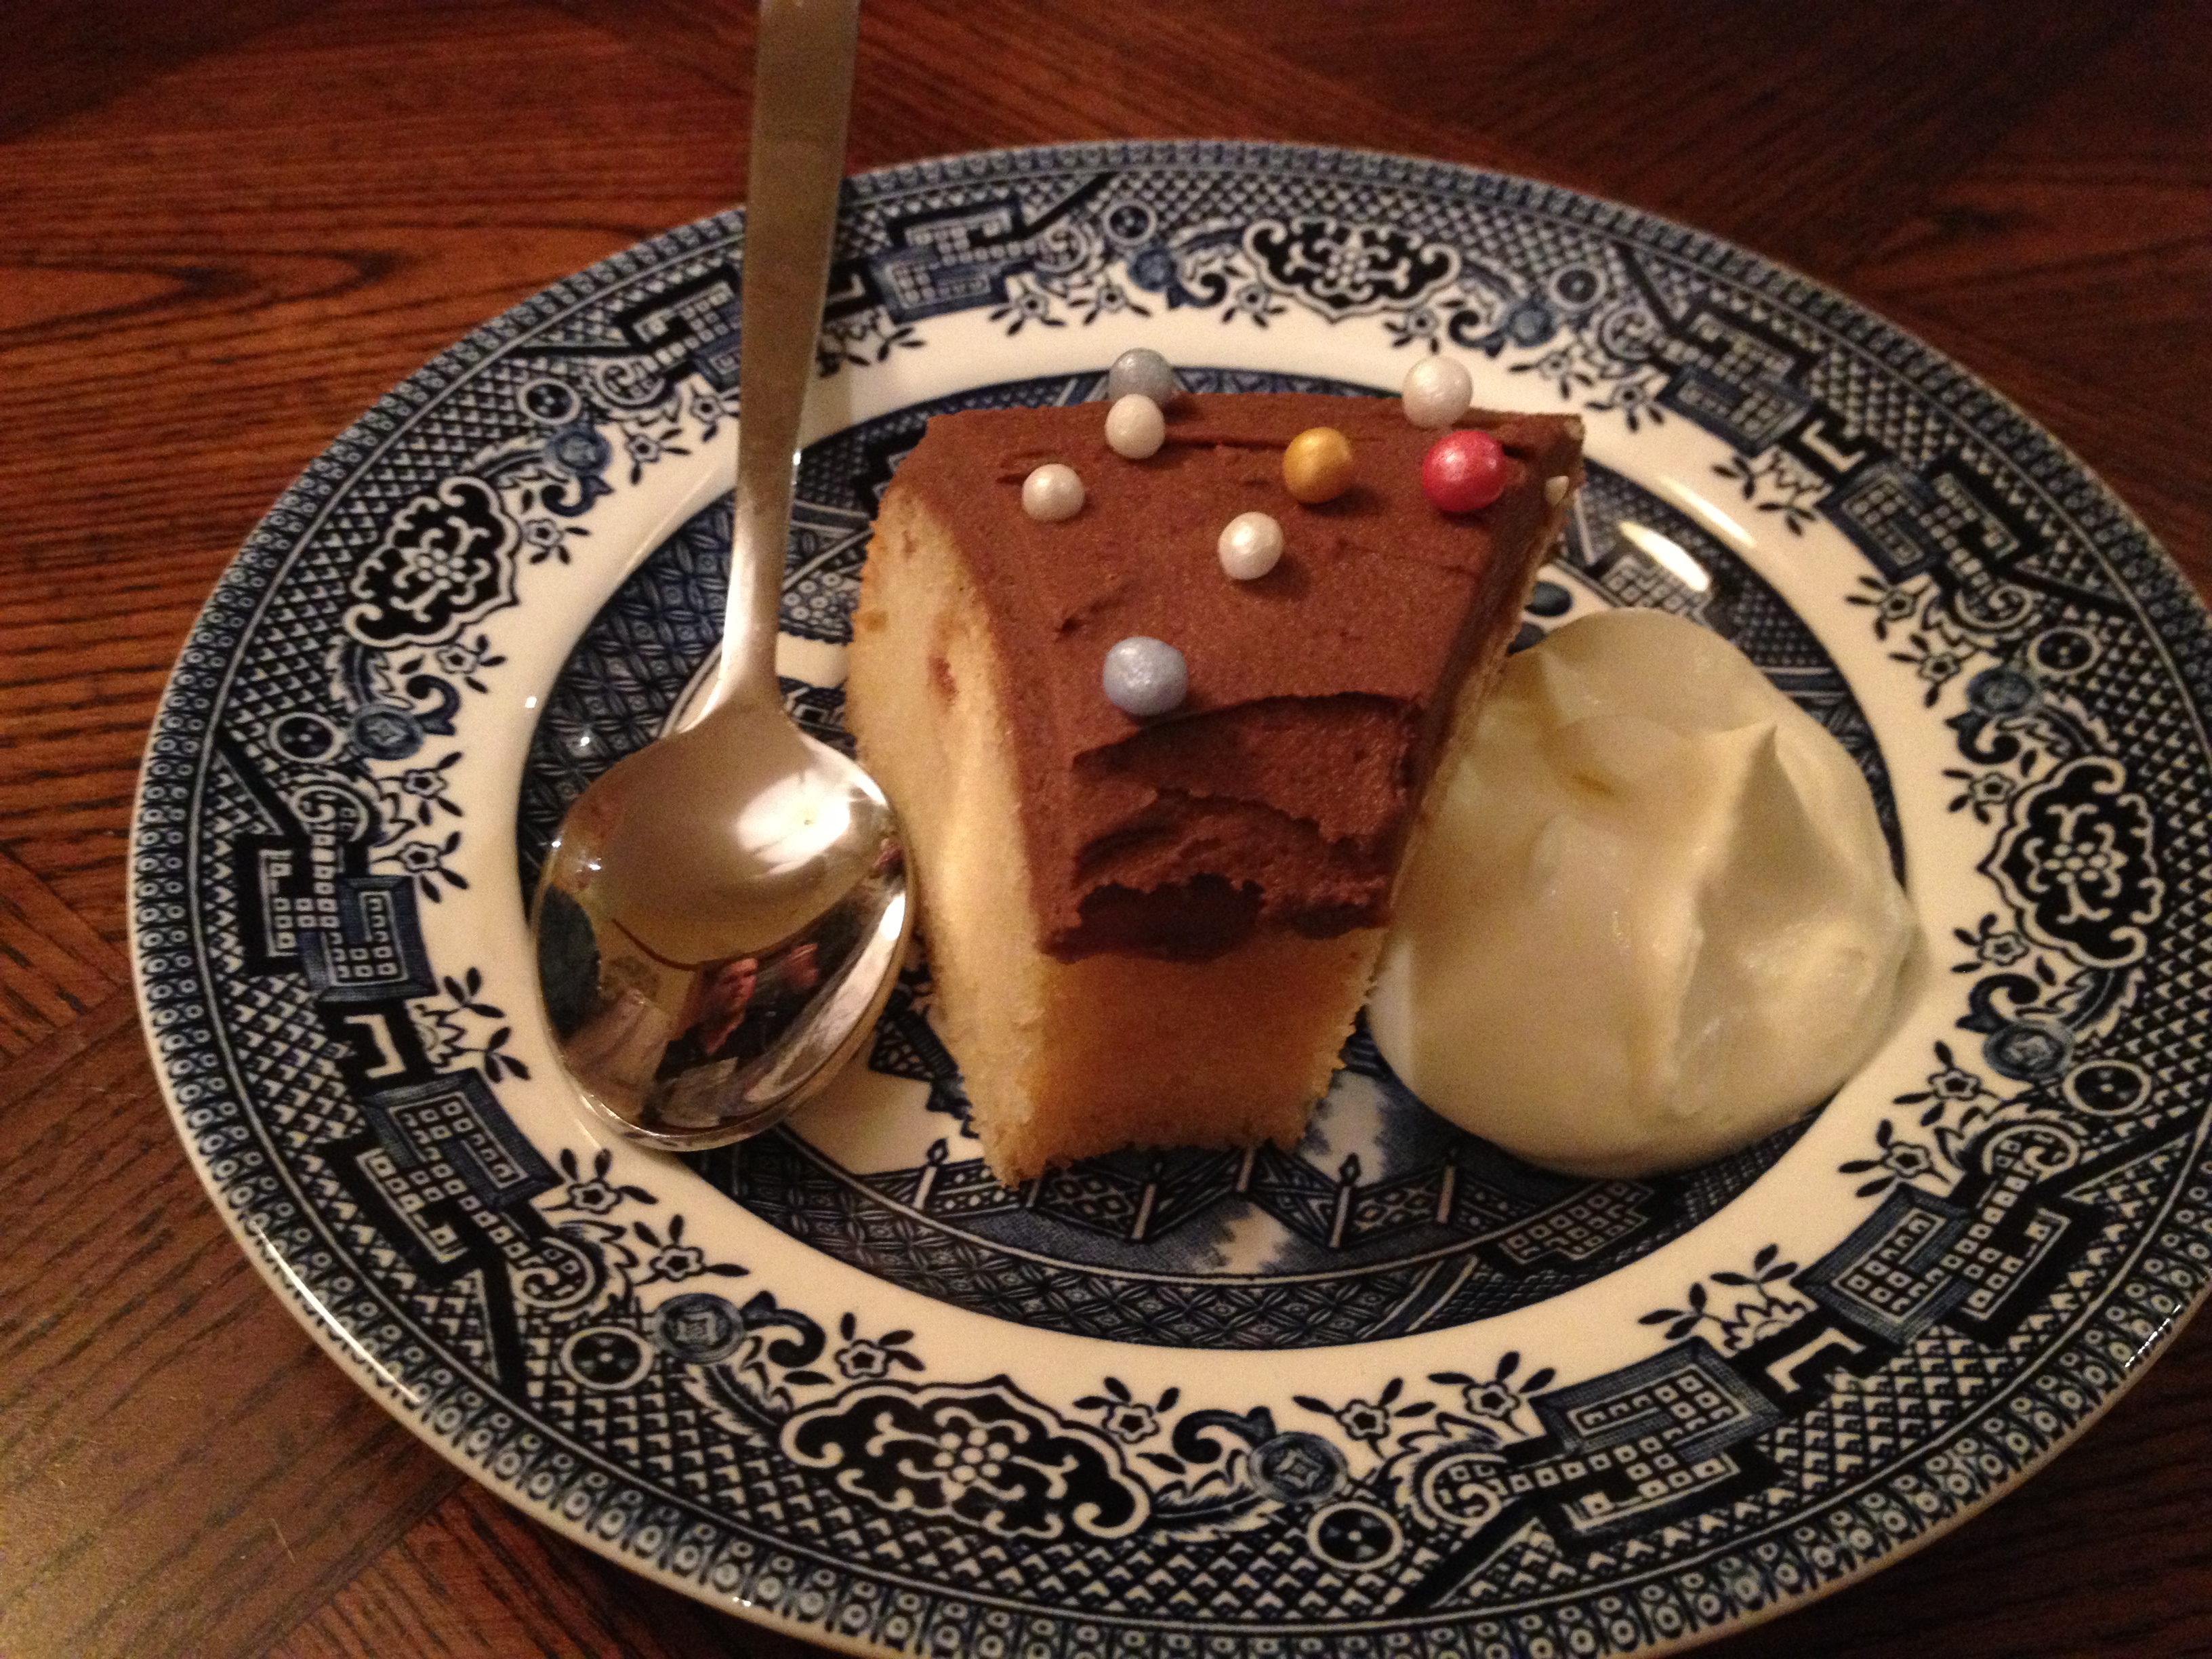
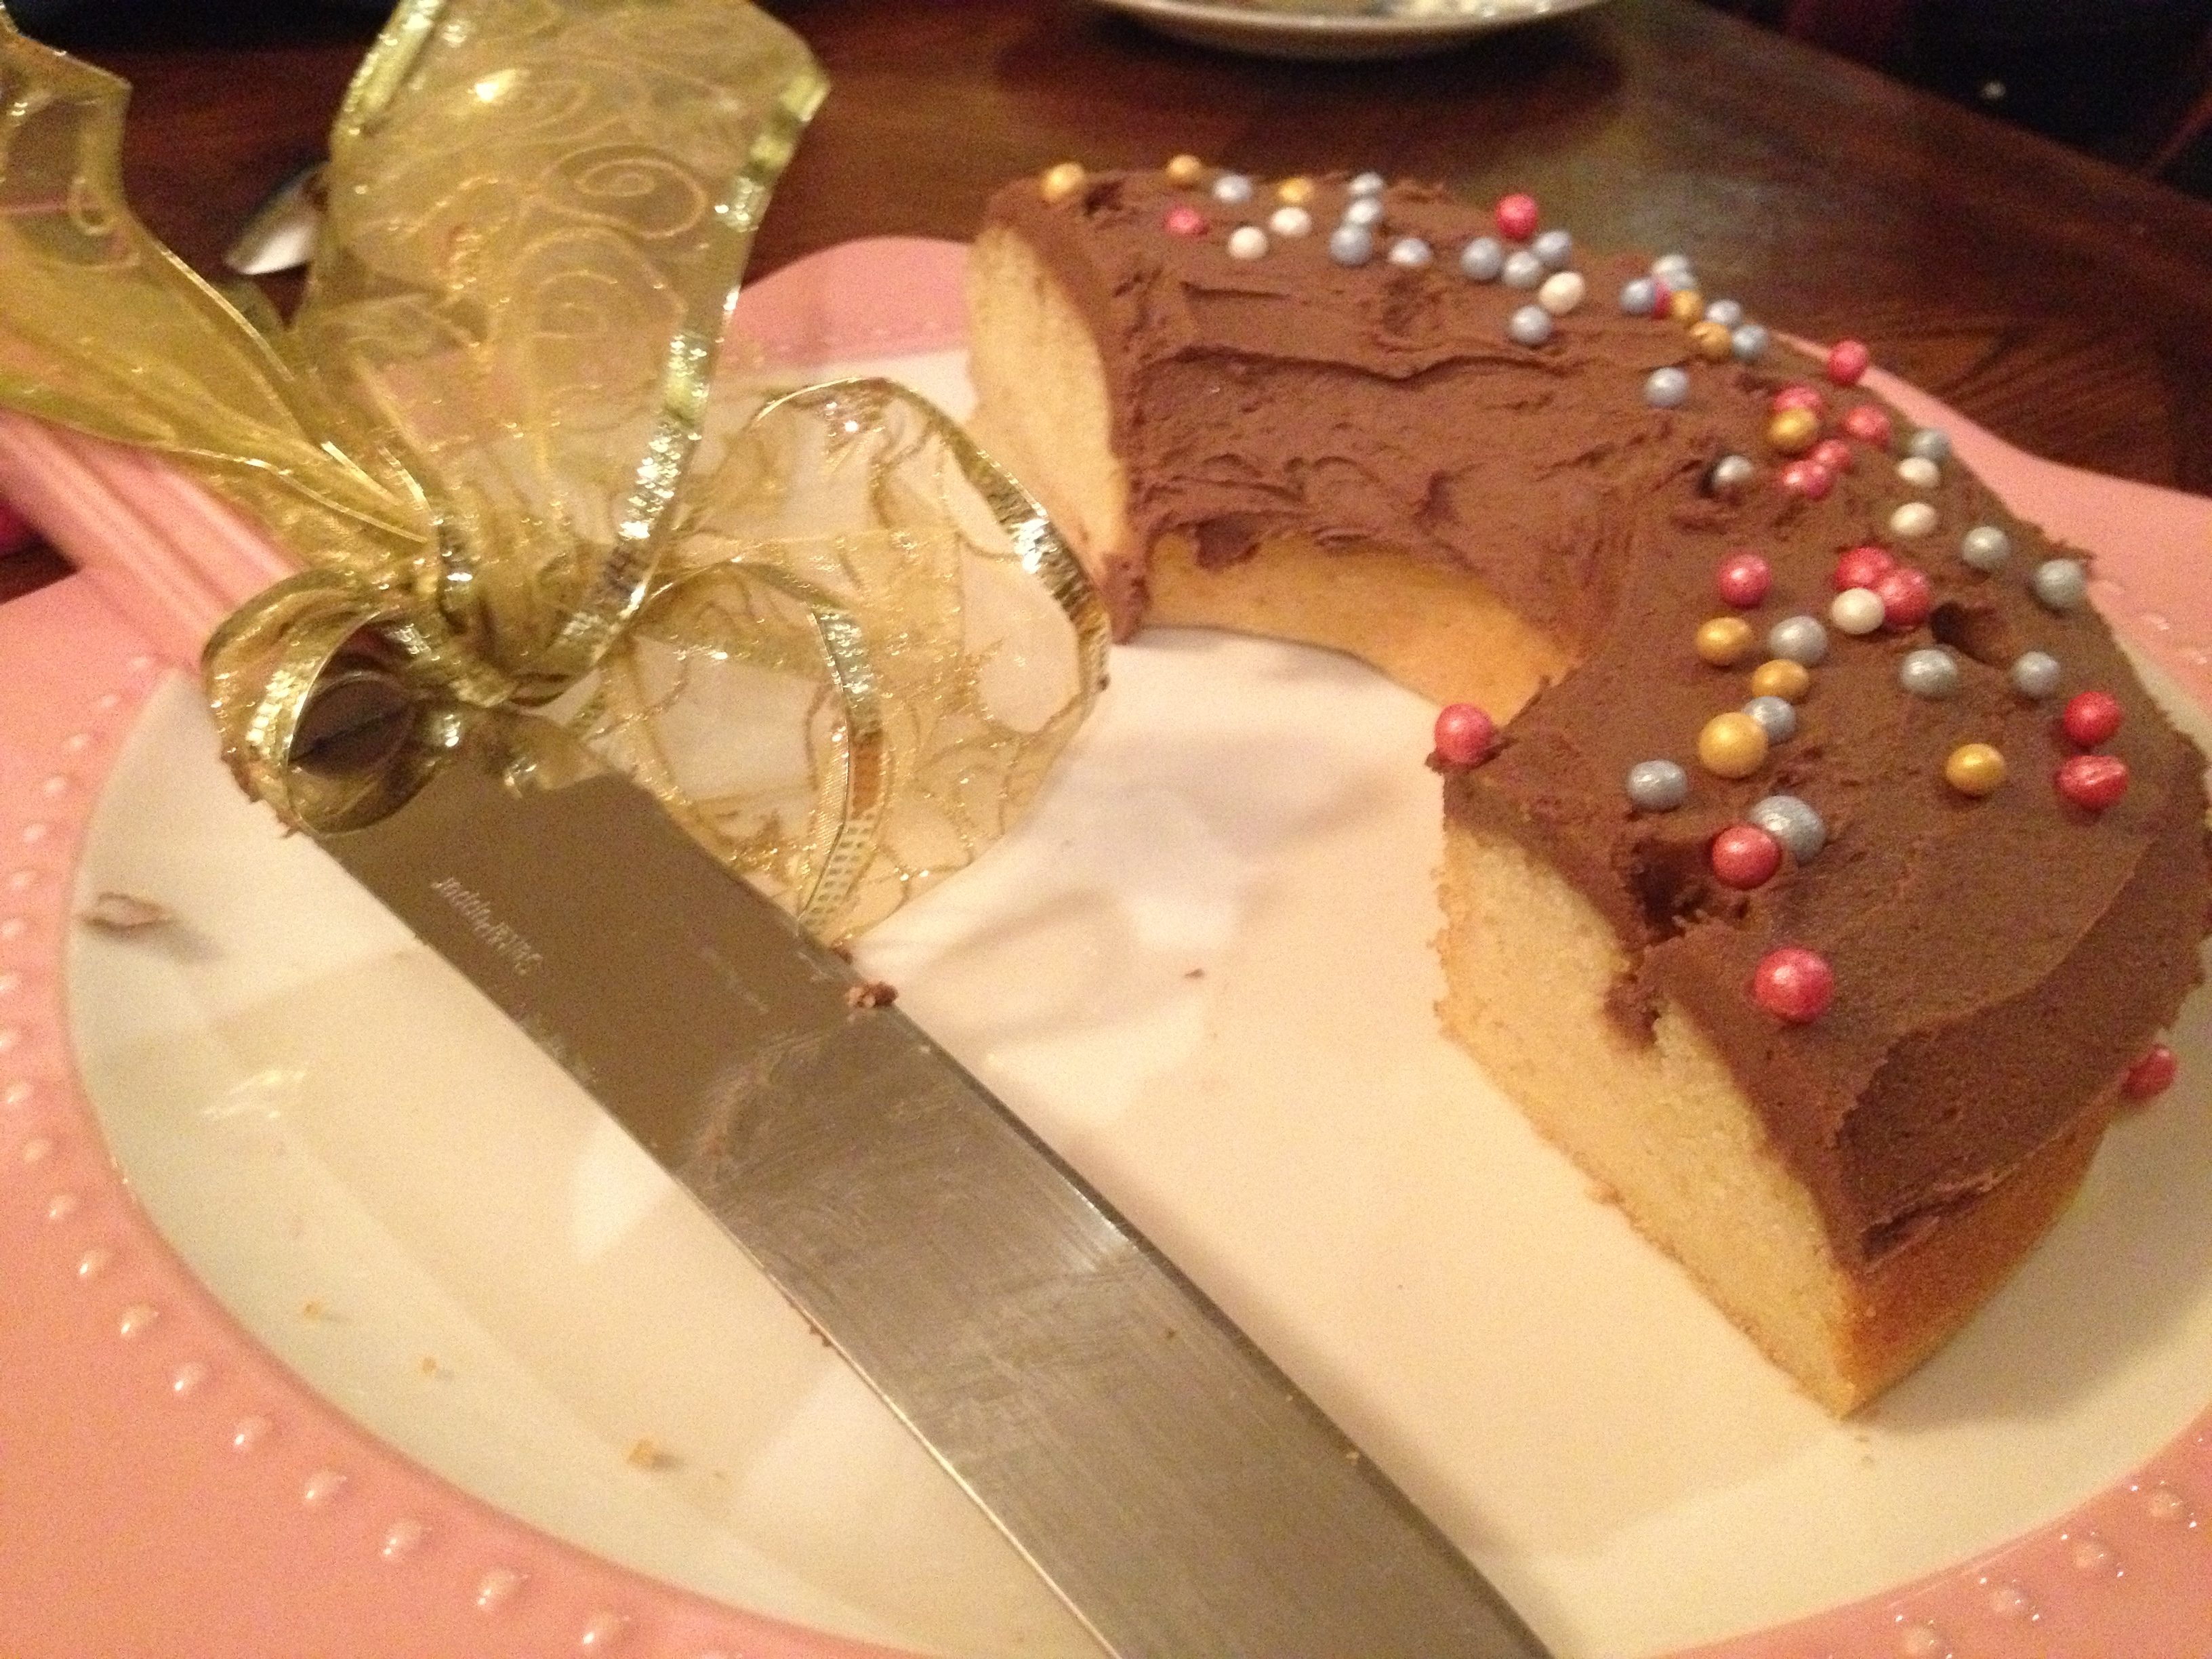 This cake was intentionally flat so that it resembled a doughnut, but you could add another teaspoon of bicarb to give it some height.
The final product was perfect for Danah, a fat skinny person’s dream!
To create a cake exactly like the one pictured, top with a chocolate buttercream and soft sugar pearls (try them, they’re great!) or experiment with other syrups/icings – tell me what you think!
Red Bull cake – great or gross?
Lemon Raspberry Meringue Pie and Craziness
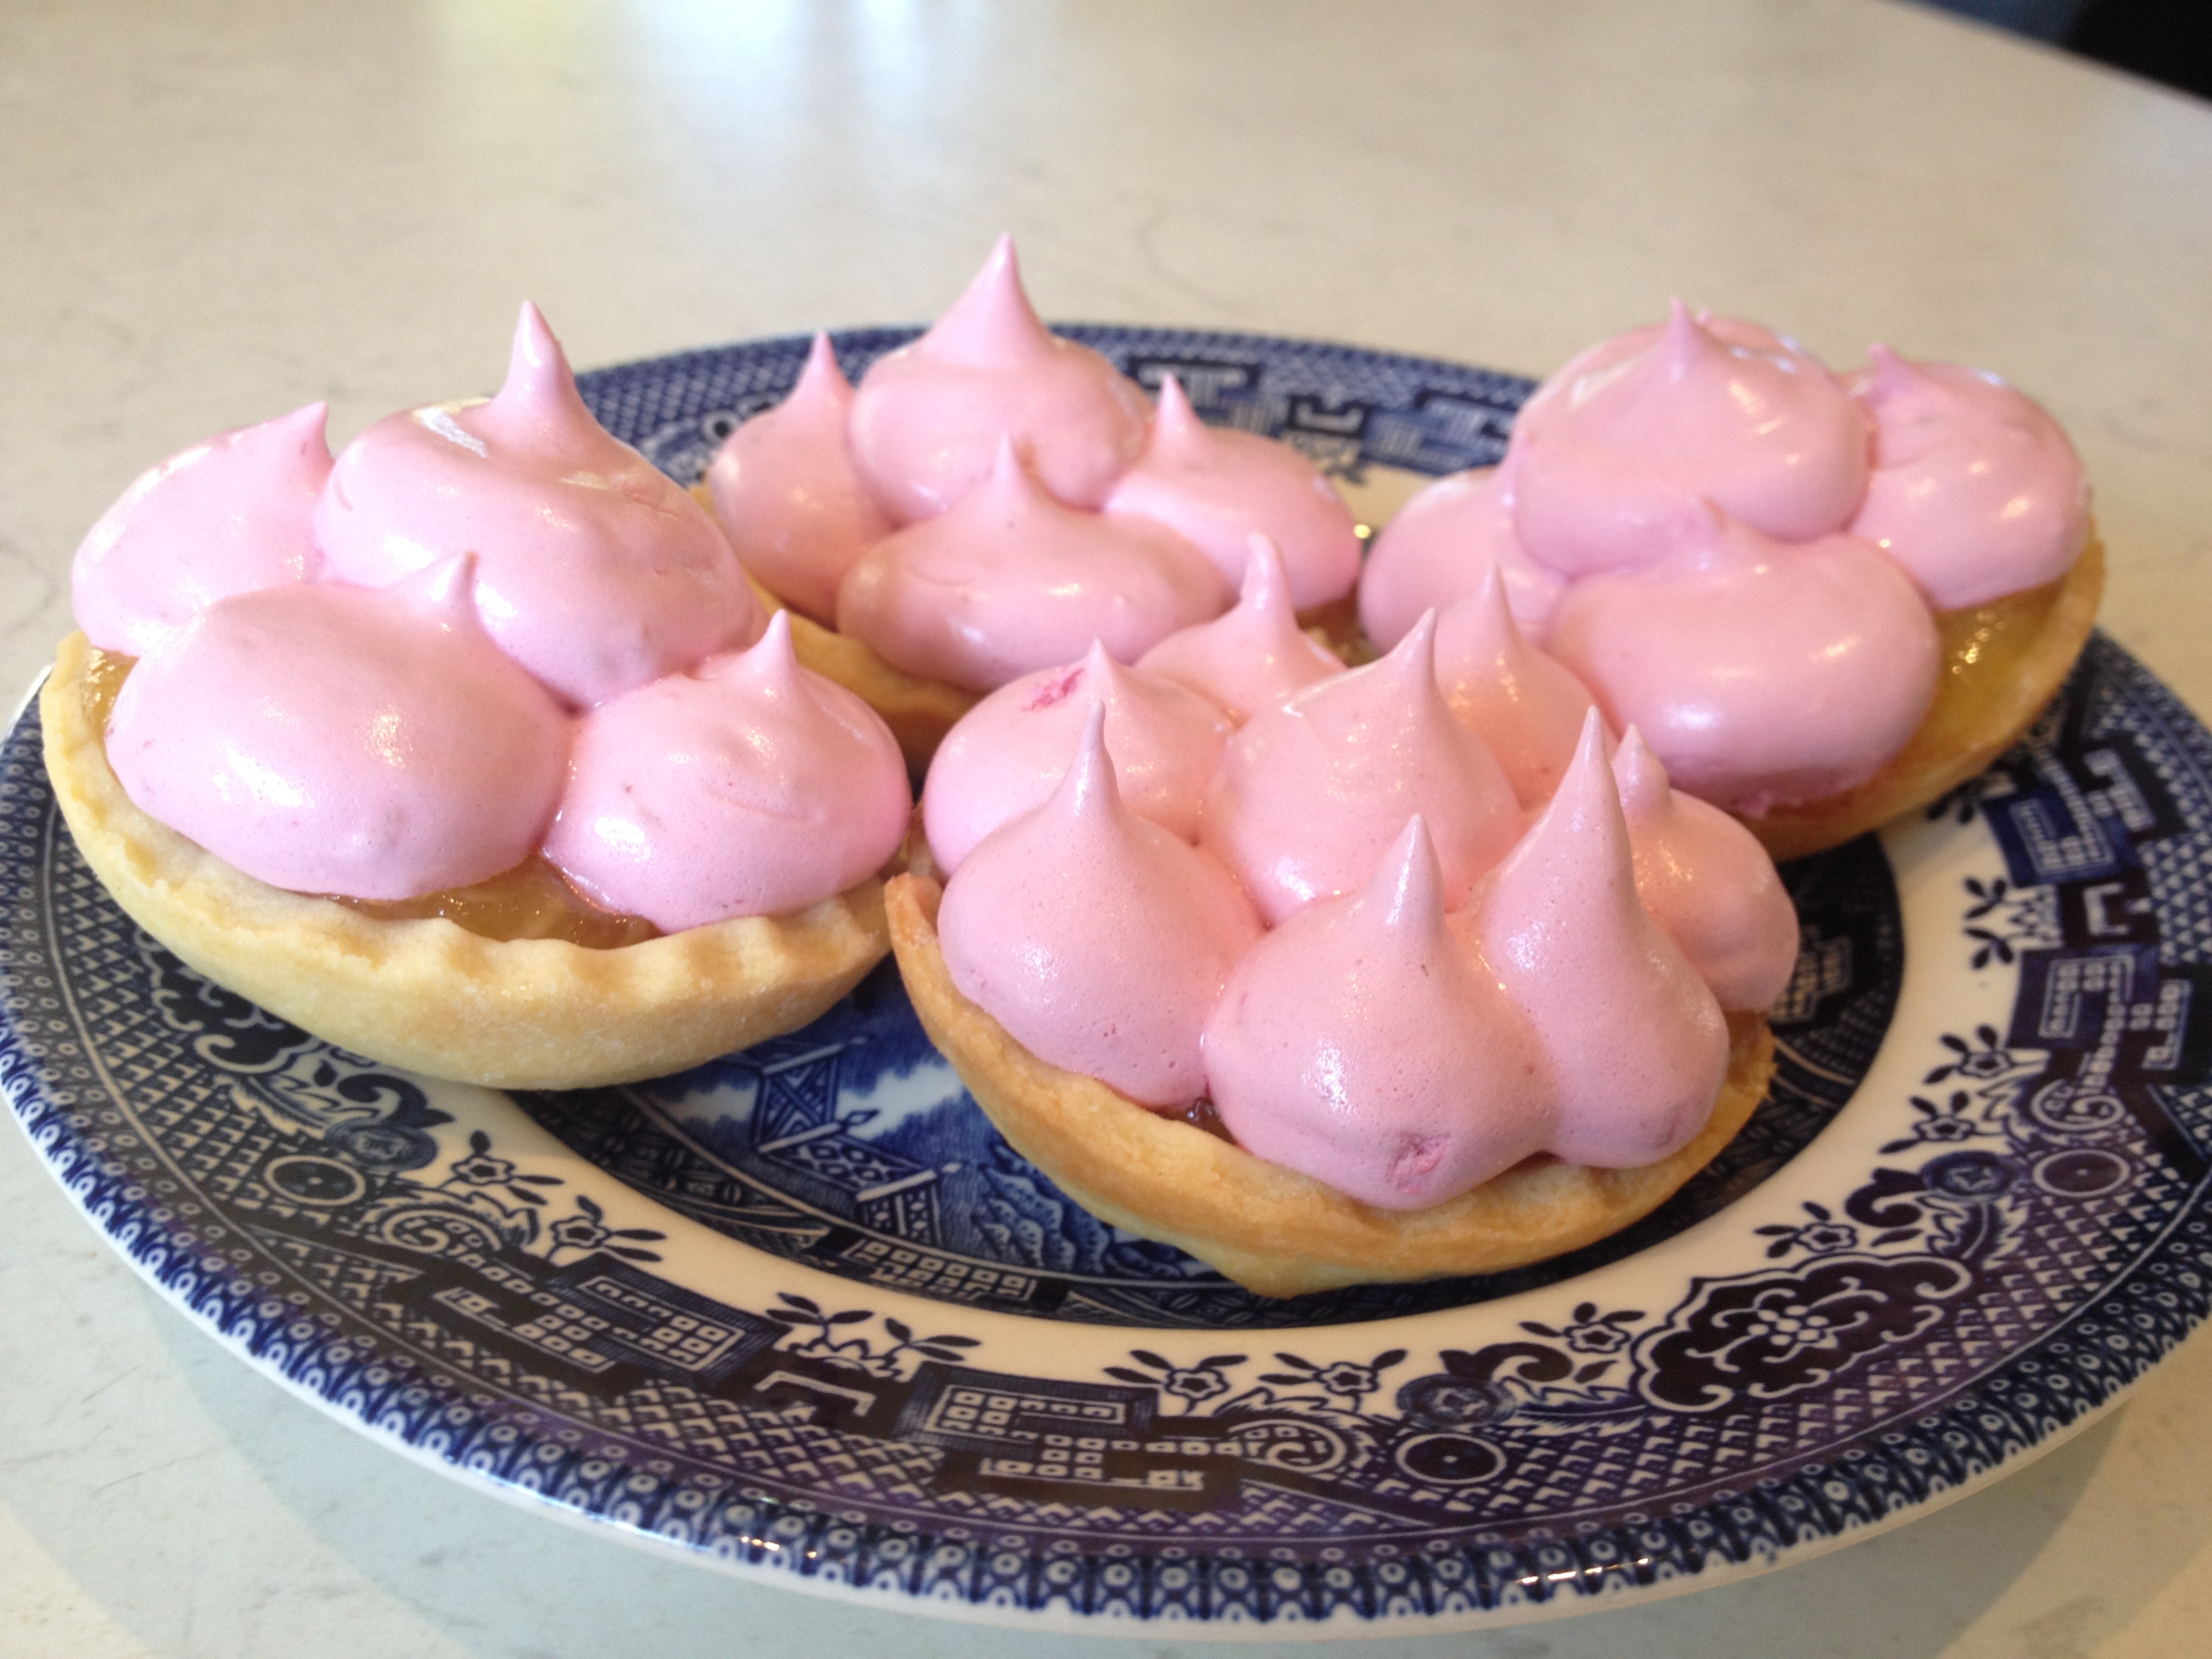
Today’s post is going to start at the end. I had made Lemon Raspberry Meringue Pies and they were a little bit crazy. The recipe worked perfectly and cooked without a hitch, but I got the feeling that the beautiful bright colours were a little unusual for the humble lemon meringue pie.
 I took a sample down to my neighbour. She’s lived one house away from me for my entire life and always played a bit of a cameo role in my life. I used to play with her grandchildren, see her at church and bump into her on my morning walks. Since I started Baking With Gab I have had so much excess food that I take her some every now and then.
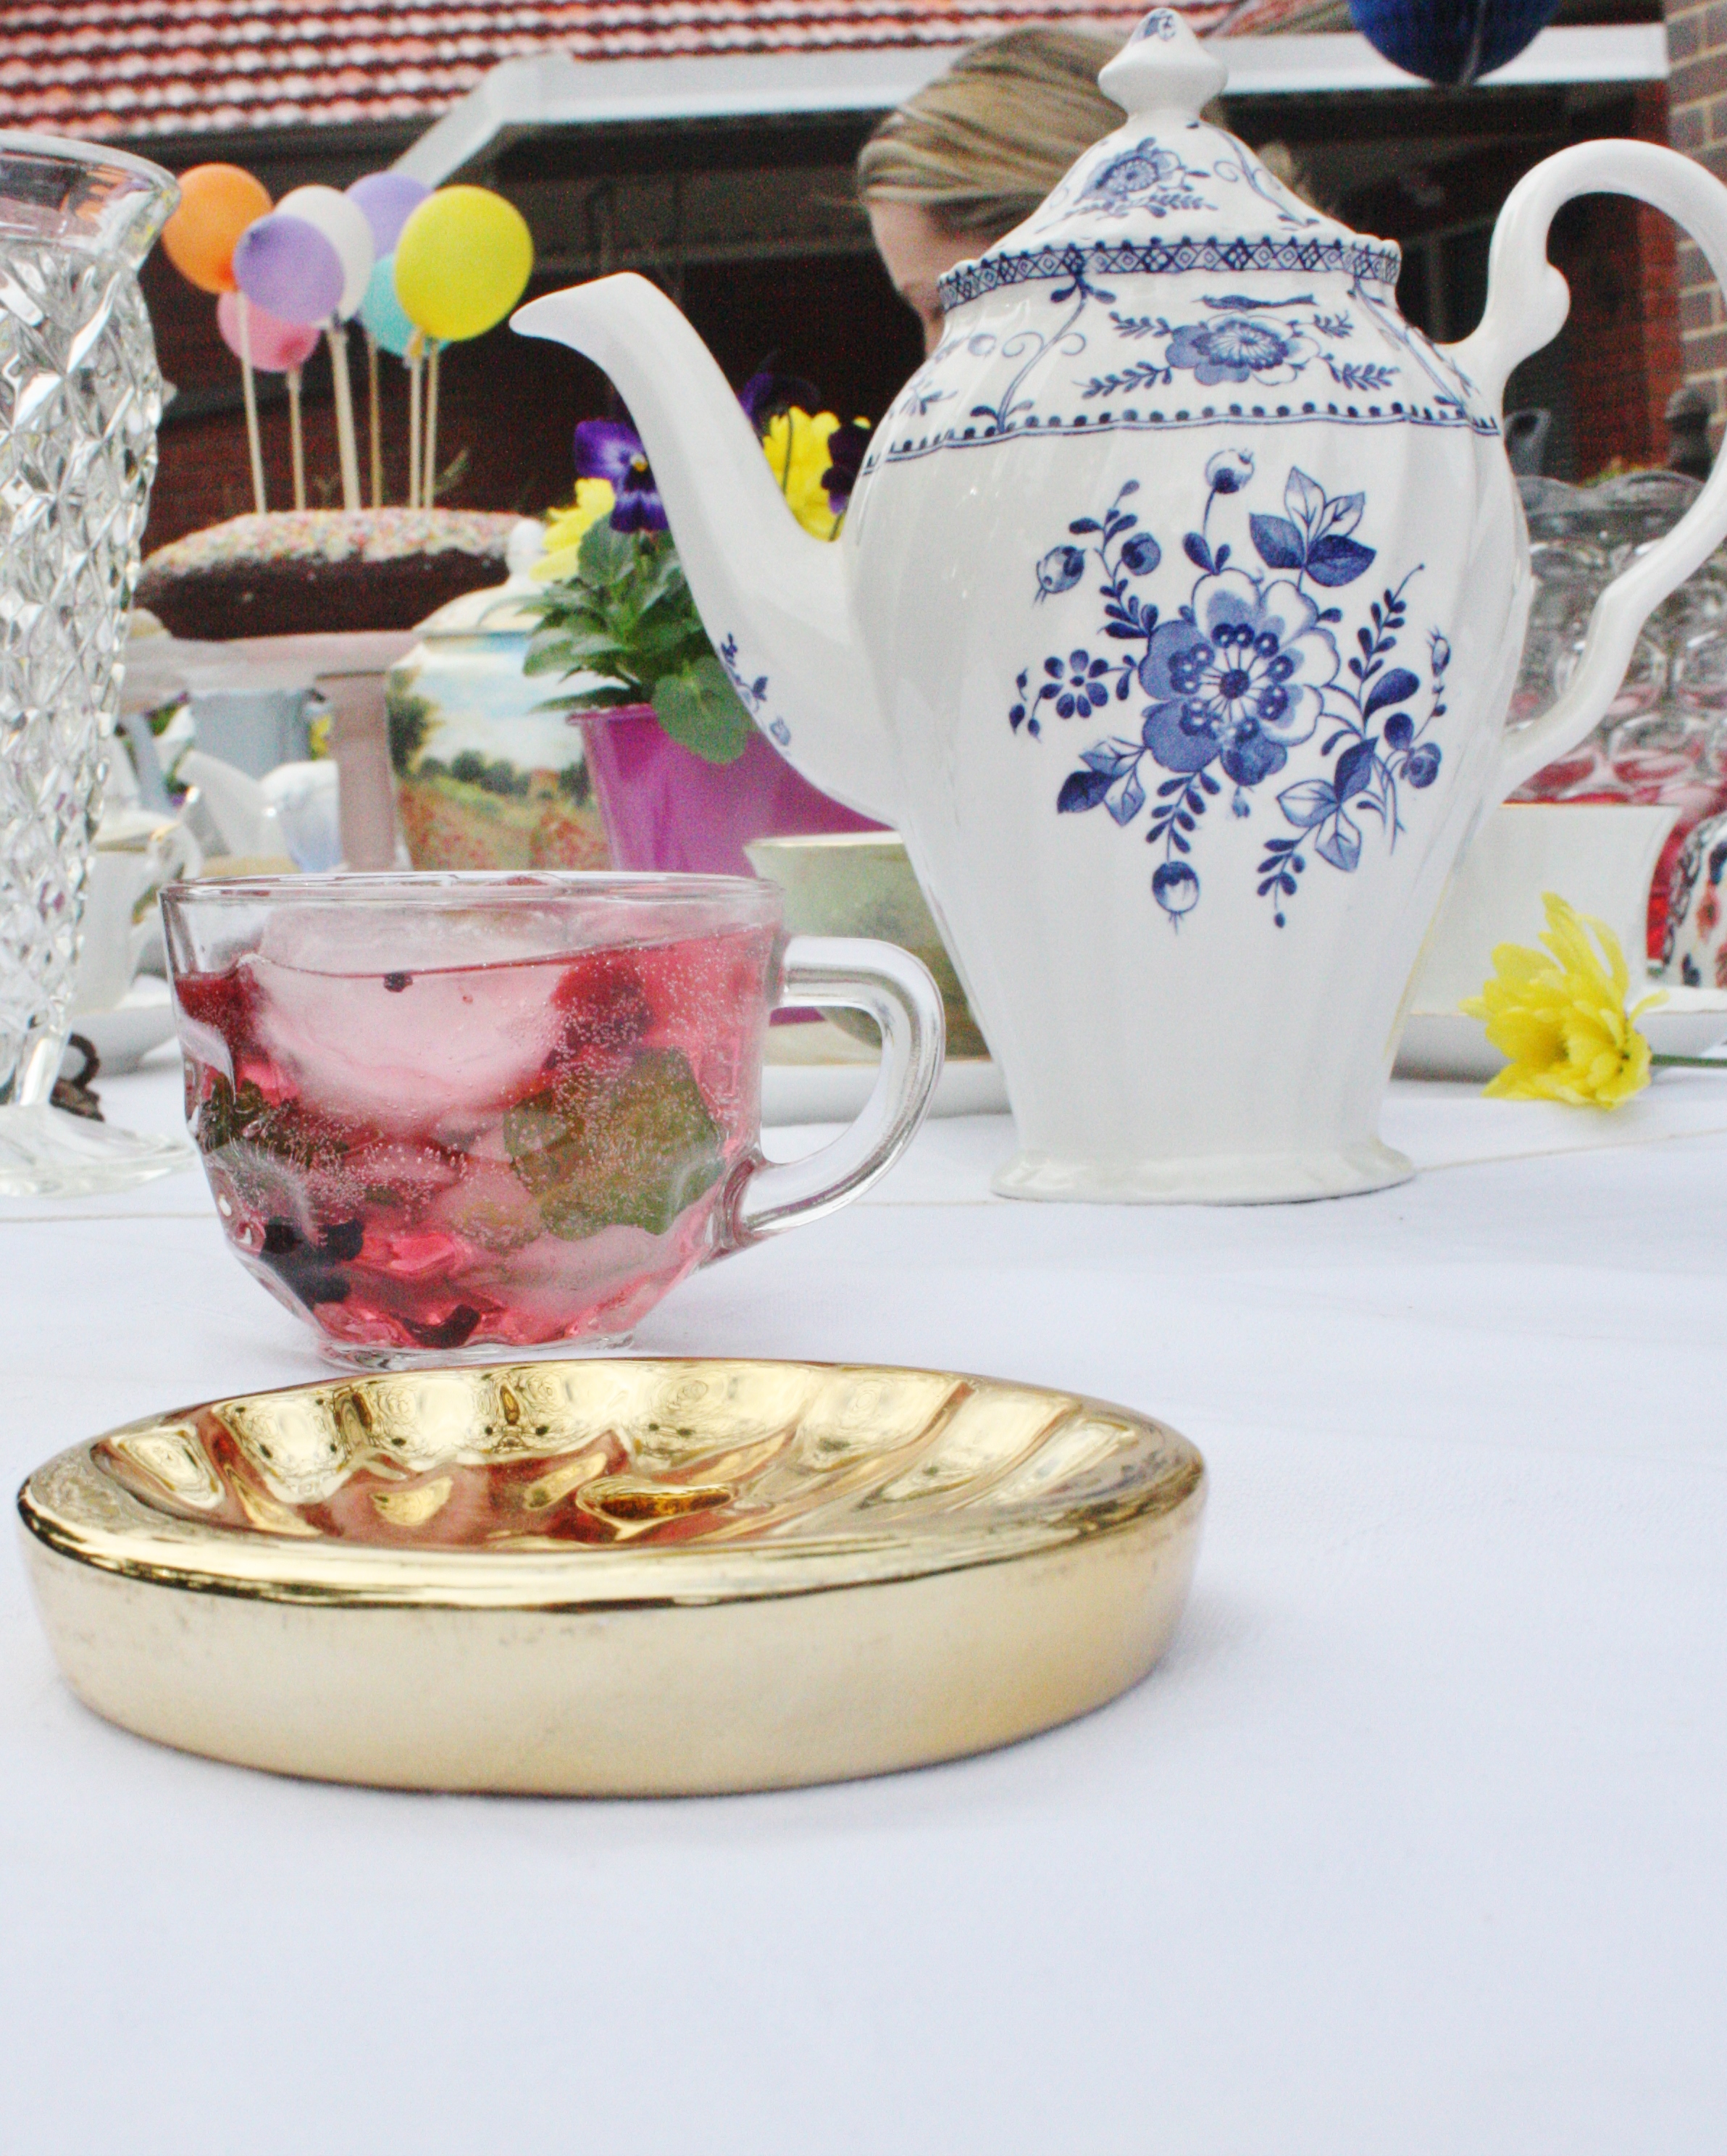
Walking through her dining room I was struck by how beautiful her tea set was. Six cups, plates and saucers were out on the table, each with its own character and story. She explained that she’d been given them all individually and it was known as a ‘crazy tea set.’ Being born in 1989, I had never heard this phrase before, but I’m now completely in love with the idea of it. She told me a little history about each and I marvelled at how beautifully they worked as a set.
My lemon raspberry meringue pie is crazy in its own way. I piped the meringues onto each one differently – they all match, but they’ve got their own little bit of flair. This was done intentionally because:
- I don’t have the patience to agonise over perfect meringues and
- I’m not really that skilled a piper.
This whole thing takes about an hour, provided you time everything right. It could easily take you about half an hour if you cheat and use lemon curd from a jar and frozen puff pastry. I wouldn’t even tell anyone you cheated! I would usually cheat as well, but I had to use up excess lemons from my nan’s tree and surplus eggs that I had in the fridge. This is perfect for using up lemons and eggs!
Crazy Lemon Raspberry Meringue Pie:
 Shortcrust pastry:
- 150g butter
- 1 ¾ cups plain flour
- ¼ cup icing sugar
- 1 egg
- 1 tsp cold water
- 3 lemons
- 1 cup sugar*
- 100g butter
- 3 eggs + one egg yolk
 *you can cut this back to ½ a cup if you want it to be super tart!
Raspberry meringue:
- 3 egg whites
- Juice of half a lemon
- 2 cups sugar
- 200g frozen raspberries
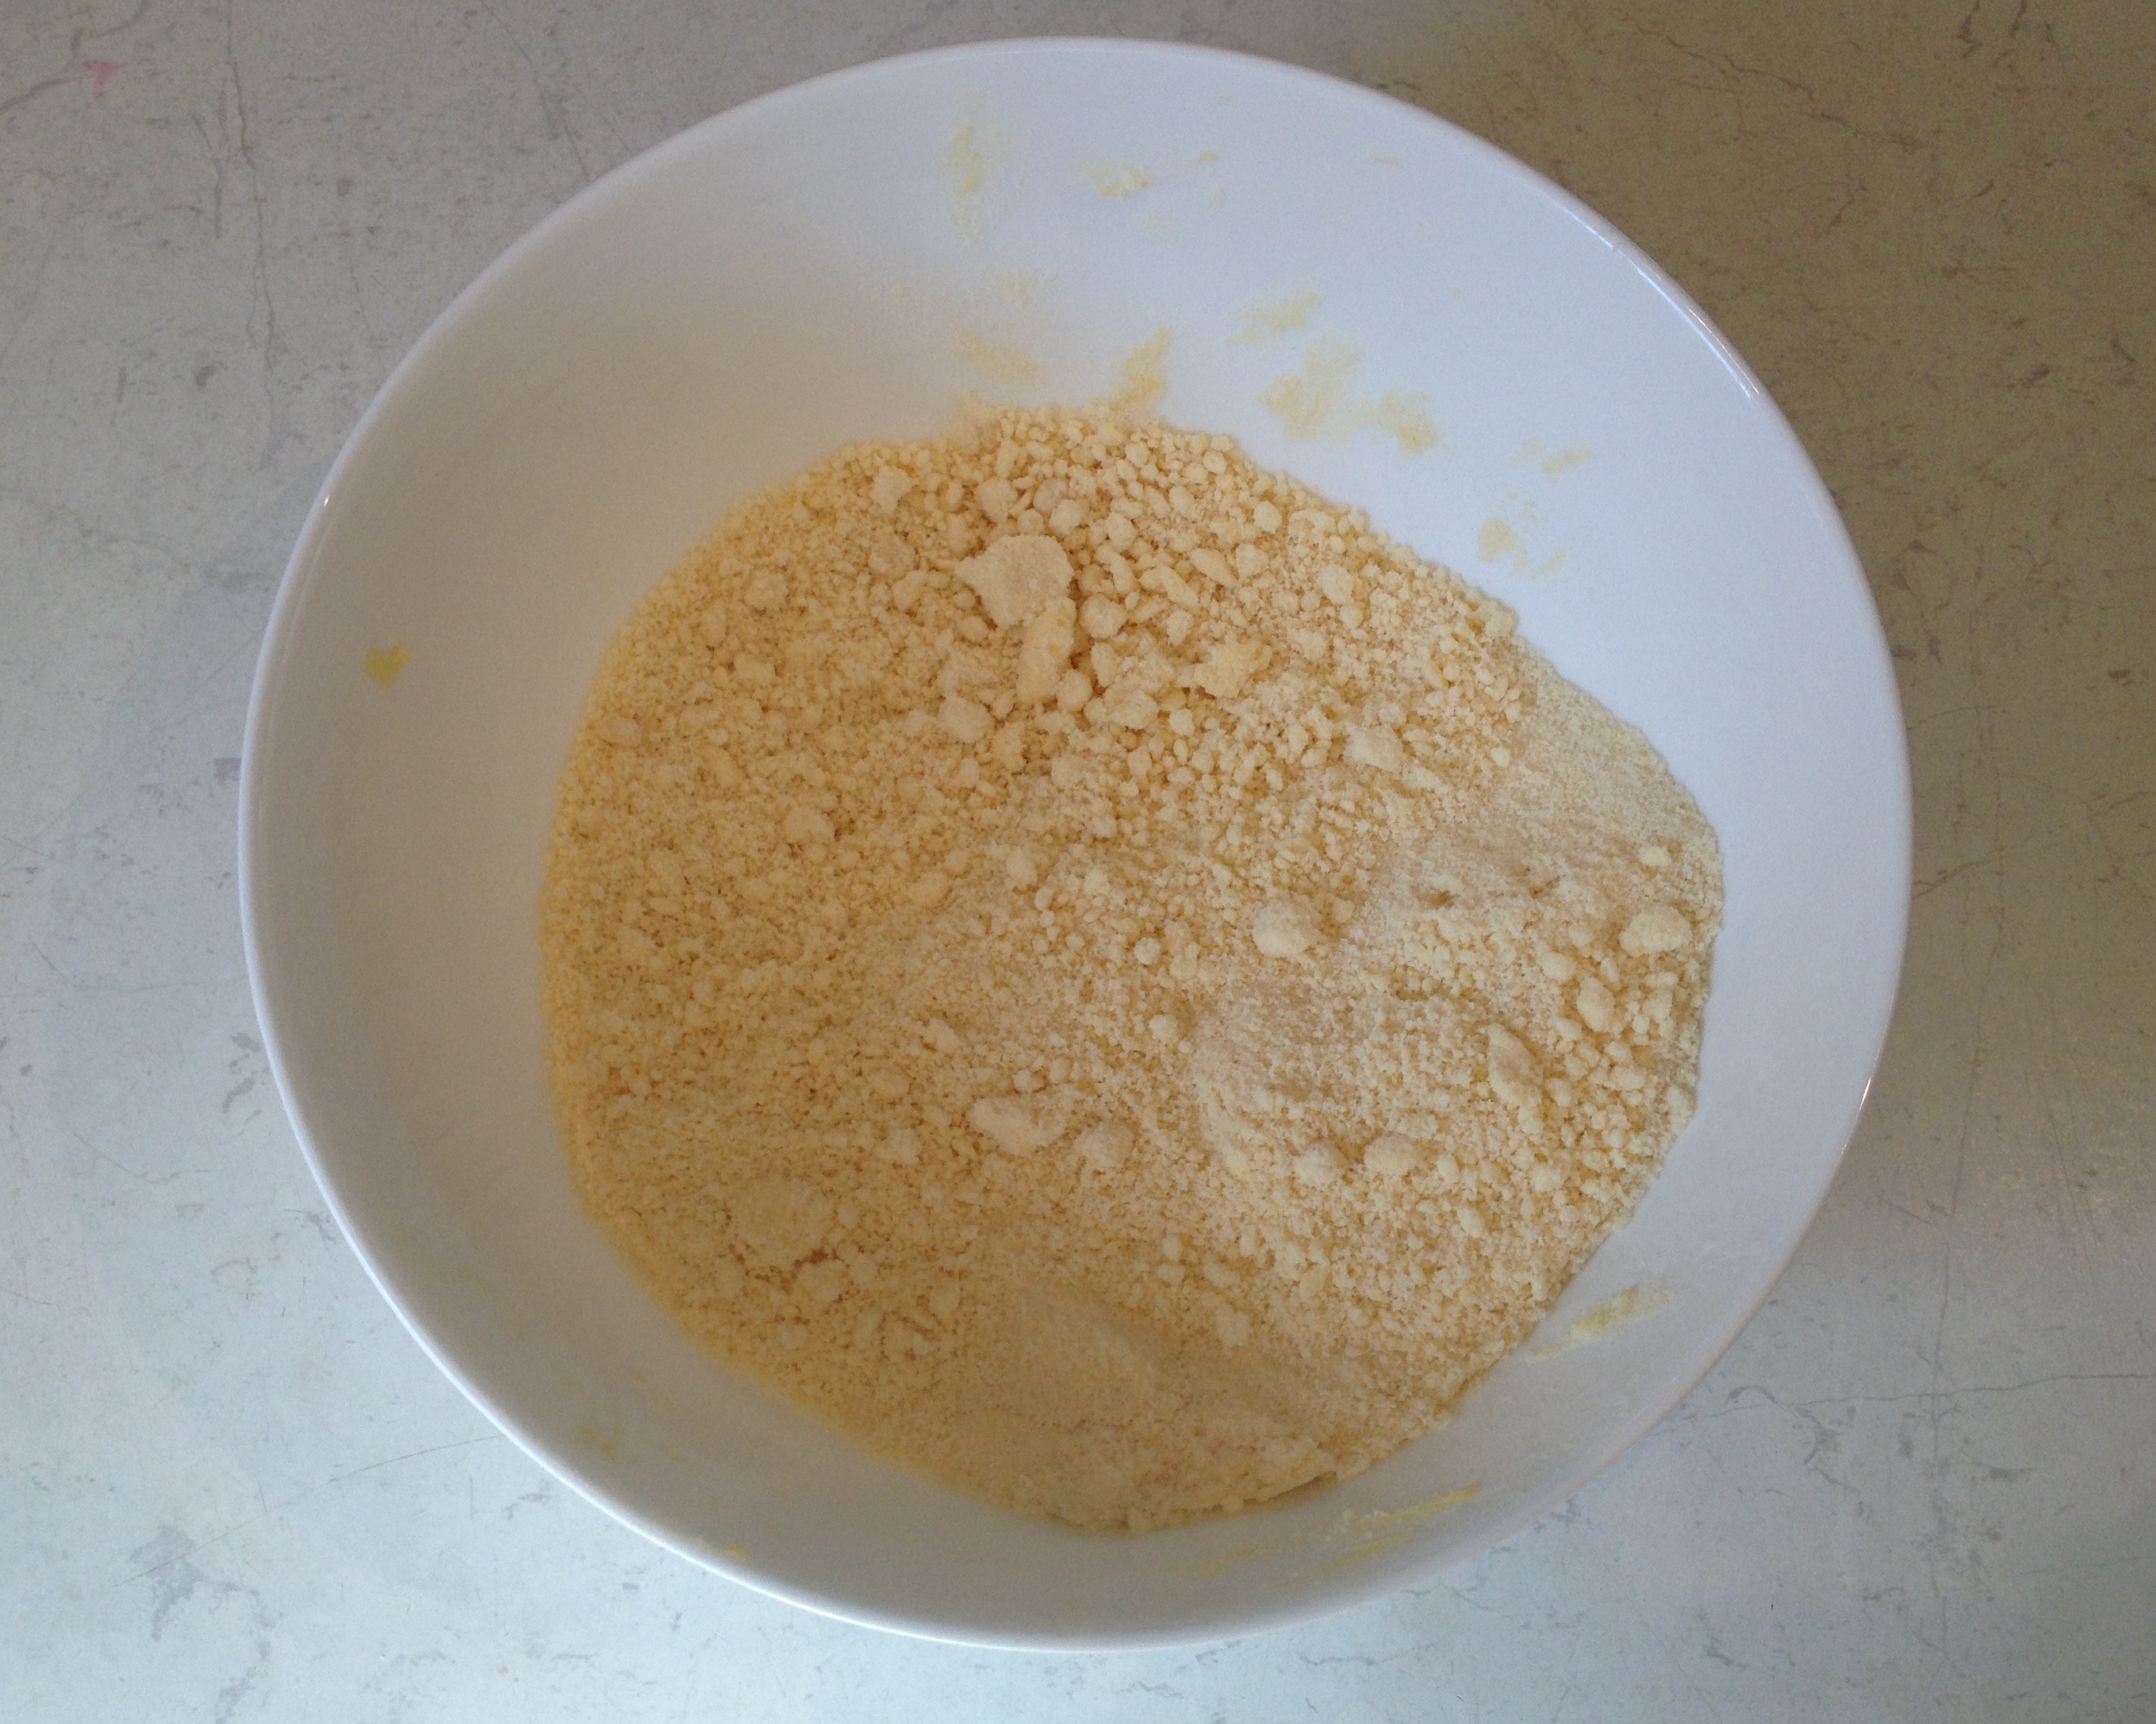 Dice up the butter and put it in a bowl with the flour and sugar. Grab a butter knife and cut through the butter to mix the flour and sugar into it (I use this method because my hands don’t get as dirty.) When the butter is in small pieces and covered in flour, use your fingertips to rub the mixture together until it resembles breadcrumbs. Add in your egg and teaspoon of water so that the breadcrumbs combine to make a pastry. Try not to knead, but gently squash it into a ball. Cover the bowl with cling wrap and pop it in the fridge for about 20 minutes while you make the lemon curd.
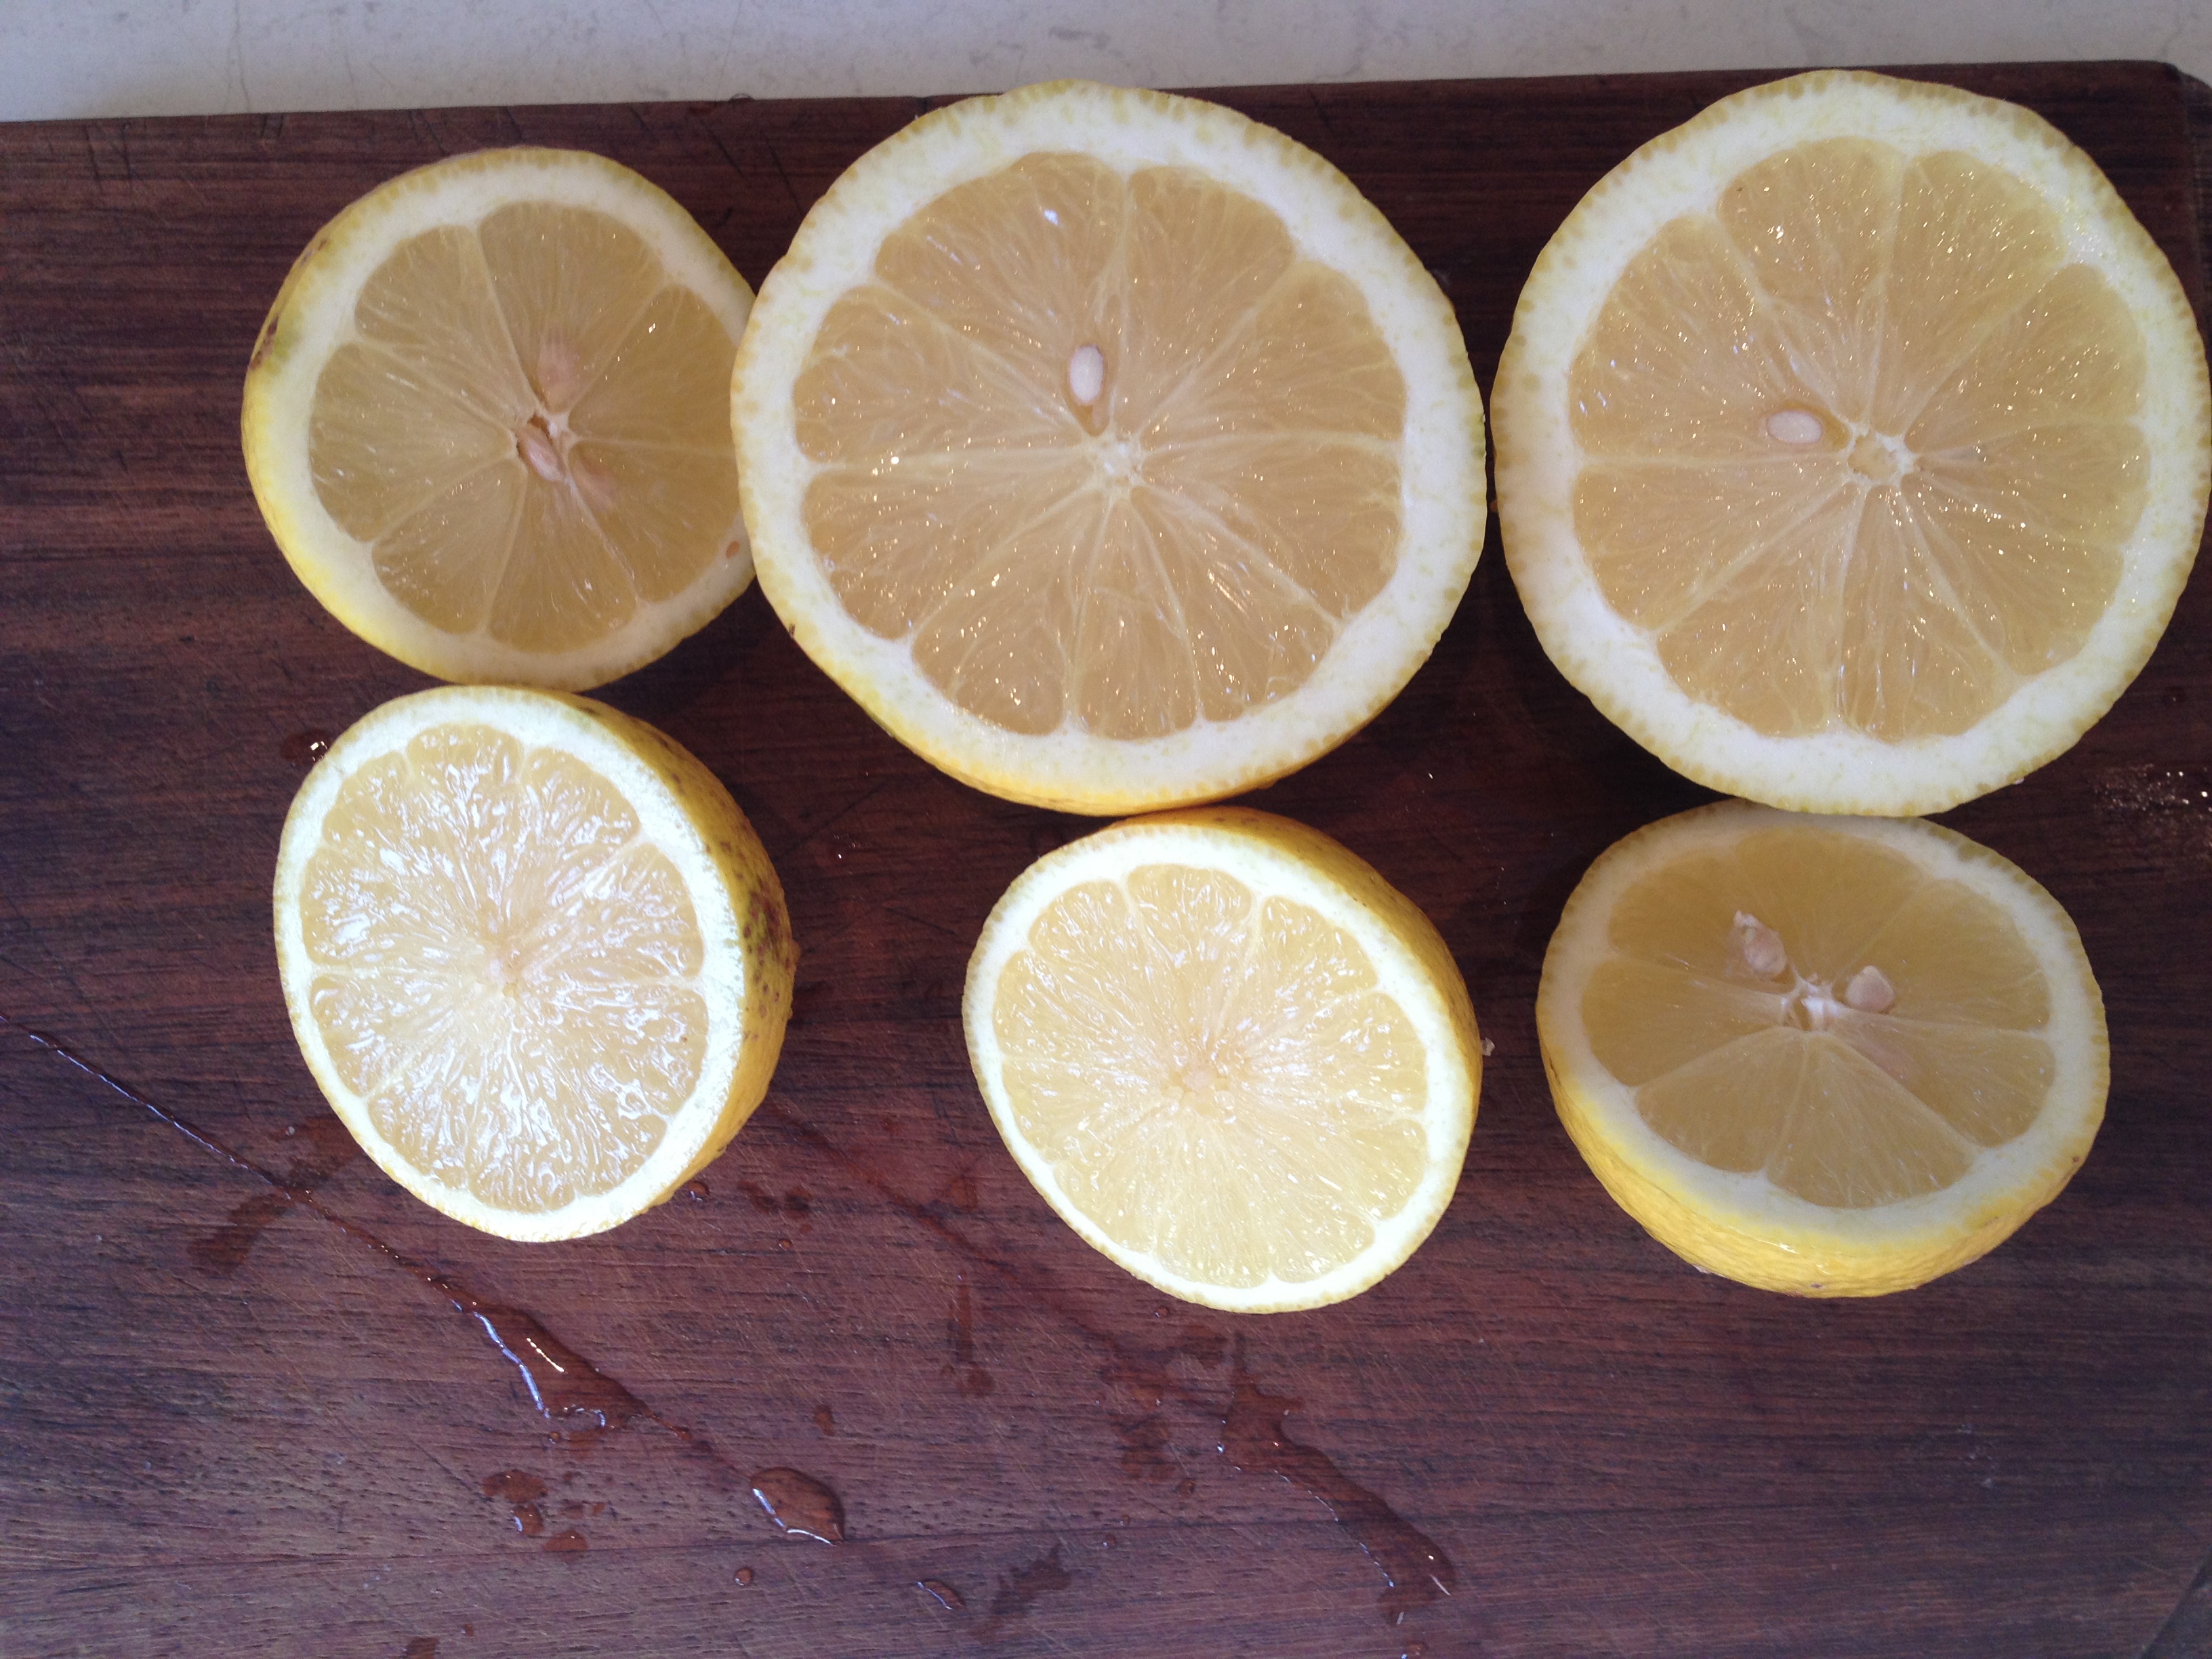 Zest and juice your lemons. Or juice then zest them – whatever works for you. Put the lemon juice, zest, sugar and butter into a pan over a medium heat. Stir the mixture until the butter is melted. Whisk the eggs and egg yolk together, then add it slowly to the lemony mixture. Turn the heat up to high and allow it bubble quite fiercely. Whisk it for about five minutes (making sure it doesn’t burn) until it starts to thicken. You can also use your whisk to fish out any chunky bits of lemon that may have snuck through when you juiced the lemons. Take off the heat and transfer into a cool bowl so it can cool.
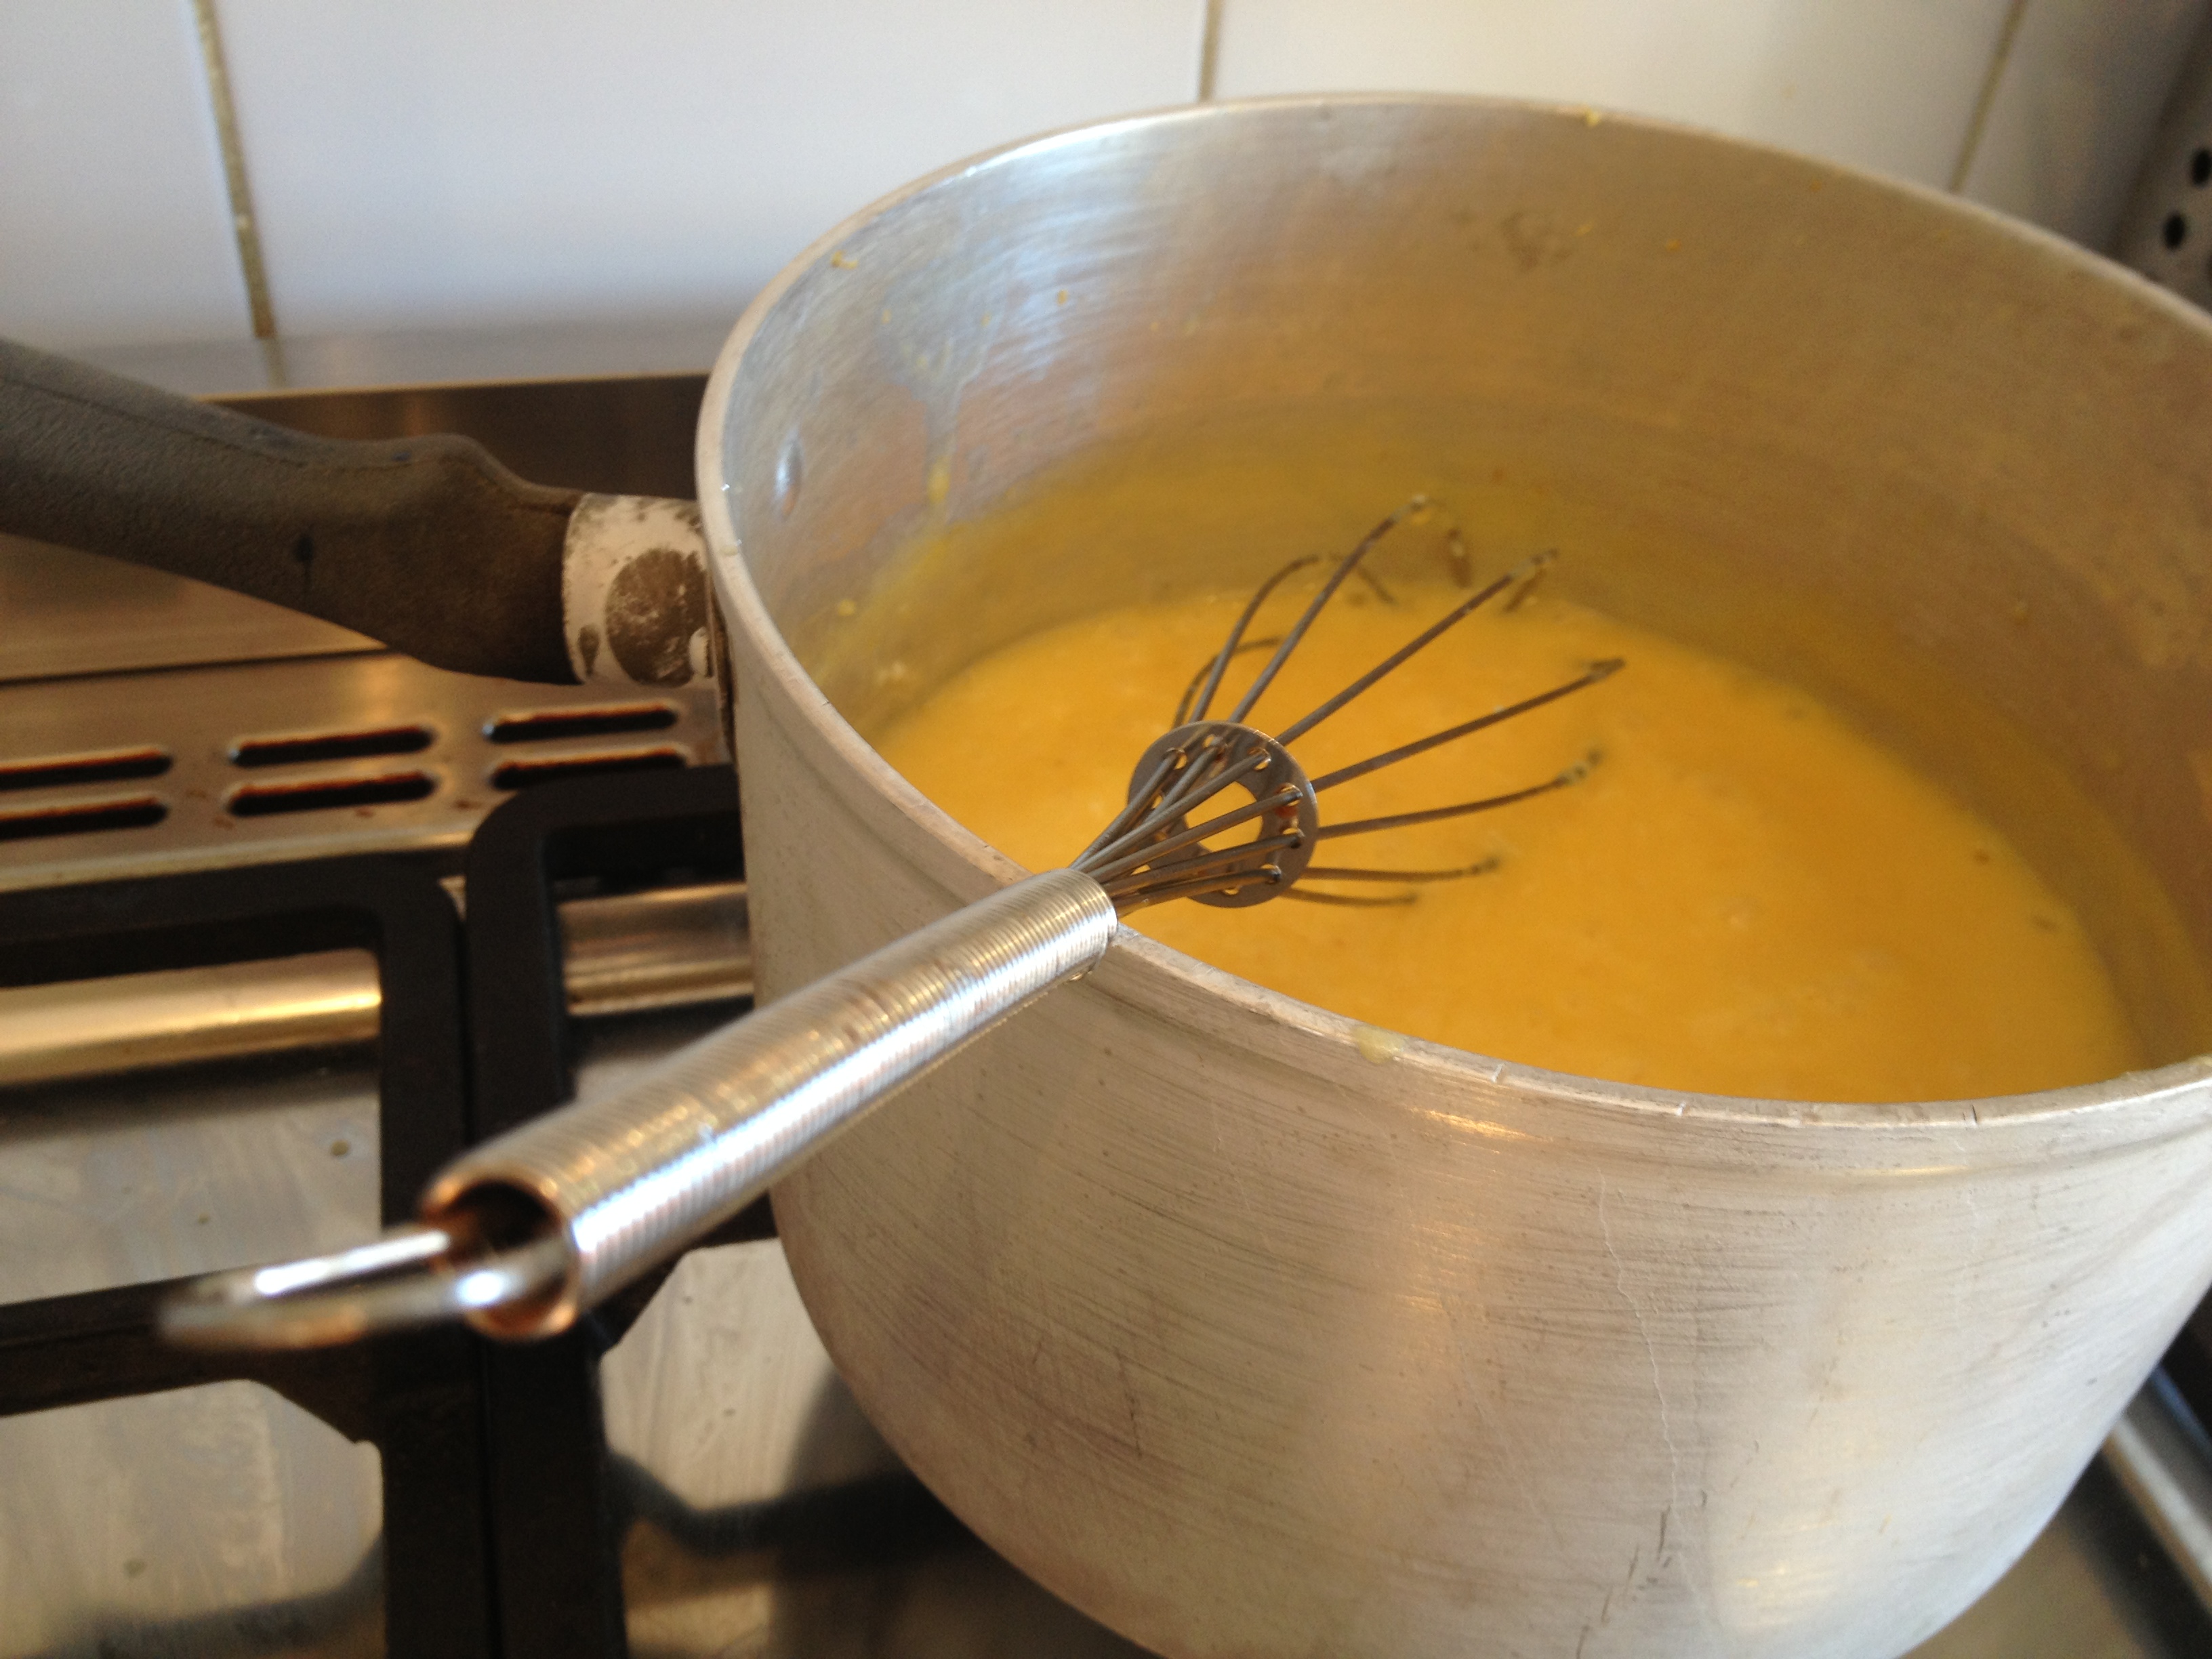
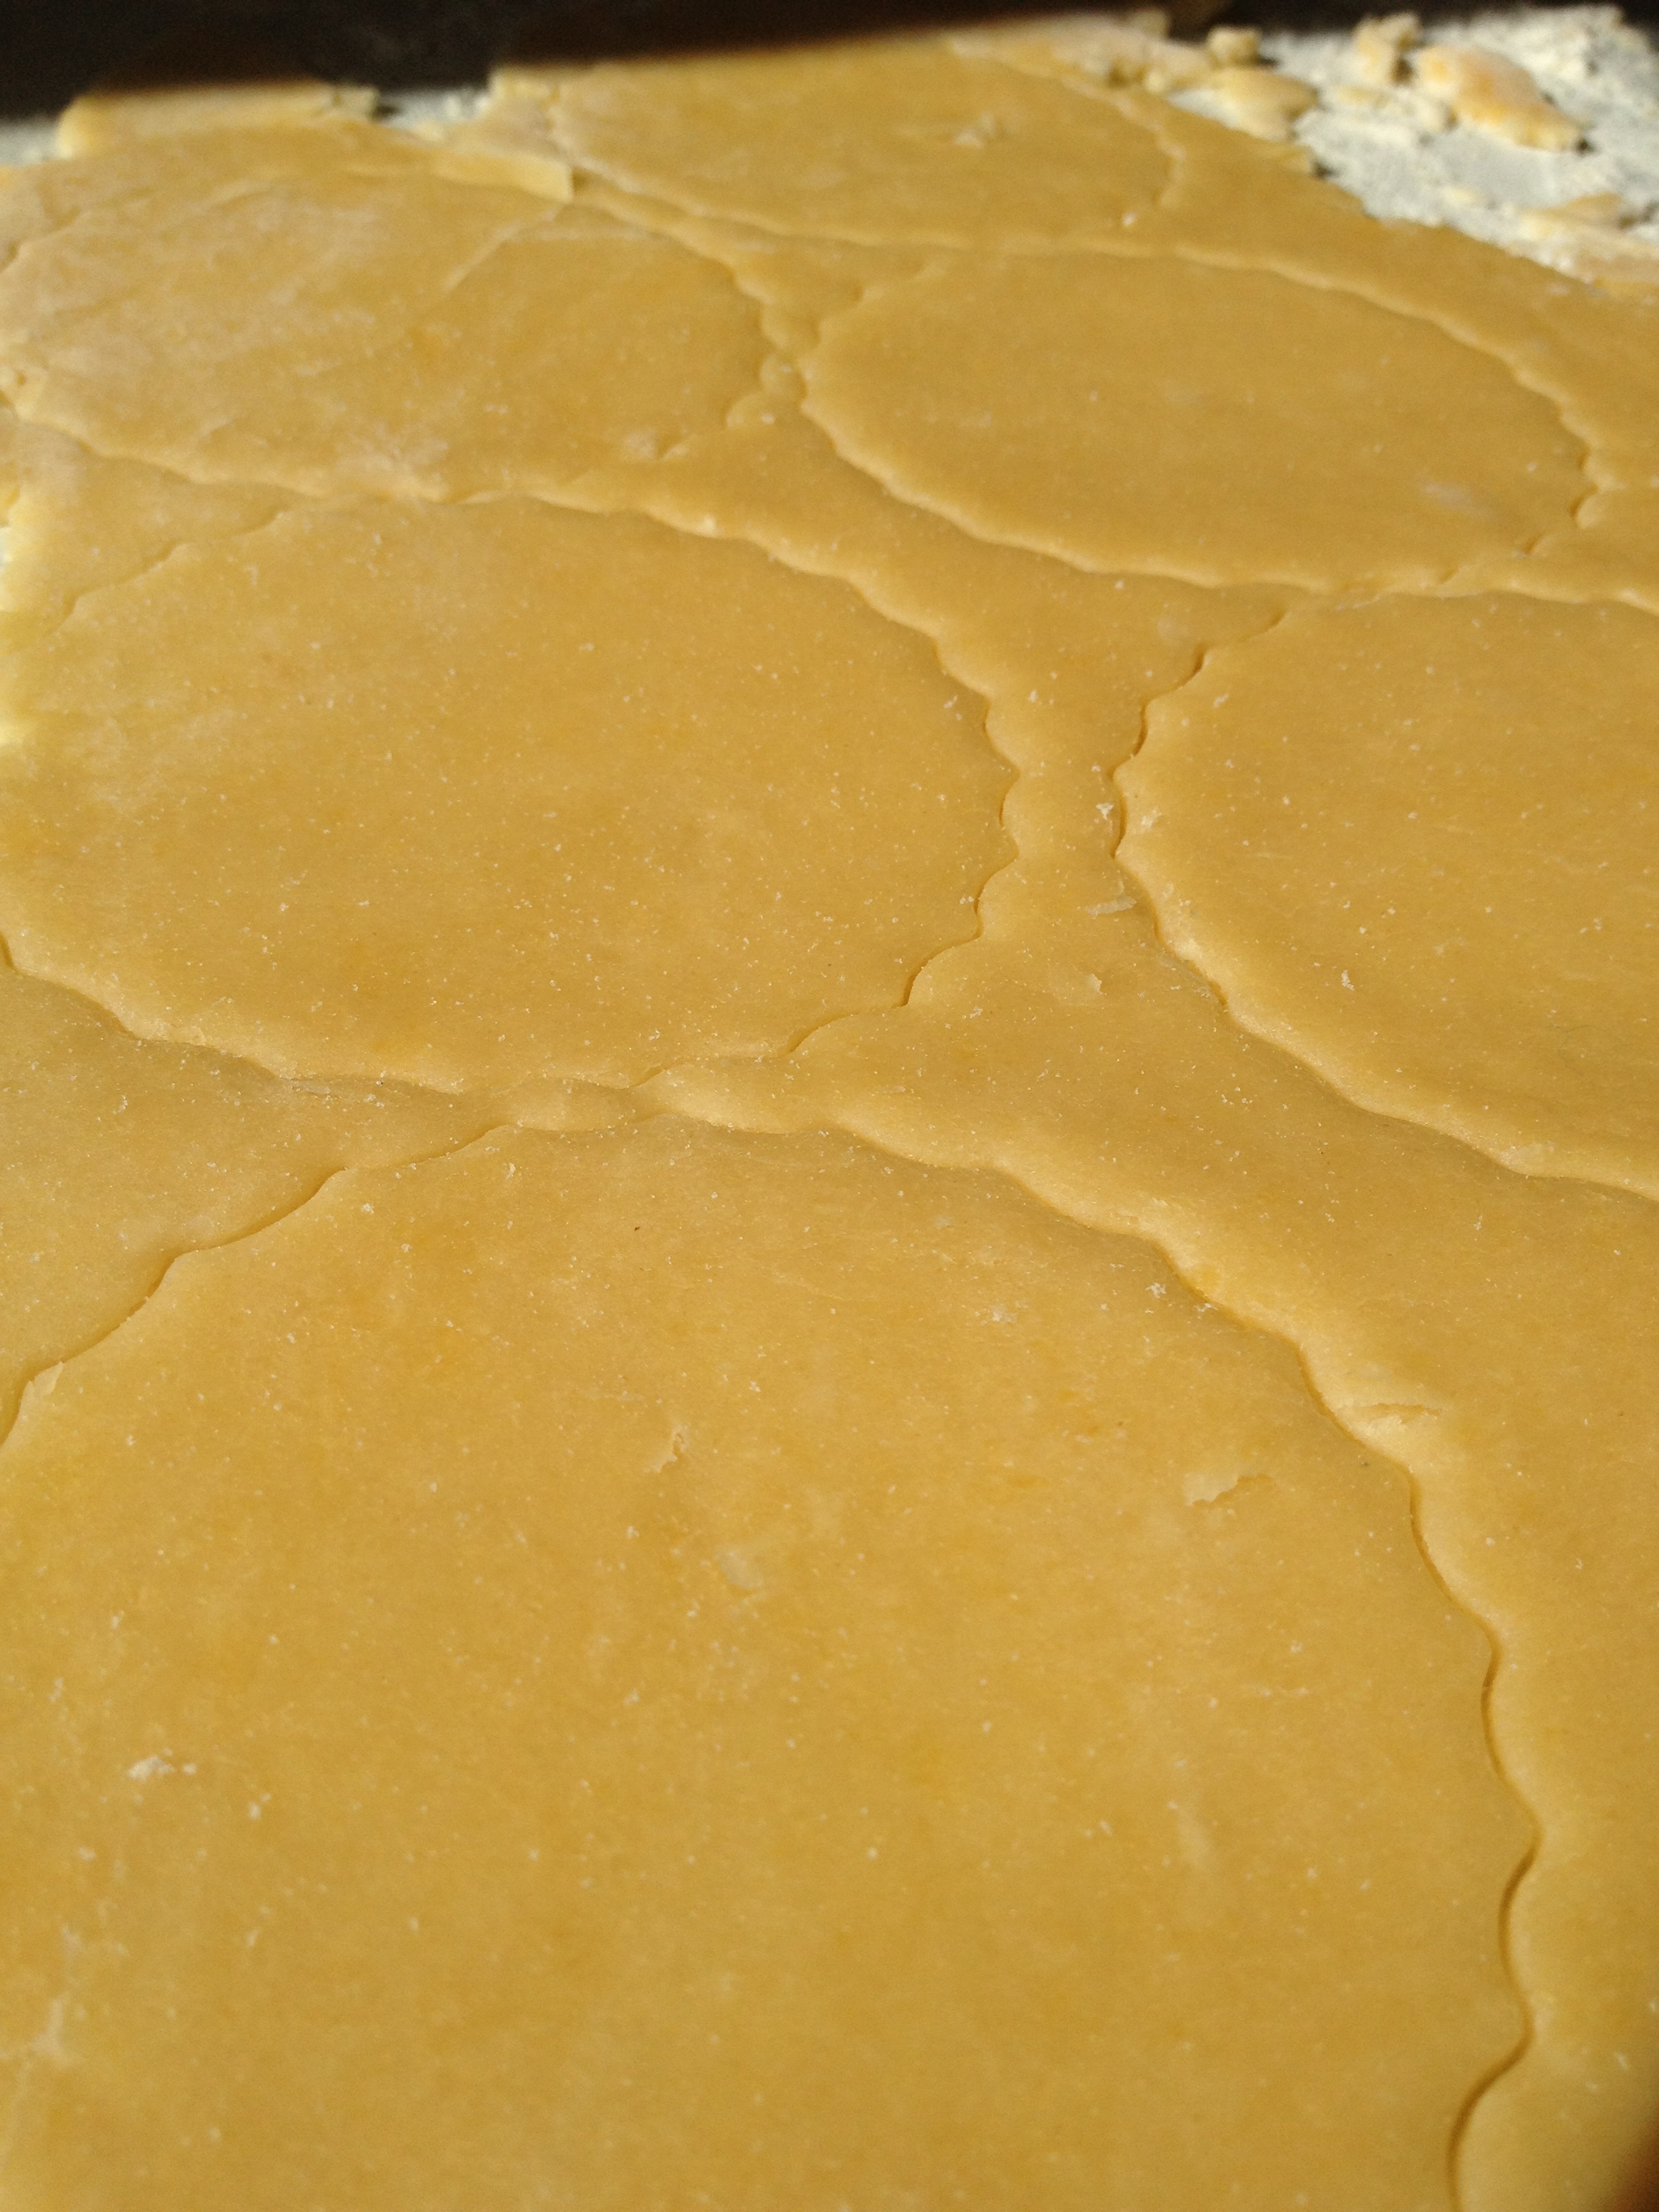
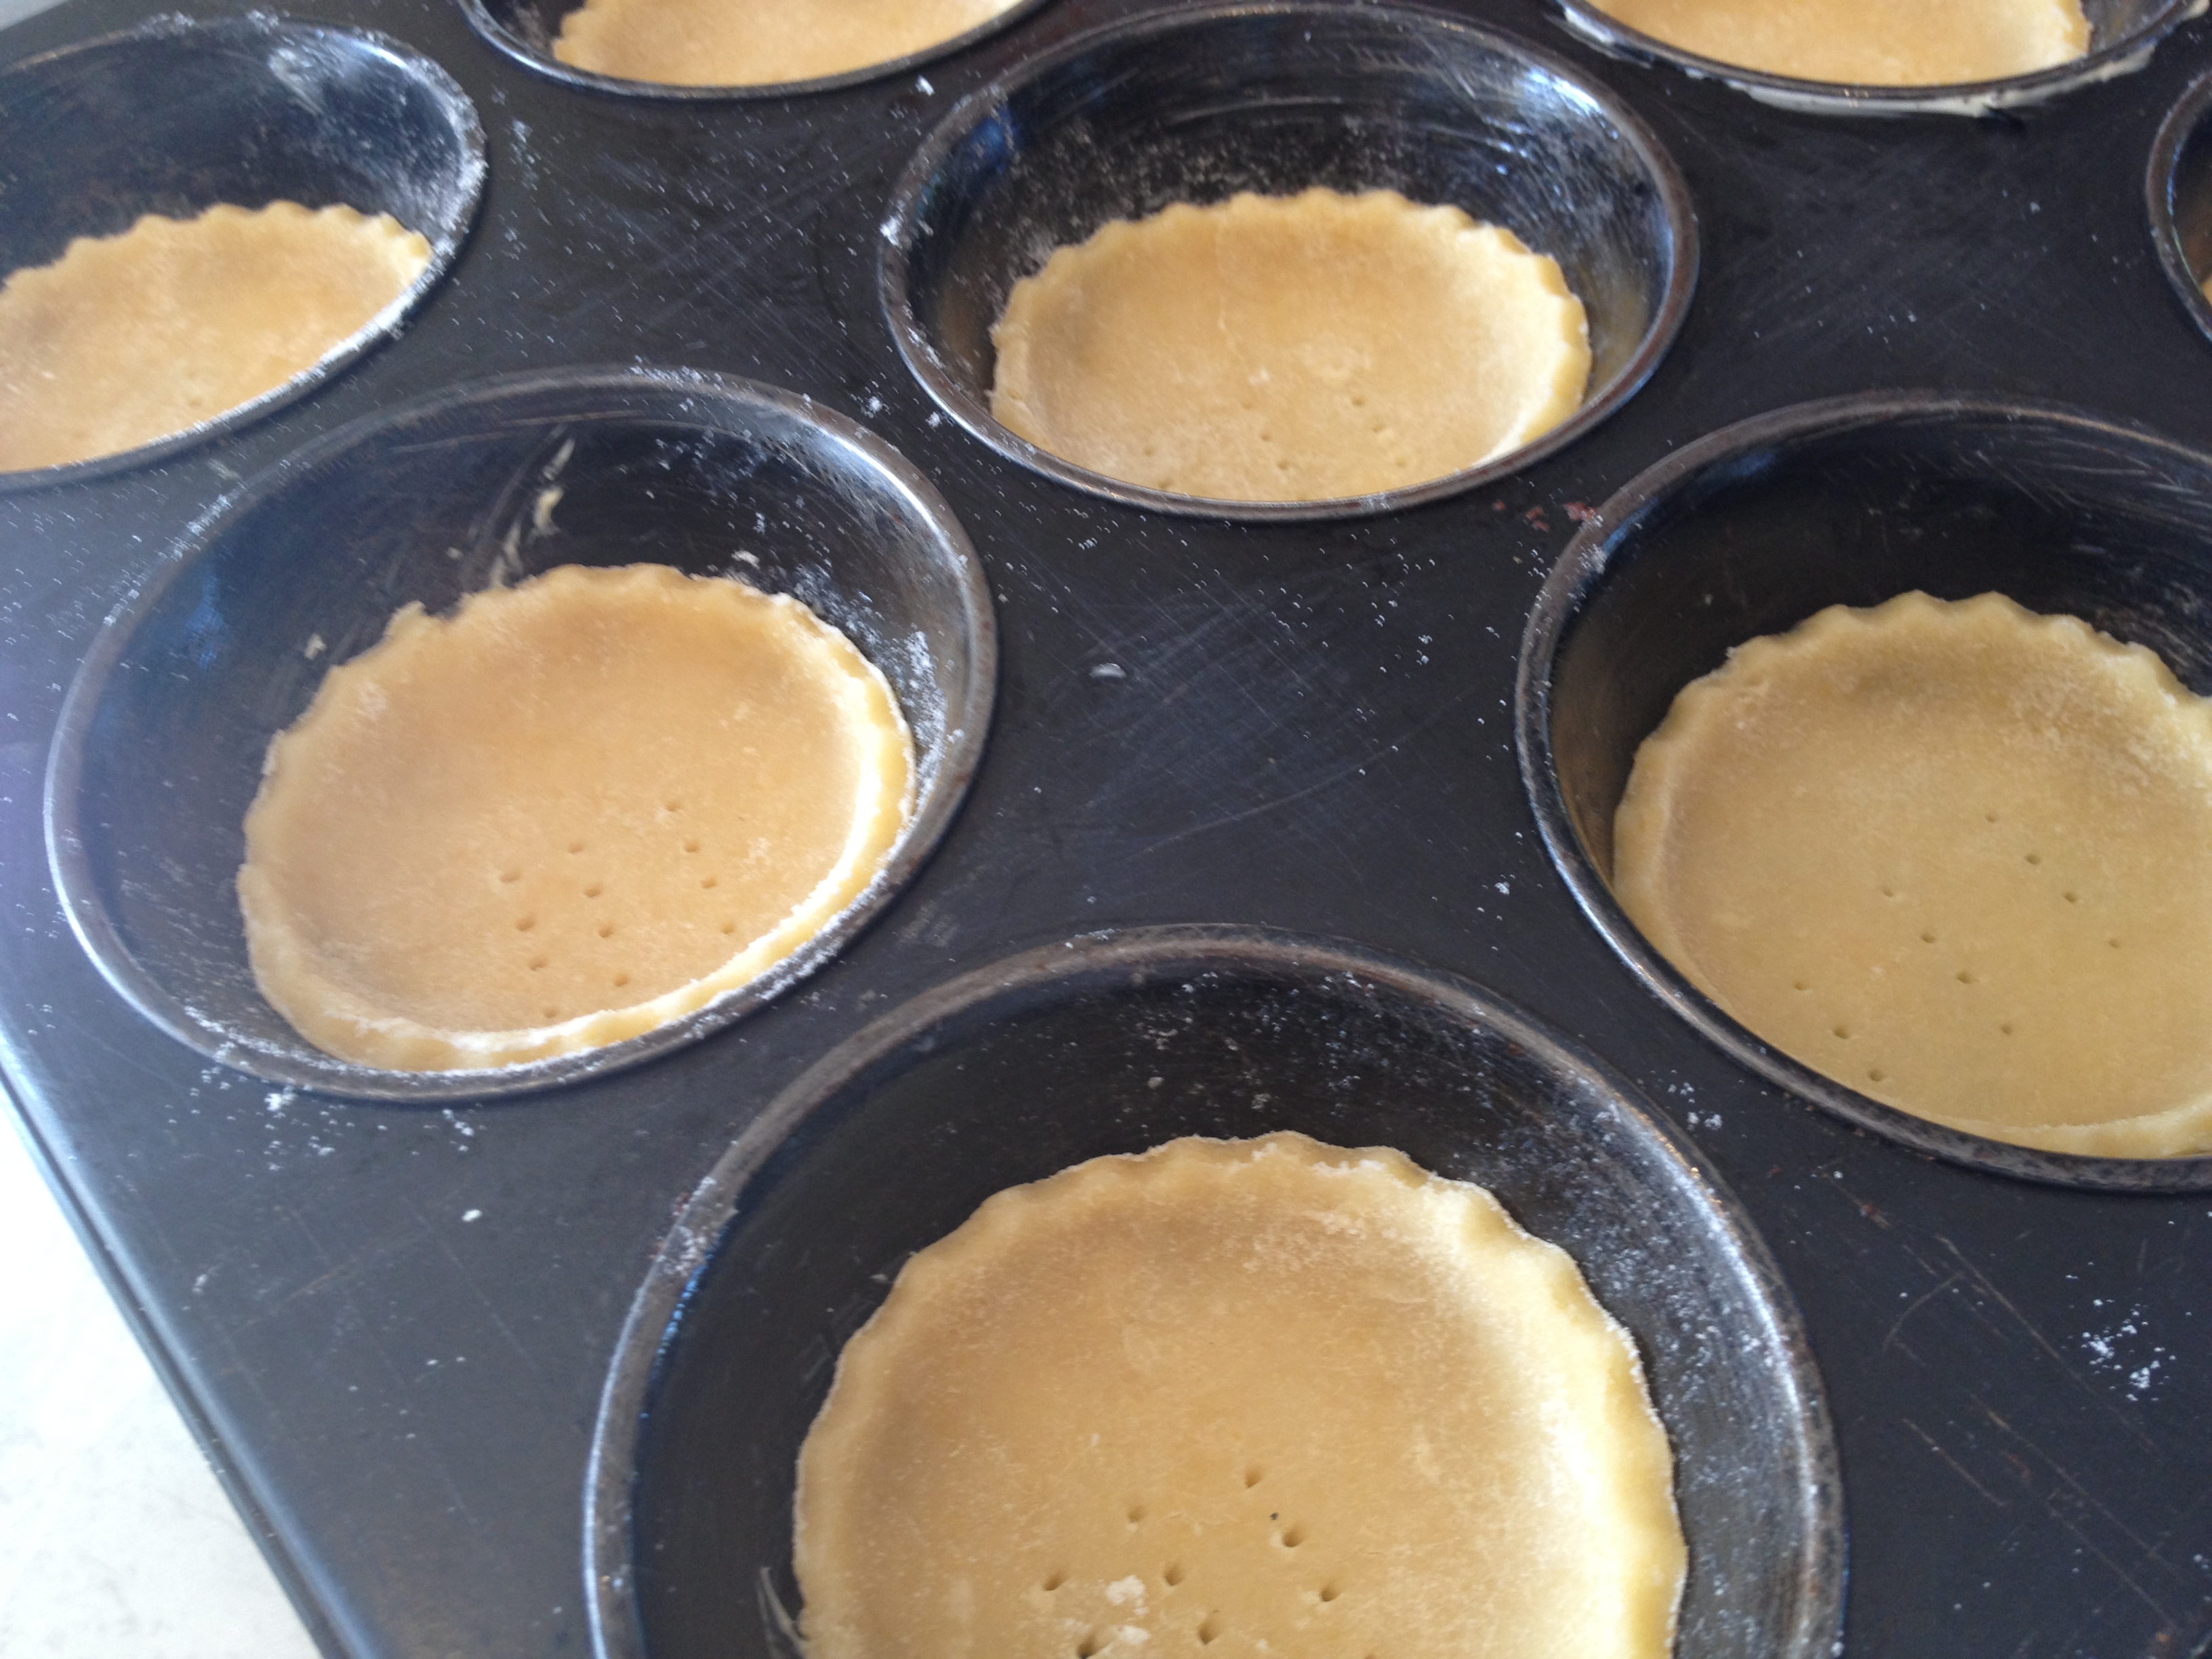
Grease two 12 cup muffin moulds and preheat the oven to 180 degrees. Take the dough out of the fridge and spread flour over a clean surface. Spread your rolling pin with flour too to stop the dough from sticking to it. Roll your dough out very thinly and use a cutter that is bigger than your muffin cups. Press the circles of pastry into your greased tins. Prick each circle at least three times and then pop them into the oven for ten minutes.
 You’ll have one egg white left over from making pastry, use this and two extra egg whites for the meringue while the cases cook.
Whip up your egg whites with half a cup of sugar and the lemon juice. In a separate bowl, pour one cup of sugar over your raspberries and mix to combine them. Set them to one side so that they make a raspberry-sugary mush. Once the meringue
 forms stiff peaks, add the final half cup of sugar to the mixture. Mash the raspberry and sugar together so it’s smooth and spoon it gradually into the meringue mixture.

Take the muffin cases out of oven and let them cool for five minutes. Spoon two tablespoons of lemon curd into each pastry case and pop them back into the oven for ten minutes. When they come out of the oven set them to one side and turn the oven up to 240 degrees. Pipe or spoon the raspberry meringue onto the lemon curd (be generous!) and then put them in the middle tray of the oven with the door open for 10-15 minutes.
 Allow them to cool before serving. Sprinkle them with icing sugar and serve with raspberries on top!
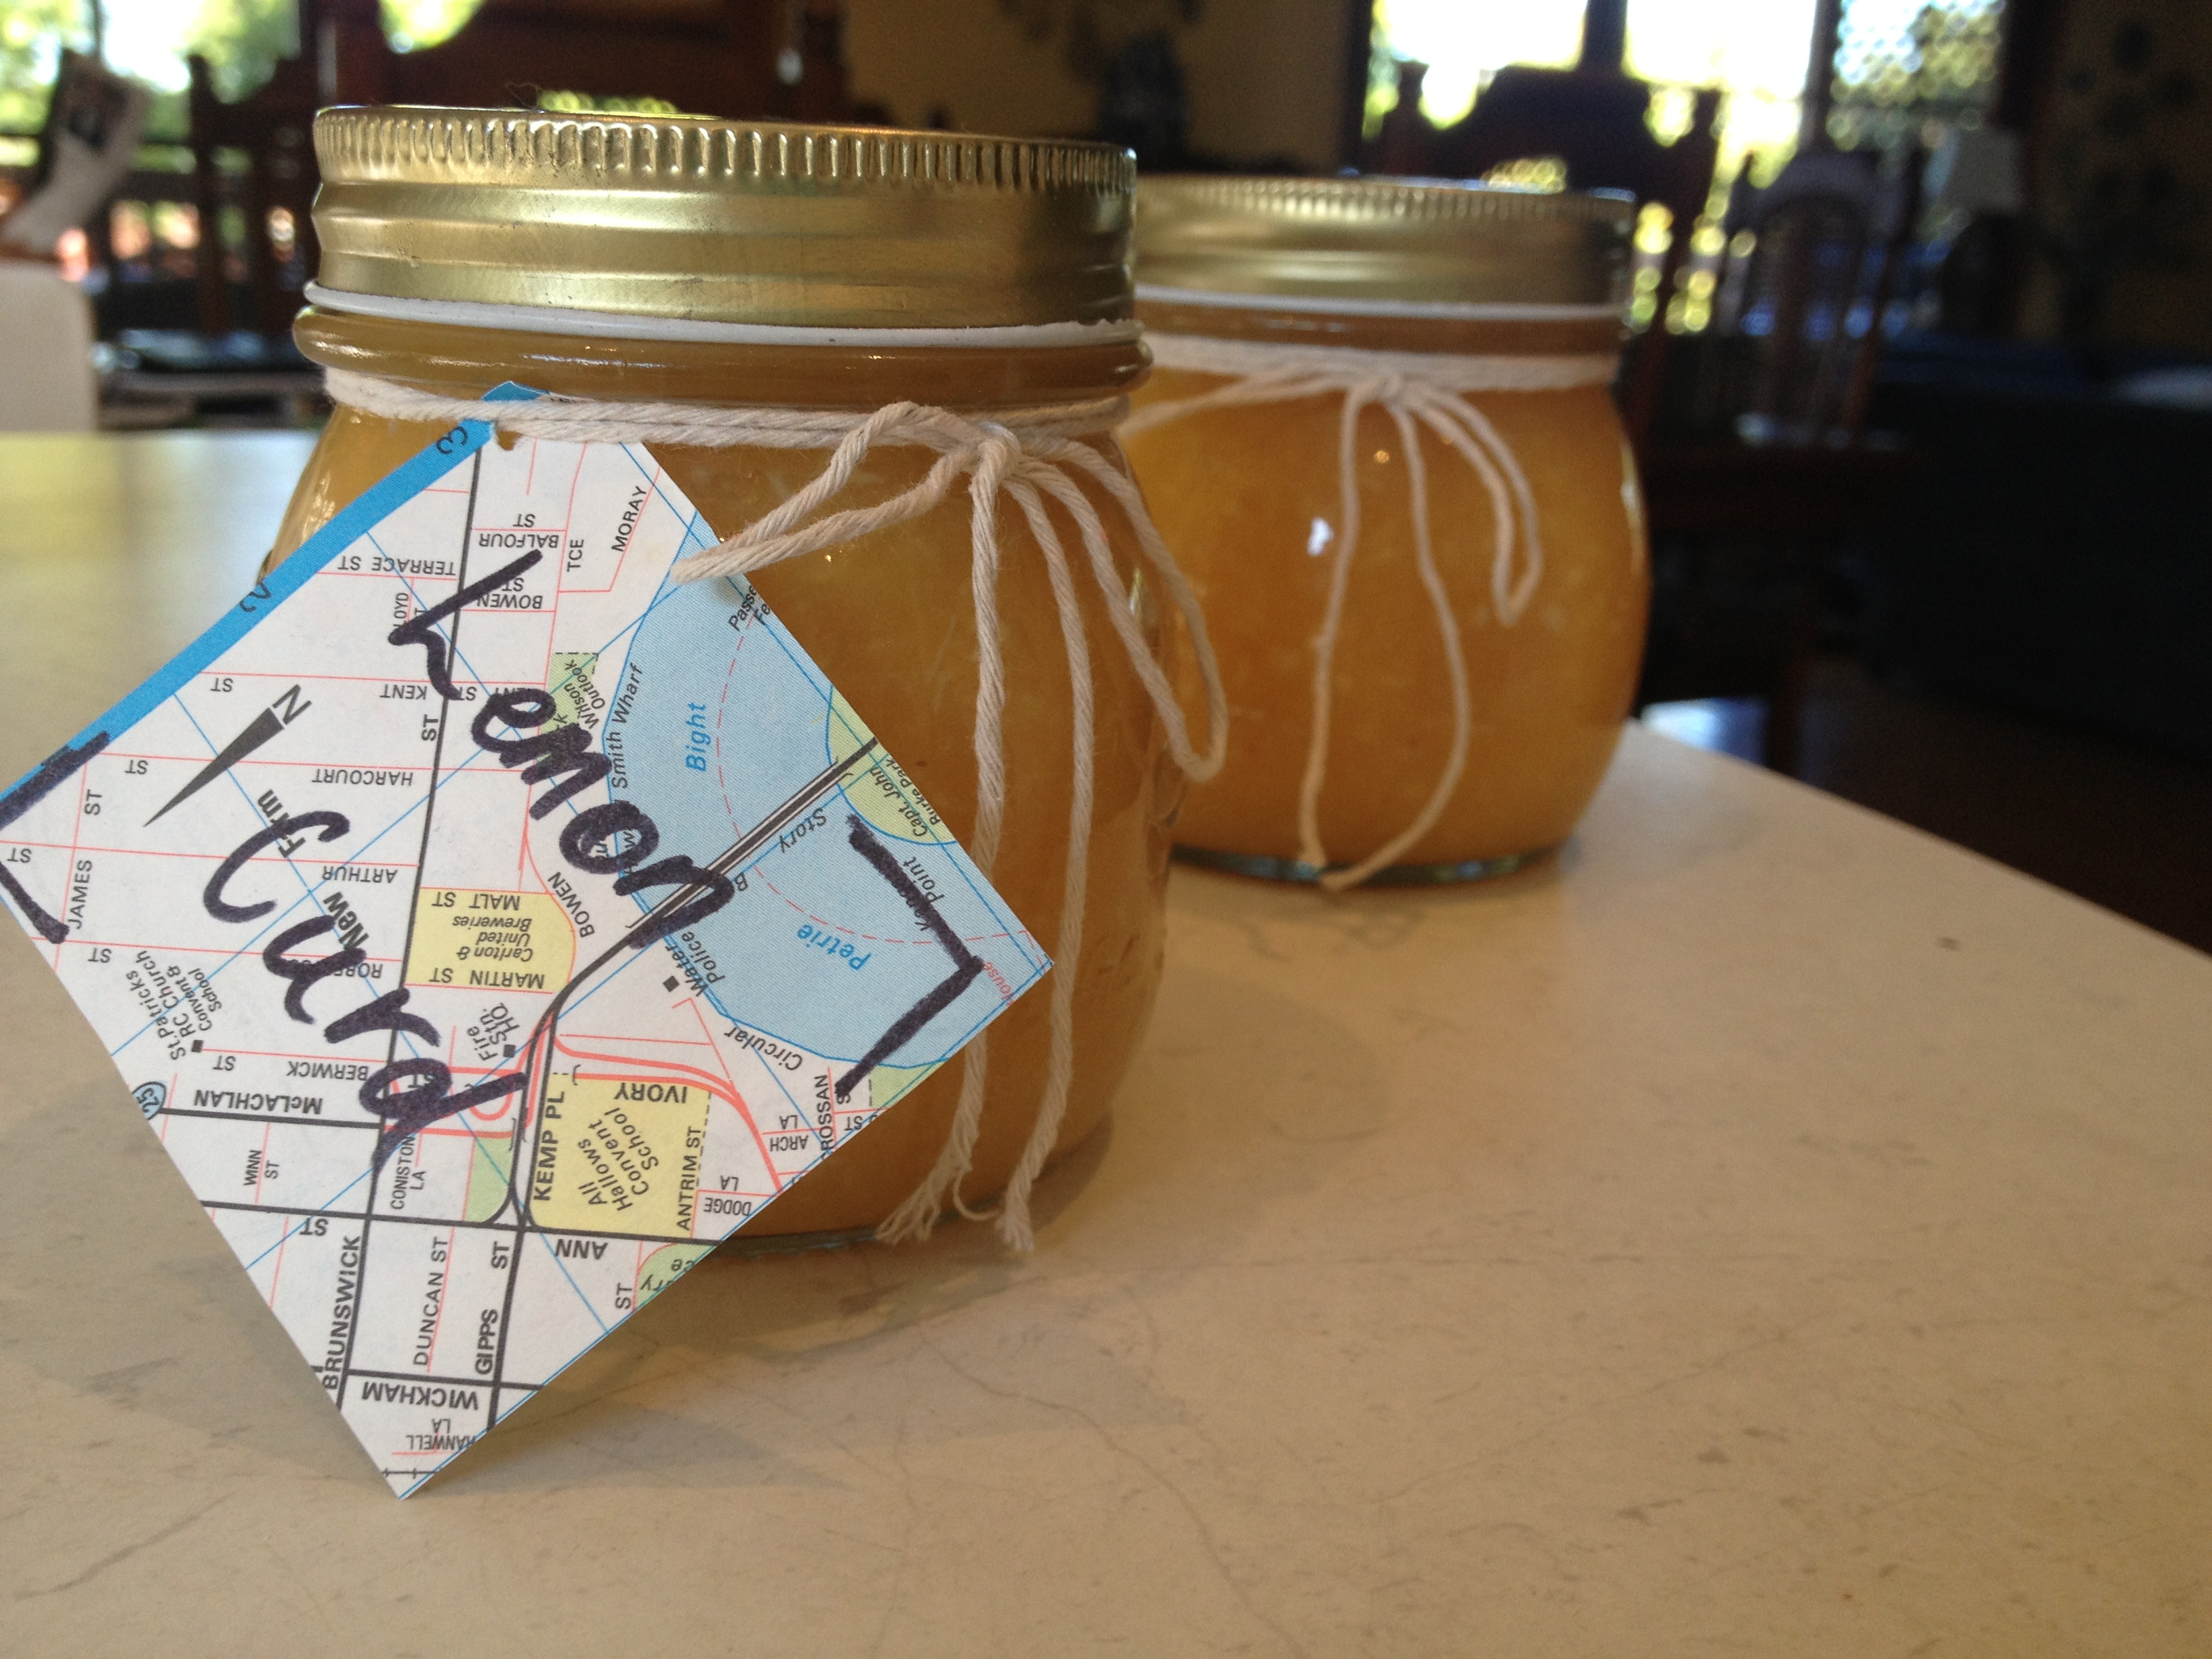
*I doubled the lemon curd recipe that I listed in this recipe to use up the ginormous lemons that had come from my nan’s tree, but also because it means I have some ready for the next time I want to make this! Home made lemon curd is worth the extra effort, it’s tart and zesty – far superior to even the best store-bought stuff. Plus there are no preservatives or sneaky additives, just sugar, butter, lemons and eggs!
Chocolate Nutella pots de crème and chilly weather
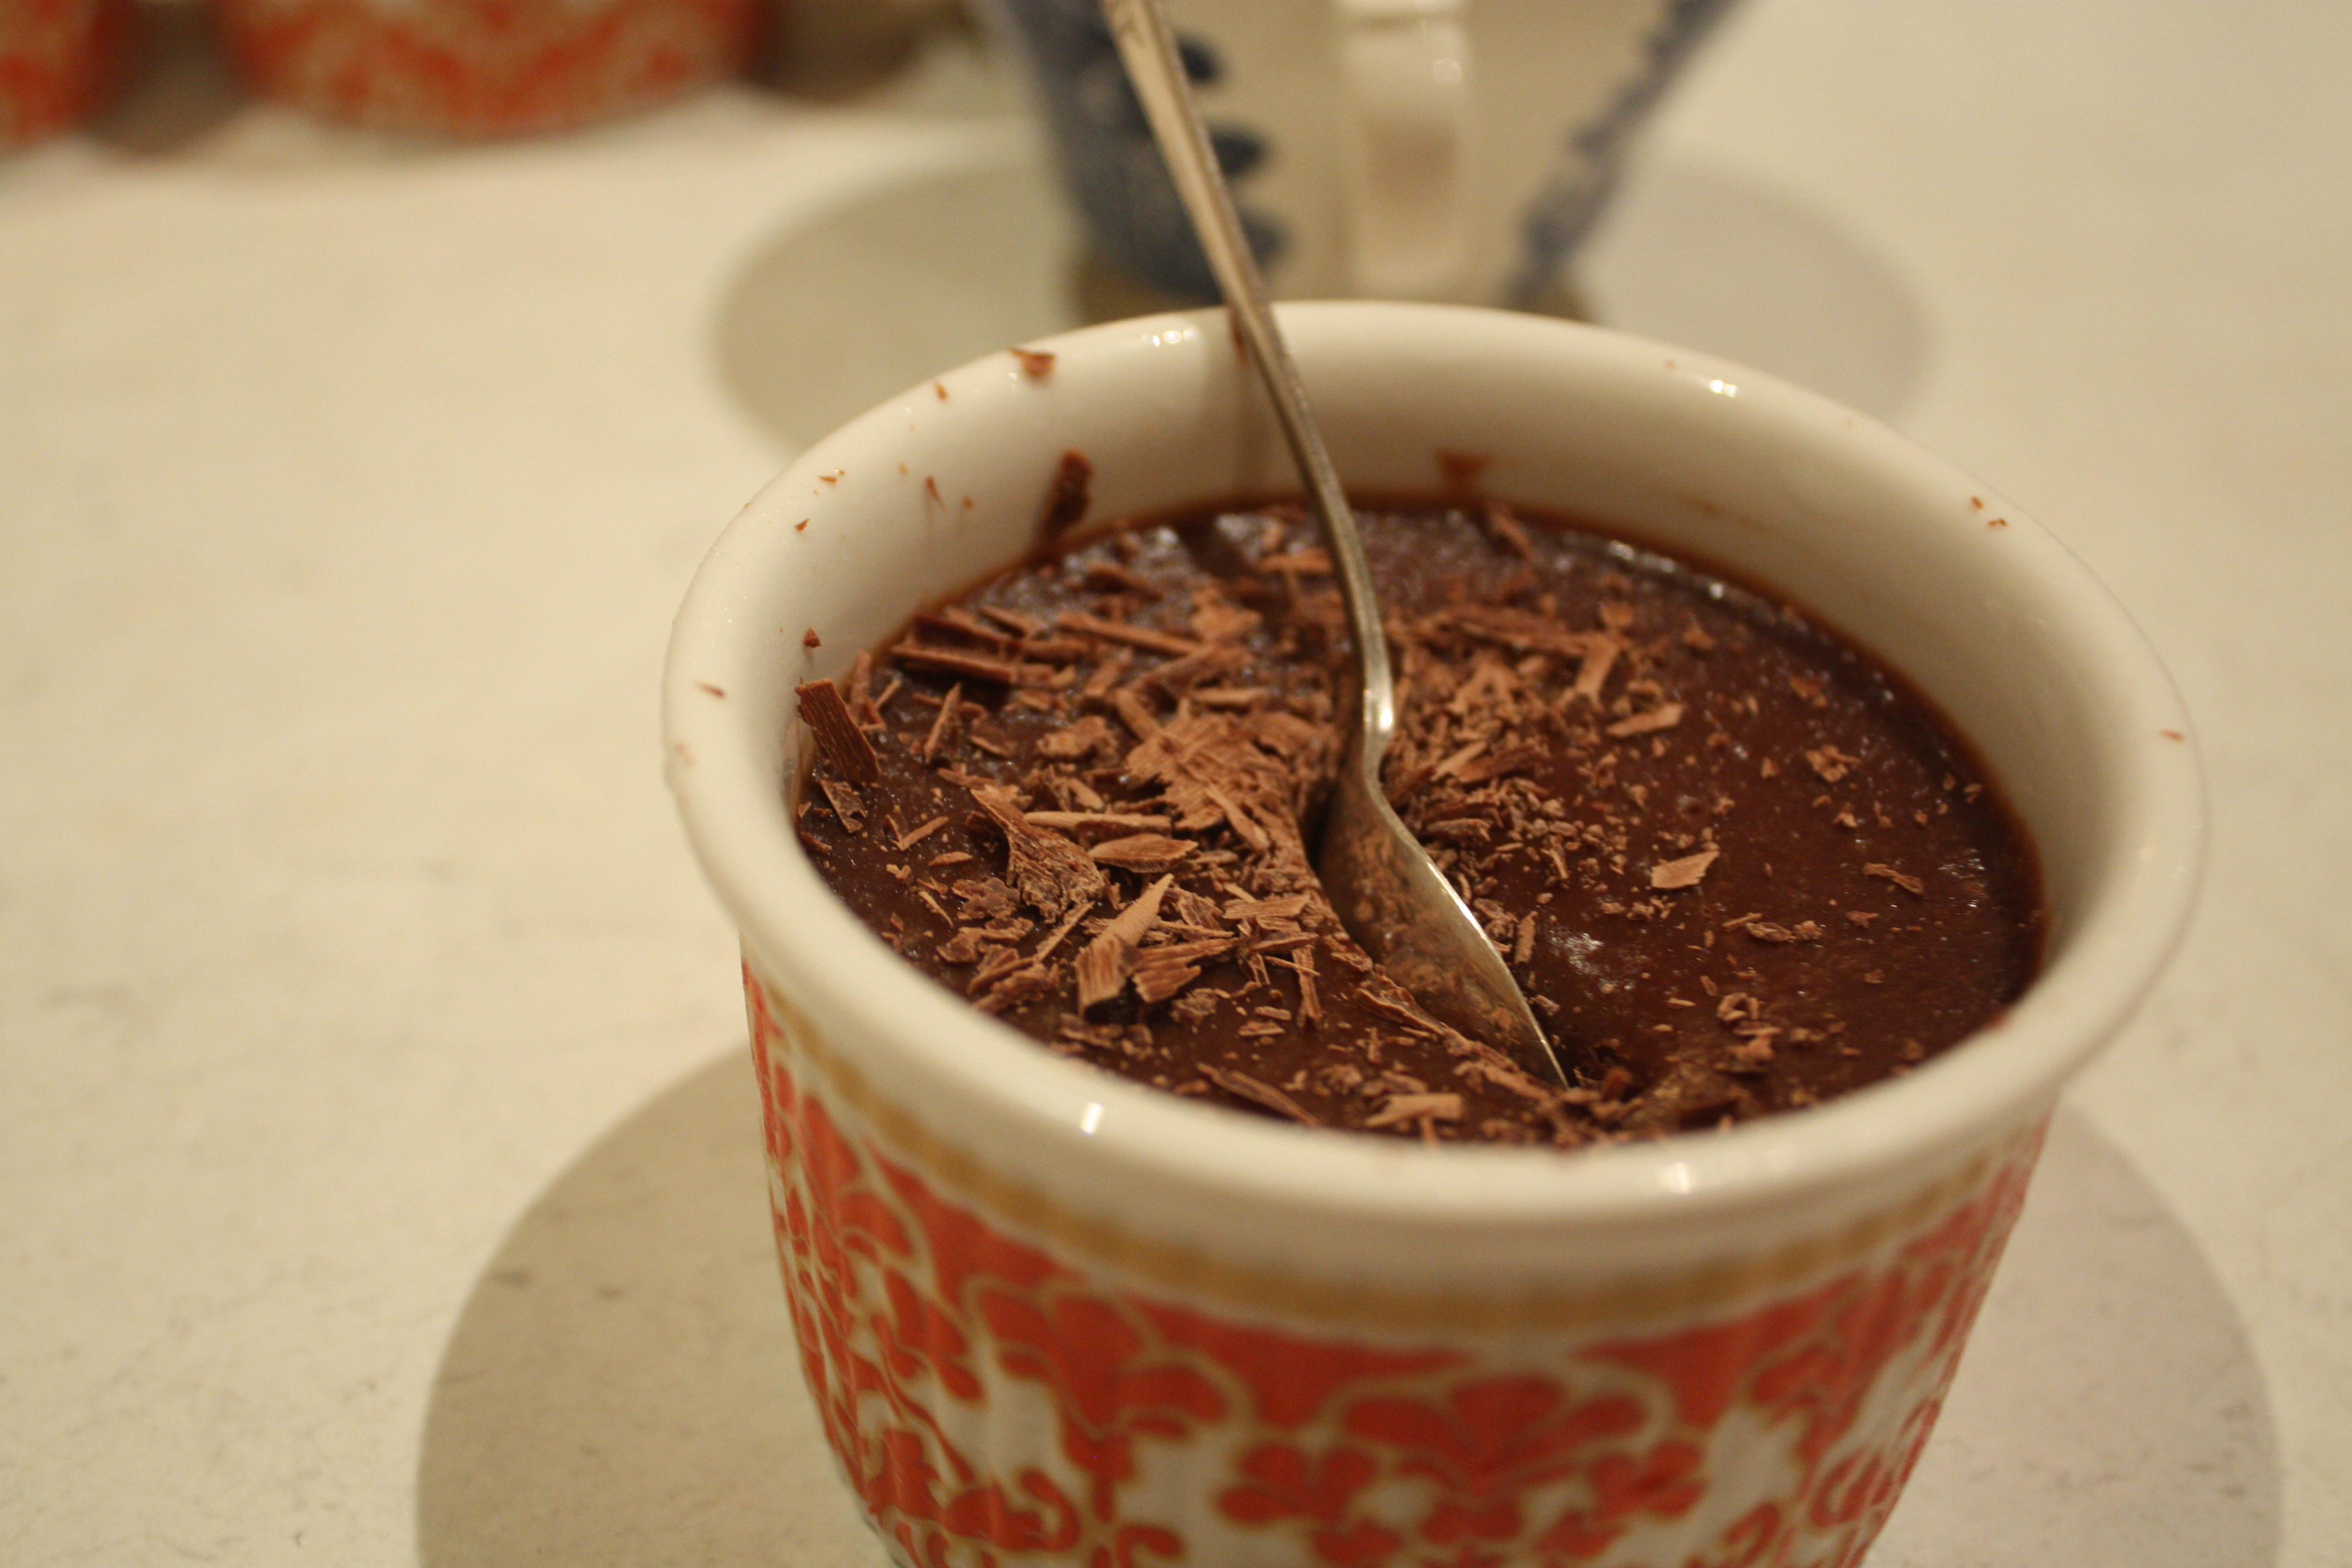
Chilly weather is making me fat. I’m staying indoors, seeking out sugar and becoming too attached to the heater. Luckily, chocolate Nutella Pots de crème are not as indulgent as you would imagine. Below a dark layer of chocolatey thickness is a paler, lighter substance…I feel less bad about eating them because they’re not too rich, they’re just right.
These little devils are less posh than they sound. The French vibe they give off is enough to wow dinner guests, but they’re super simple…not to mention delectable! They’re basically a chocolate custard pudding thing – do labels matter? If people ask, just say they’re made entirely of delicious ingredients, they don’t need a name.
You can throw them together in 15 minutes and leave them in the oven to do their work. Pop them in the fridge while you eat mains, and they’re ready to be devoured! They’re adaptable enough to be served alongside a three course dinner, but will fit neatly along side a casual Sunday lunch menu. Serve them with berries to dress them up, or chuck a spoon straight into them to give them a laid back scruffy feel.
Do what you please, just make sure you lick the bowl.
Chocolate Nutella pots de Crème (aka deliciousness in a ramekin)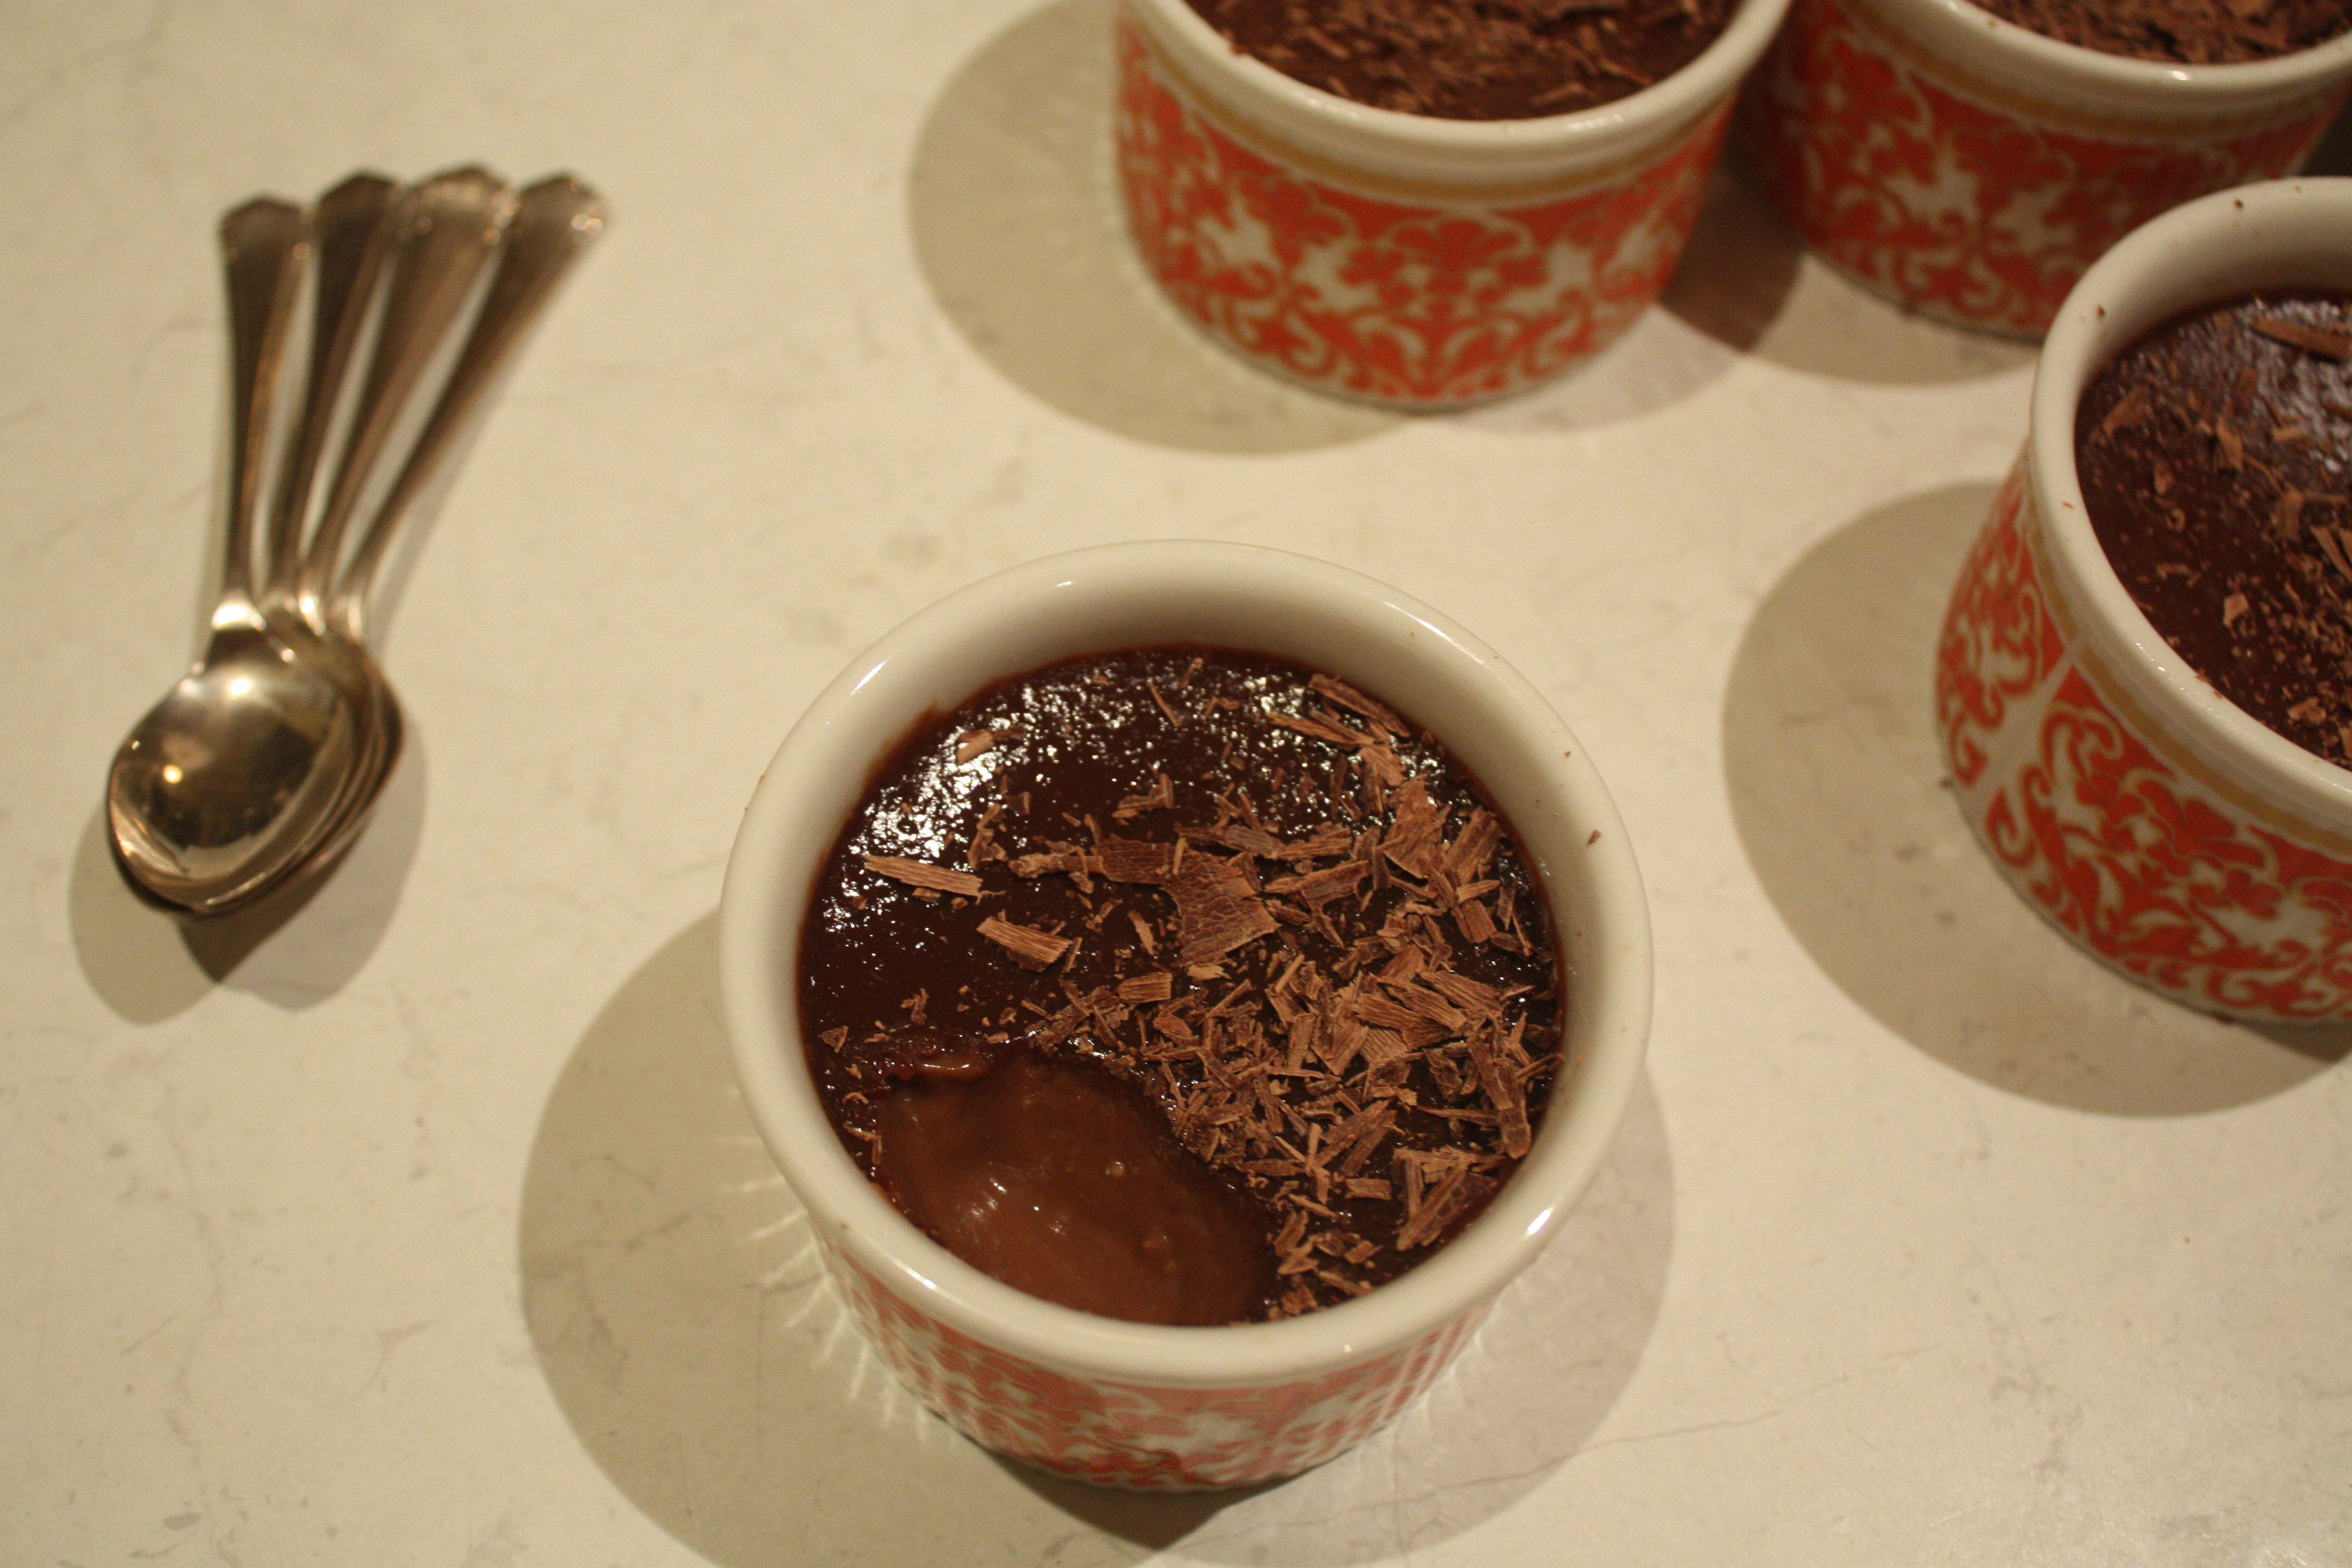
- 4 egg yolks
- ¼ cup sugar
- 1 tsp vanilla
- 1 ½ cups cream
- ½ cup milk
- 2/3 cup nutella
- 50g chocolate
Preheat your oven to 170°C. Resist the urge to eat the Nutella. Find six ramekins or oven-safe tea cups (I’ve gone for a mix of both because two of my Nanna’s darling ramekins have broken over time.)
Mix together your egg yolks, sugar and vanilla in a bowl. Set them to one side.
In a saucepan over low heat, melt the chocolate down and add the Nutella. Once you add the Nutella in it should be thicker and glossier. Once again, resist the urge to eat the Nutella from the jar. Mix the chocolate and Nutella until no lumps remain. Add your cream and milk in and turn up to medium so that it combines. Keep stirring.
Boil your kettle now, you’ll need hot water to surround the filled ramekins later.
 The mixture will be speckled, so you need to keep on stirring for about ten minutes. You don’t want speckled pots de crème! Once the mixture is an even colour (with no more speckles) slowly add the egg mixture in. Make sure the chocolate mixture isn’t too hot, you don’t want to cook the sugary egg!
Once all the egg mixture is incorporated, whisk the mixture over heat for five minutes, allowing it to bubble and thicken slightly.
Divide the mixture among the ramekins. If you’re a messy pourer like me, wipe the edges so there are no sloppy bits. Place the ramekins in a baking tray and carefully pour the hot (not boiling) water into the tray, about half way up the ramekins.

 Pop them in the oven for 50 minutes to 1 hour. If you can gently press the top of the chocolate without it wobbling too much, they’re done. Put them back in the oven if you’re not 100% sure, the water means that it’s really hard to burn them. This style of cooking also ensures that your mixture is super silky and smooth. When they’re out of the oven, allow them to cool and place them in the fridge until they’re ready to serve.
 Use a vegetable peeler to cover your pots de crème with shavings of chocolate – enjoy!